Why Generosity, Not Perfection, is the Secret to the Italian Art of Antipasti – Recipes and Tips for an Abundant and Inviting Spread
Set the tone for your gathering with little bites that welcome you in, stretch the meal, and make sure there’s always room at the table


Design expertise in your inbox – from inspiring decorating ideas and beautiful celebrity homes to practical gardening advice and shopping round-ups.
You are now subscribed
Your newsletter sign-up was successful
Want to add more newsletters?

Twice a week
Homes&Gardens
The ultimate interior design resource from the world's leading experts - discover inspiring decorating ideas, color scheming know-how, garden inspiration and shopping expertise.

Once a week
In The Loop from Next In Design
Members of the Next in Design Circle will receive In the Loop, our weekly email filled with trade news, names to know and spotlight moments. Together we’re building a brighter design future.

Twice a week
Cucina
Whether you’re passionate about hosting exquisite dinners, experimenting with culinary trends, or perfecting your kitchen's design with timeless elegance and innovative functionality, this newsletter is here to inspire
My very earliest memory of what I’d now call antipasti is standing at the table with my mother and brothers, making mini meatball sandwiches en masse. Everything was laid out in an assembly line: soft bread, room-temperature butter, a big bowl of meatball filling. We’d all pitch in, talking and laughing, wrapping and stacking until there were literal bags of sandwiches heading for the freezer in the run-up to the holidays.
The Antipasti Tradition
The tradition has deep roots. In my research for my latest cookbook Mother Sauce: Italian American Family Recipes and the Story of the Women Who Created Them (Artisan), I traveled through the classic Italian American hubs – New Jersey and South Philly, Boston and Chicago, Rhode Island, San Francisco – and I saw how antipasti evolved on this side of the Atlantic. Early immigrants were profoundly poor, but they knew how to preserve and stretch food.
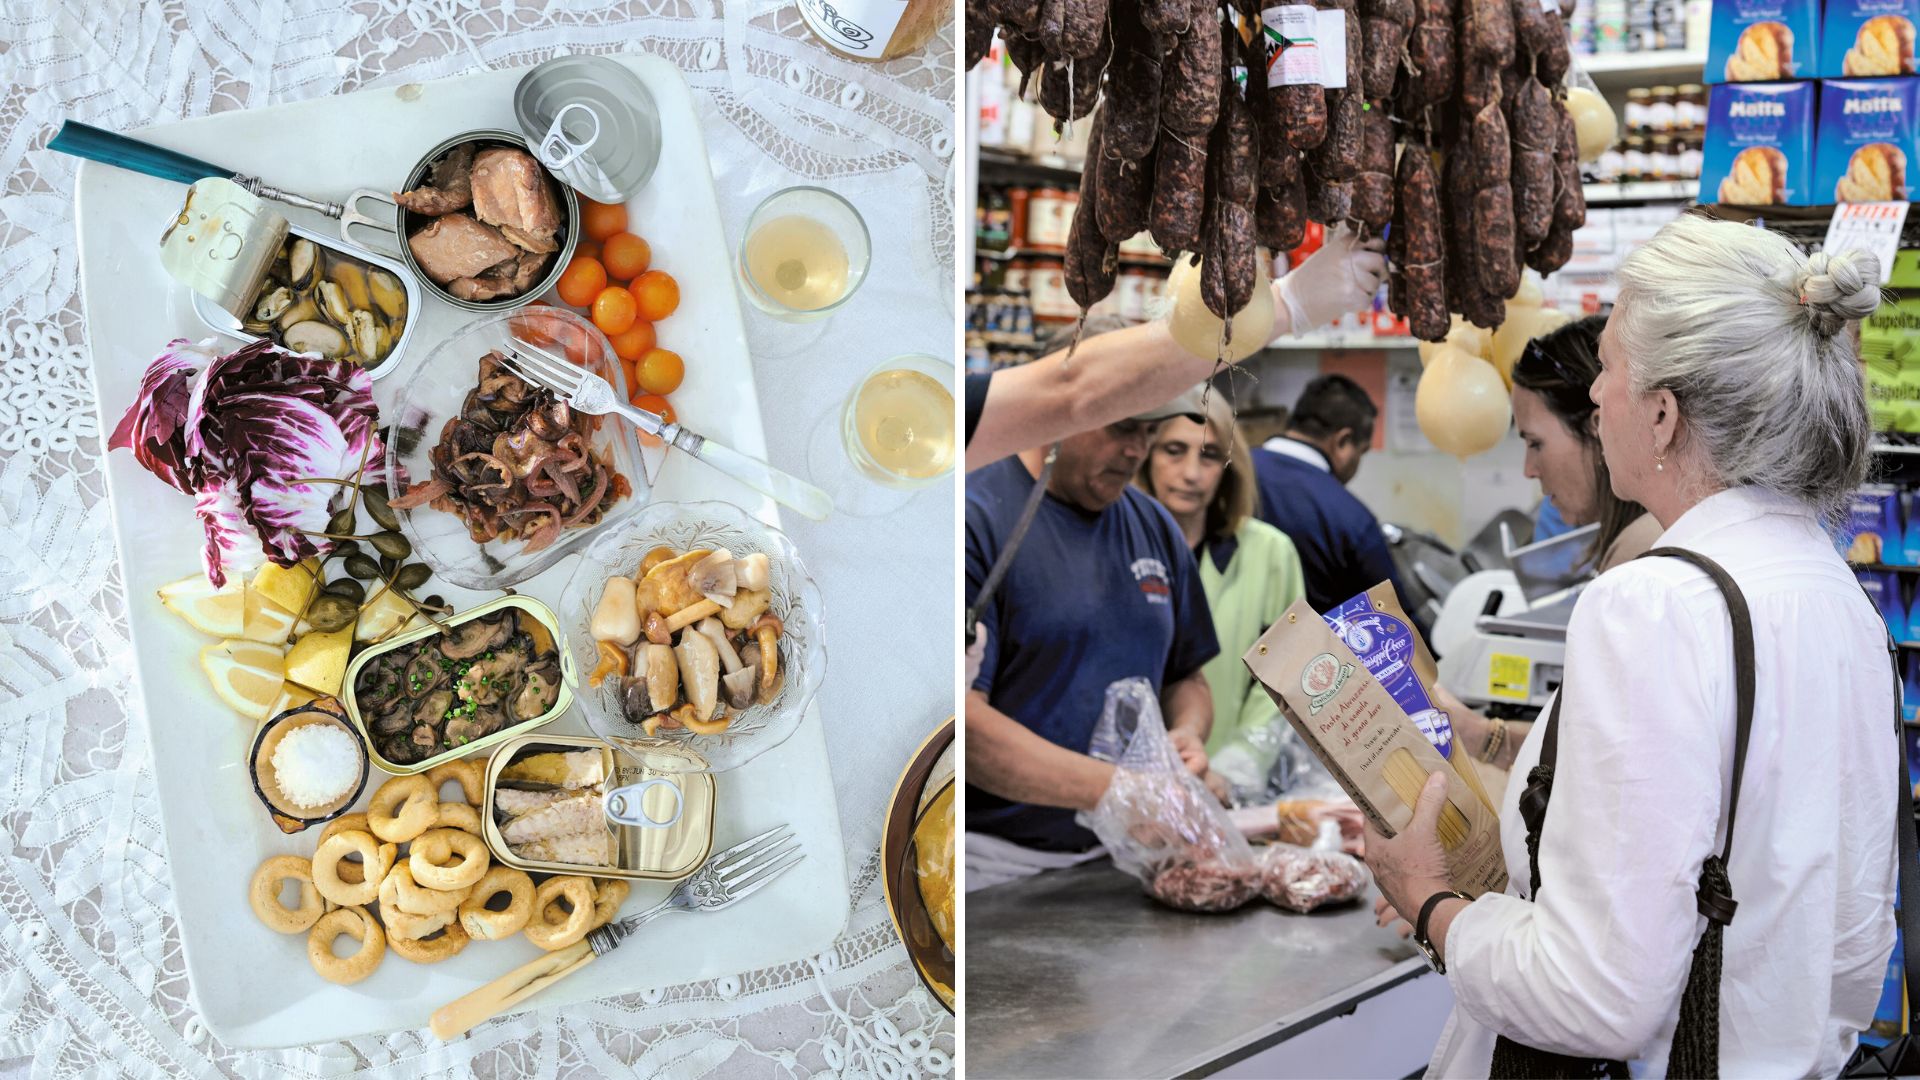
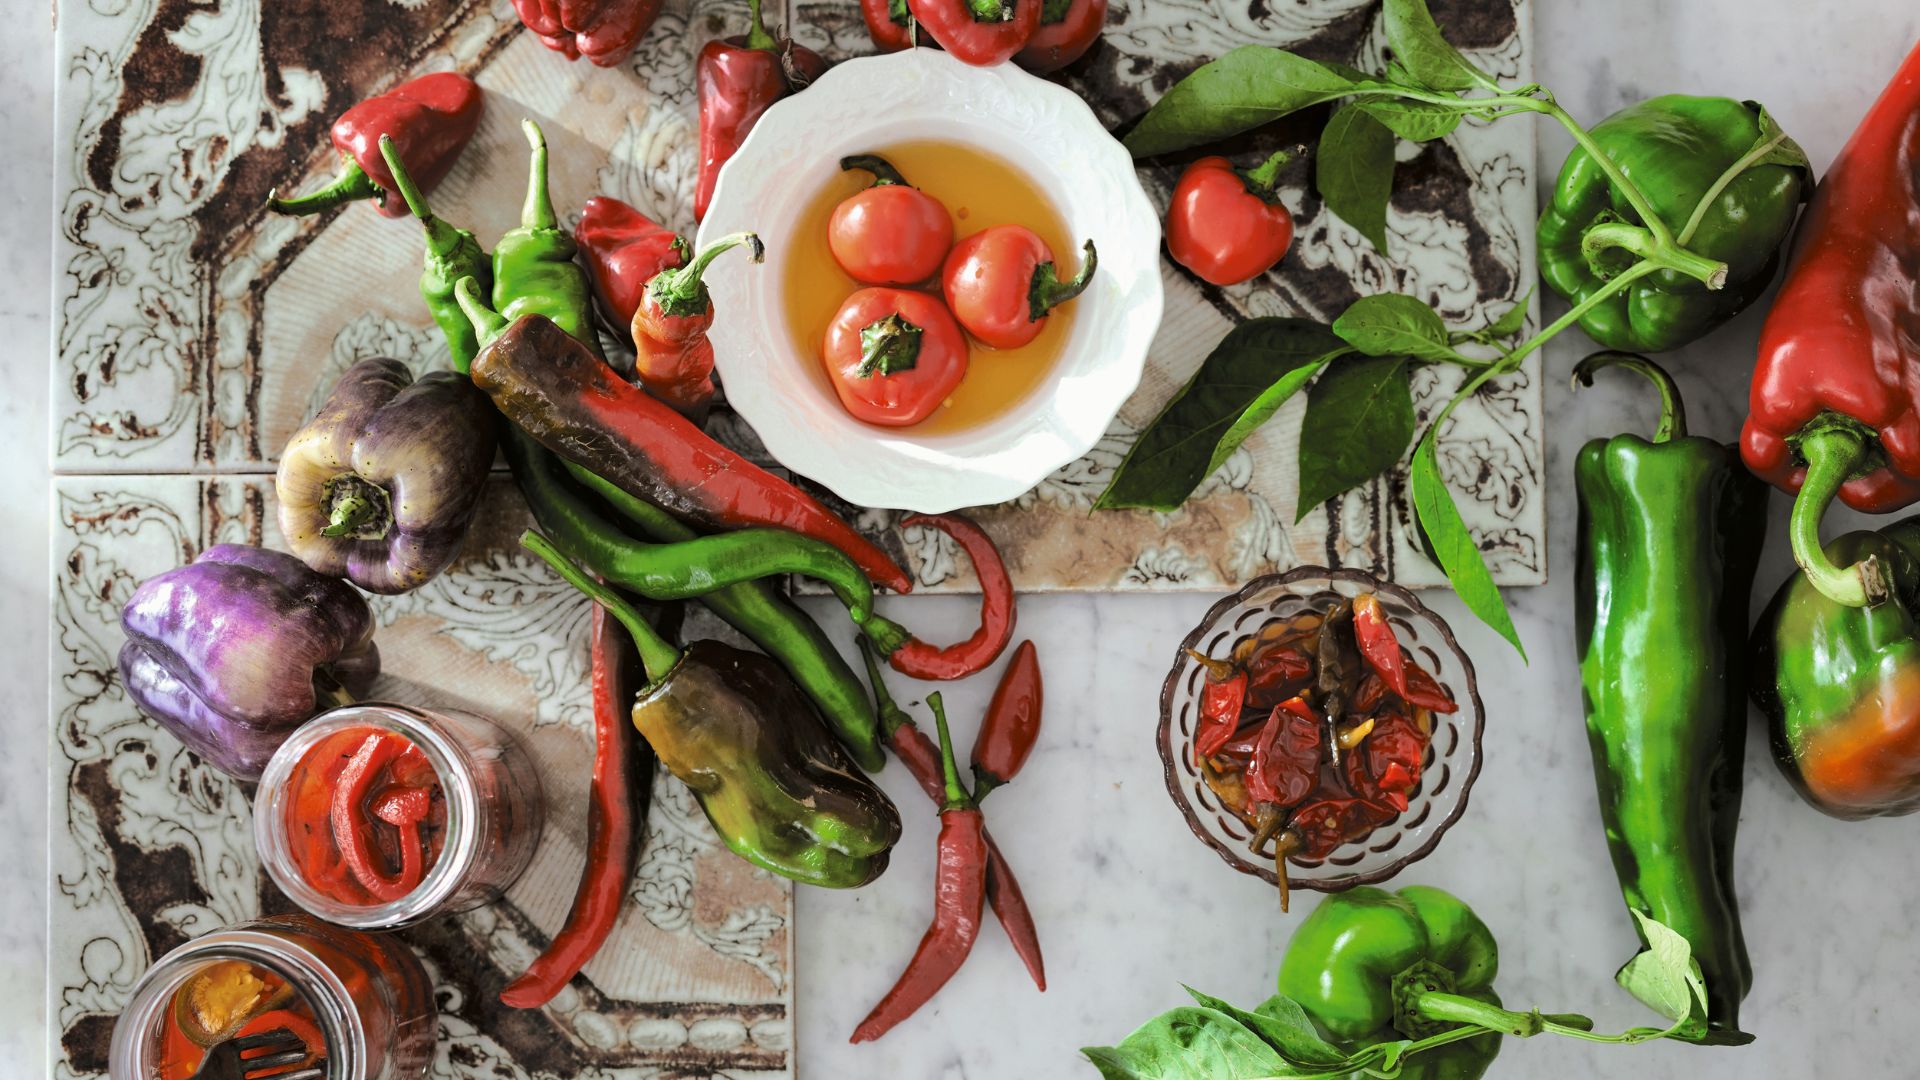
There were always 'nibbles' in some form: taralli, those dry, savory rings that once were so humble they were even hydrated with seawater; cured salami from the whole slaughtered pig; peppers and tomatoes put up in jars; dried nuts and fruit. Bread, a scrap of sausage, a few olives – that could be a snack, a light meal, or the beginning of a feast. For rich and poor alike, the idea was the same: if you’re waiting to eat, you’re eating.

When to Serve Antipasti
As part of Thanksgiving menus or Christmas meals, those were always the first things to come out: hot, crispy little bites that felt wildly special to us, even though they were made from very ordinary ingredients. To this day, there’s controversy in my extended family about whose grandmother 'invented' them, which feels exactly right for Italian Americans. Everyone claiming the recipe is just another way of saying: this is ours, this is who we are.
My mom used to call the hours between lunch and dinner, or after dessert but before midnight, 'the betwixt and between time.' In our world, that liminal space was never empty. There was always something to nibble on – a little sandwich, a slice of tomato pie, a dish of olives, a shard of cheese – something to bridge the gap between one meal and the next, or to accompany a glass of wine and a good conversation.
In Italian American families, mealtimes may be the main event, but antipasti sets the tone. While the Sunday sauce bubbles, before the soup is ladled, or simply to keep company with an aperitivo, a small spread appears almost without thinking: salumi, cheeses, pickled or marinated vegetables, maybe a family specialty or two.
The Instagram Influence
Over time, what we’d now call an antipasti platter might have been a whole lunch or evening meal. Today’s charcuterie board craze? (Designer, Bryan Graybill talks about creating a charcuterie formula in a recent column for Homes & Gardens). To me it’s just the latest expression of something Italian families have quietly done for generations: put out what you have, make it look inviting, and let people help themselves.
Antipasti at Home, in the Modern Kitchen
In my own life as a cook in New York, antipasti has become my favorite way to welcome people in. I love a big surface – a wooden board, a worn tray, a marble slab – covered in things you can grab: roasted peppers slick with olive oil, marinated mushrooms, wedges of fennel, a few beautiful tinned fishes opened and arranged with lemon, slices of salami, a pile of fresh ricotta for smearing on bread.
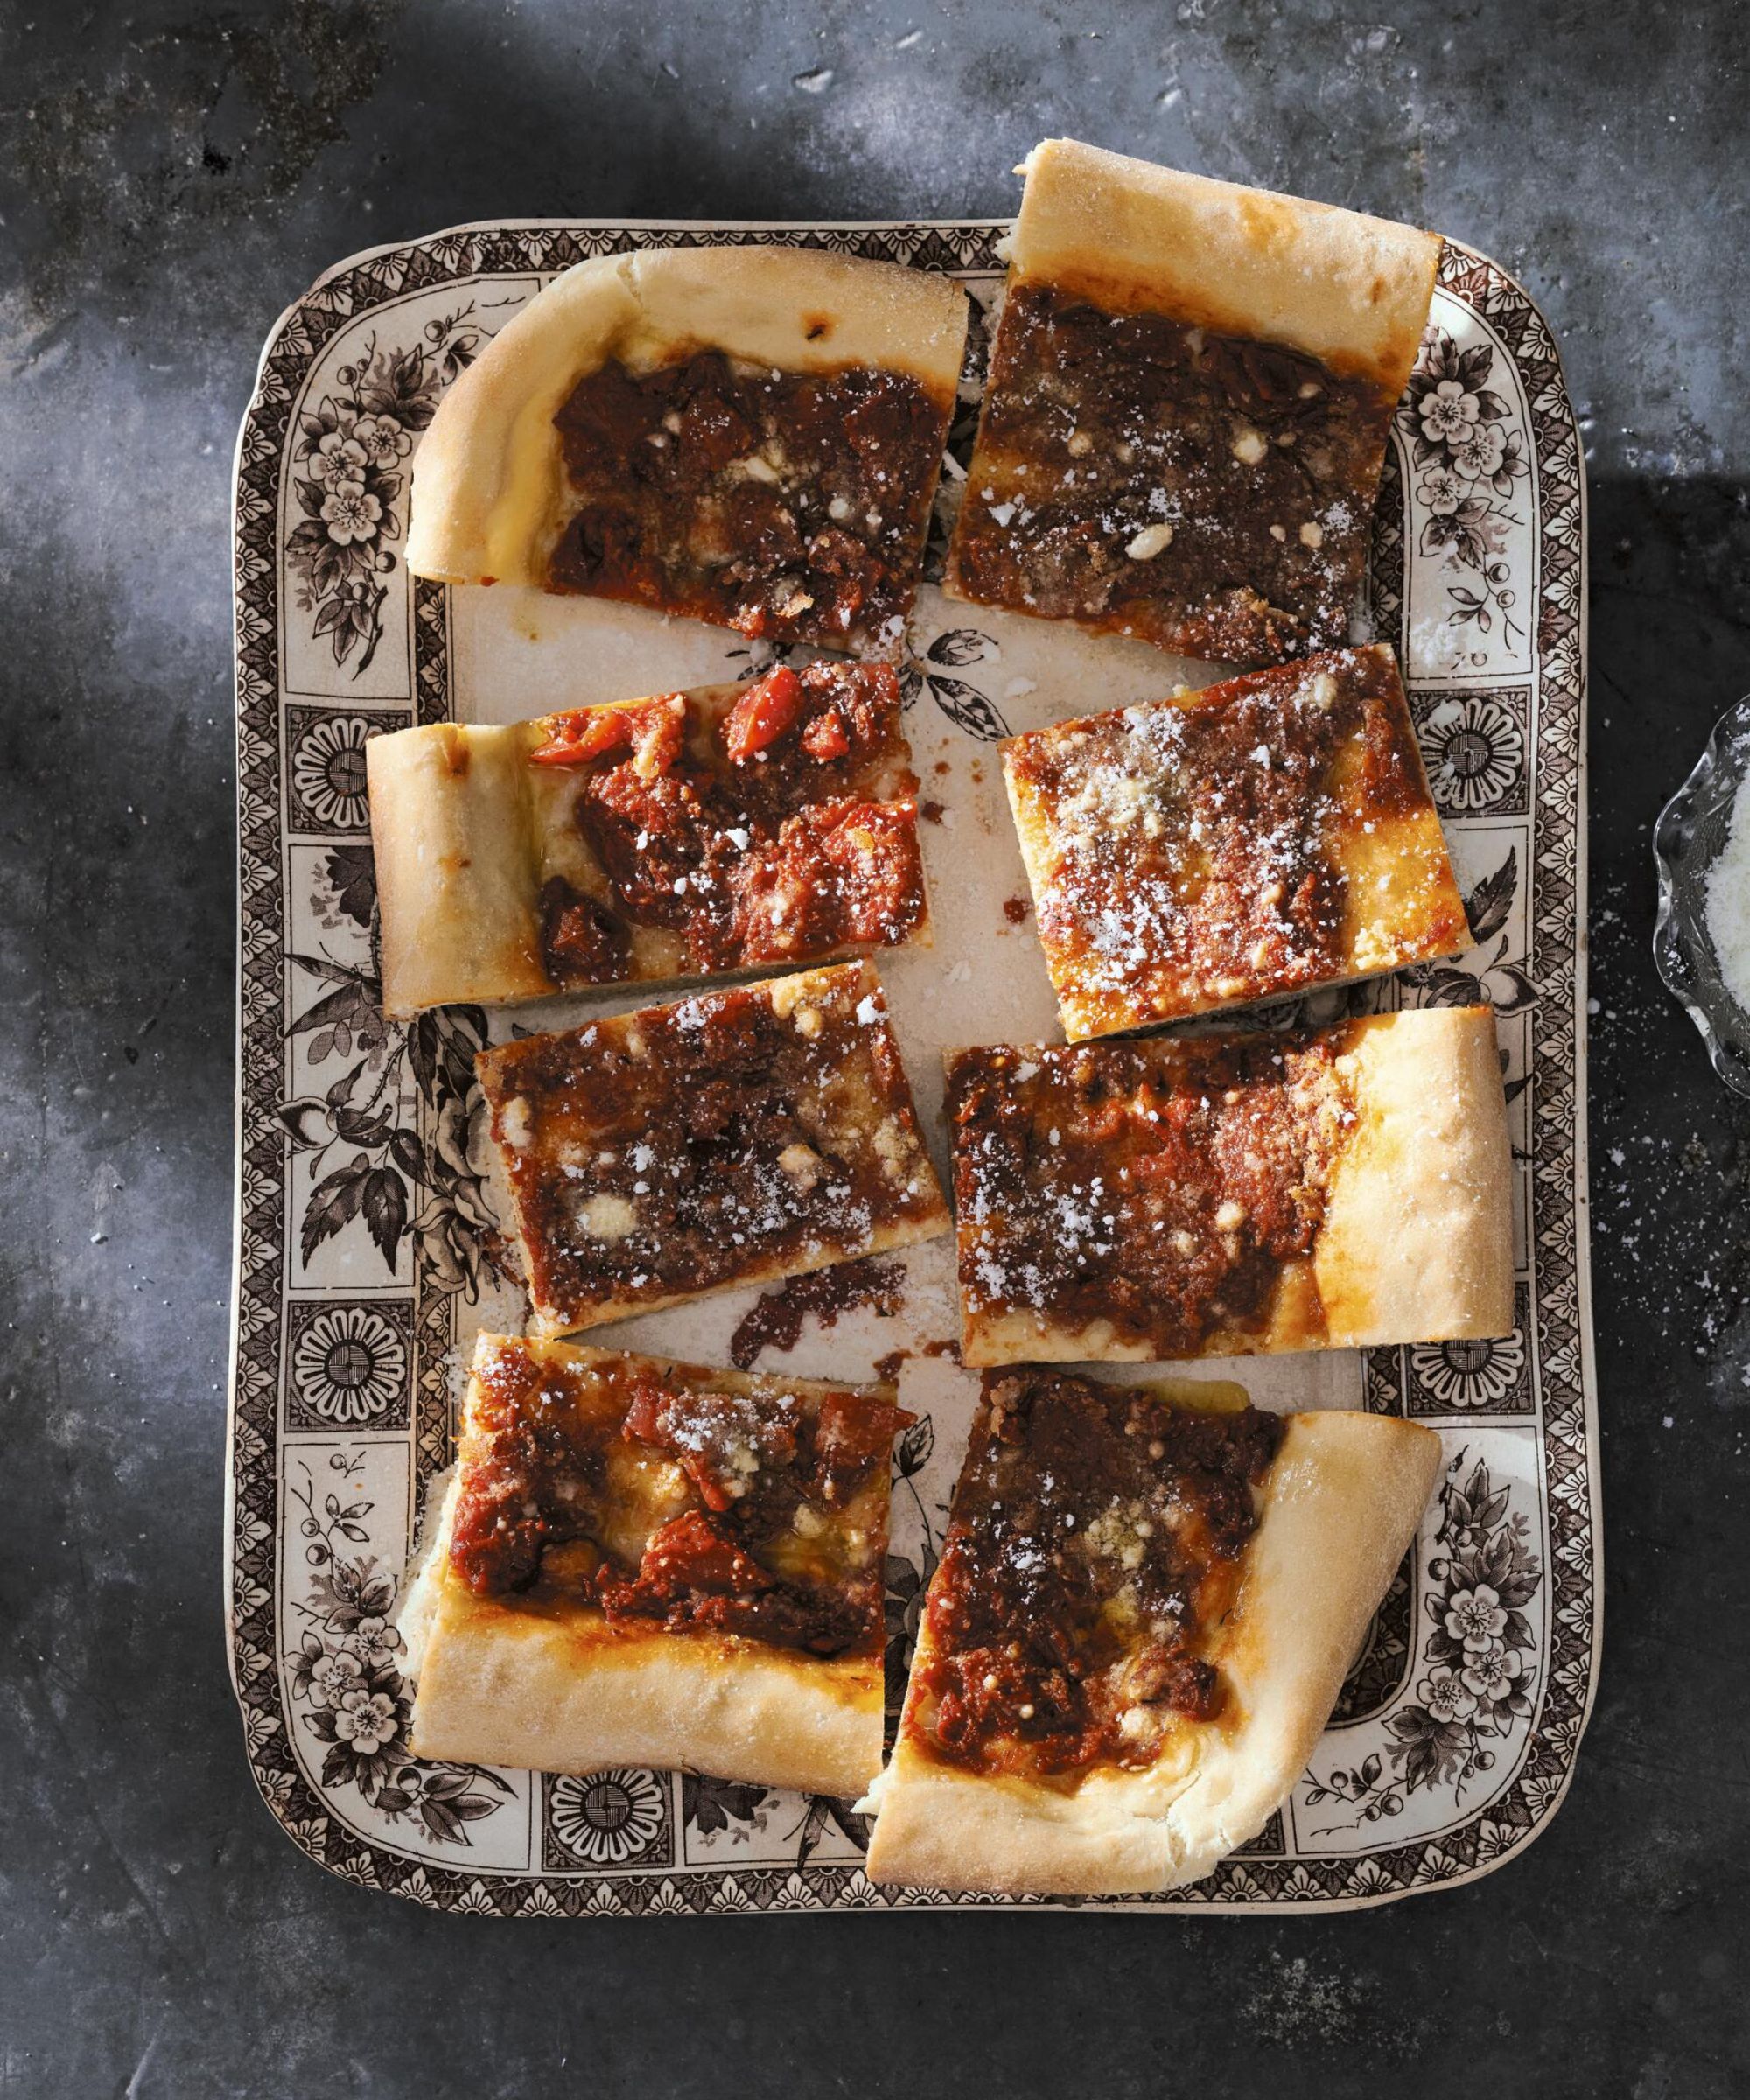
I almost always mix homemade with store-bought. Maybe I’ve preserved my own mushrooms or peppers, or baked a slab of tomato pie to cut into little rectangles. I’ll round that out with good olives from the shop, a tin of sardines or anchovies, crackers, a hunk of Parmesan. Sometimes I go all-seafood – a 'fish board' that’s wonderful for the Feast of the Seven Fishes – sometimes it’s mostly meat, sometimes it’s vegetables and beans. The point isn’t perfection; it’s generosity.
And of course, those mini meatball sandwiches still make an appearance, especially around the holidays. I make them ahead, freeze them, and then bring them out as soon as people start drifting in.
It’s All About Abundance, no Matter Your Means
Antipasti used to be reserved for holidays and big celebrations. Now, I see it as an everyday expression of abundance, no matter what your circumstances are. It can be as simple as a few olives and a chunk of cheese, or as elaborate as a groaning board before a feast.
However you do it, the message is the same: there’s always something to eat here, and there’s always room for you.

How to Build an Antipasti Platter
If you want to be the person who can pull together antipasti at a moment’s notice, it starts with a well-stocked pantry and freezer. I keep jars of relishes, tinned fish, olives, caper berries, nuts, and crackers or toasts on hand. I organize the freezer by tucking away a few well-wrapped packages of sliced cured meats and, when I can, a slab of tomato pie.
If I’ve prepped antipasti ahead, I make sure it comes back to room temperature before serving – about 30 minutes out of the fridge. Cold cheese and cold tomatoes never taste as good as room-temperature ones.
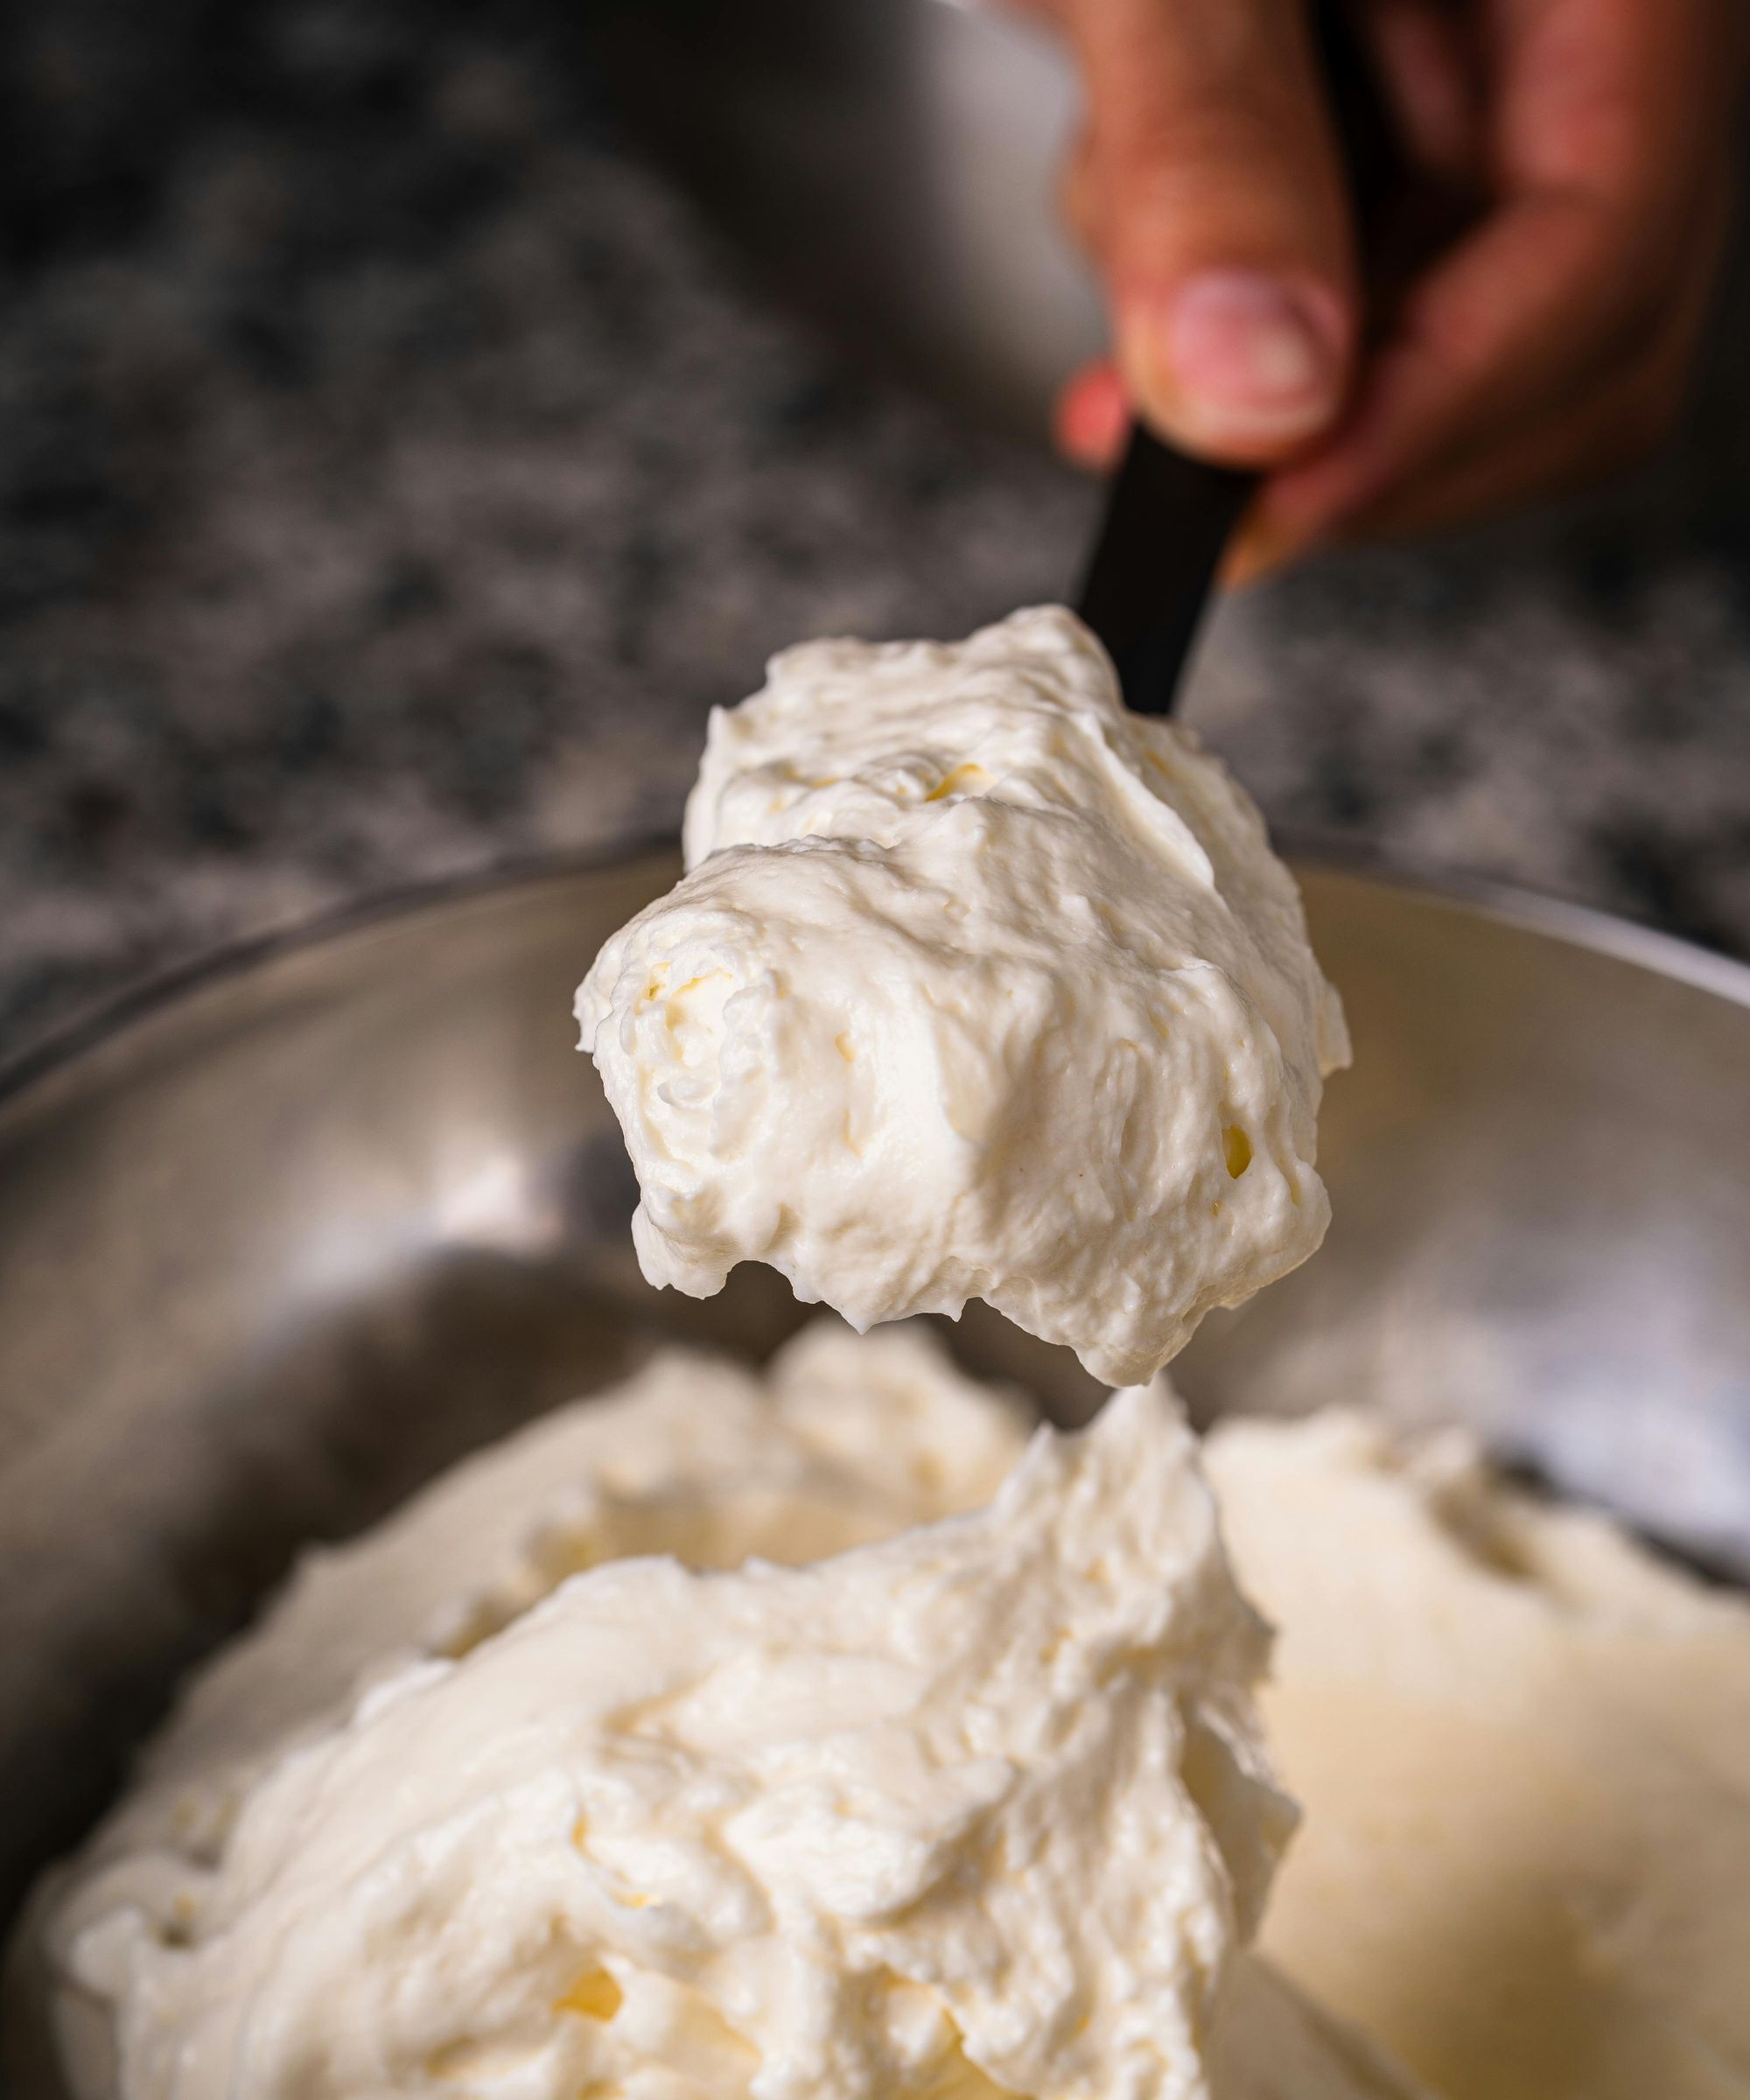
And whenever possible, I make fresh ricotta. It’s three ingredients – milk, acid, salt – and once you realize how easy it is, you’ll start using it as a stand-in for butter: thick on toasted bread, under roasted peppers, alongside those little meatball sandwiches.
When I’m arranging antipasti, I think like an architect and a cook at the same time – everything has to taste great and make sense together.
- Flavors: You want tangy, briny, sweet, spicy, salty, and buttery all in conversation with one another. Hot cherry peppers next to creamy ricotta, marinated mushrooms against a nutty Parmesan, olives to cut through the richness.
- Textures: Crunchy and crispy alongside smooth and creamy. Crackers or toasted bread with something soft to smear, something chewy to bite, something juicy to burst.
- Colors and shapes: Red, yellow, green; round, flat, rolled, stacked, cubed, torn. I use little ramekins and prep bowls to create pockets of color and height, and I’ll often tuck in citrus wedges or slices – blood oranges, lemons – for brightness.
- Seasonality: In tomato season, a bowl of just-picked cherry tomatoes with torn basil, crunchy salt, bread, and olive oil is all you need. In winter, I lean more heavily on preserved things: caponata, pickled peppers, roasted nuts.
Recipes For Your Antipasti Platter
Mini Meatball Sandwiches

Ingredients (Makes sixty 1½-inch squares)
- 1 loaf (about 30 slices) very thin sliced soft white bread, such as Pepperidge Farm
- 1 pound (455 g) ground pork, or a combination of pork and beef
- ¼ cup (25 g) grated Romano cheese
- ¼ cup (25 g) grated Parmesan cheese
- ¼ cup (15 g) fresh flat-leaf parsley eaves and tender stems, finely chopped
- 2 teaspoons extra virgin olive oil
- 1 large egg 1 garlic clove, minced
- ½ teaspoon dried oregano
- ½ teaspoon dried thyme
- ½ teaspoon kosher salt
- Freshly ground black pepper
- 8 tablespoons (1 stick/115 g) unsalted butter, at room temperature
Method
- Preheat the oven to 350°F (175°C).
- Process the end slices of the loaf of bread to fine crumbs in one of the best food processors or blender combos, about ½ cup (28 g). Transfer to a large bowl, add the meat, cheeses, parsley, olive oil, egg, garlic, oregano, thyme, salt, and pepper, and mix well with your hands to combine.
- Moisten your hands with cold water and roll the meat mixture into 1-inch (2.5 cm) balls; reserve on a baking sheet. Line another baking sheet with parchment or a silicone mat.
- Lay 2 slices of the bread on a clean work surface. Butter one side of each slice. Place 4 meatballs on one slice of buttered bread, top with a second slice, buttered side down, and press firmly together. Use a serrated knife to cut off the crusts. (Reserve the crusts and bake separately for a 'cook’s treat.')
- Repeat with the remaining bread and filling. Cut each sandwich into 4 squares and transfer to the lined baking sheet. (This process can be done assembly-line style, lining up slices of buttered bread and assembling multiple sandwiches at a time.)
- Bake until the sandwiches are golden brown, 15 to 20 minutes. Transfer to a rack pan and let cool slightly. Serve warm
Tomato Pie

Ingredients (makes 12 servings)
- FOR THE DOUGH
- 5 cups (625 g), all-purpose or bread flour, plus more for kneading
- 1 tablespoon kosher salt
- 2¼ teaspoons (7 g) active dry yeast (from a ¼-ounce packet)
- 2 teaspoons sugar
- 2 cups (475 ml) water
- 2 tablespoons extra virgin olive oil
- FOR THE SAUCE
- 3 tablespoons extra virgin olive oil
- 2 garlic cloves, minced
- 2 tablespoons tomato paste
- One 28-ounce (800 g) can whole tomatoes
- 1 teaspoon kosher salt 1 teaspoon sugar 1 teaspoon dried oregano (optional)
- ½ teaspoon dried thyme (optional)
- ½ teaspoon red pepper flakes (optional)
- Olive oil for brushing
- ½ cup (50 g) grated Romano cheese (optional), plus more for serving
Method
- MAKE THE DOUGH
- In a large bowl, or the bowl of one of the best stand mixers, whisk together the flour, salt, yeast, and sugar. Add the water and olive oil and stir to combine the wet and dry ingredients. Knead by hand, or fit the mixer with the dough hook and knead on low speed, until the dough is soft and smooth, about 5 minutes (a few more minutes if kneading by hand).
- Turn the dough out and shape it into a tight ball. The dough will be sticky but workable. Dust flour on your hands and the work surface as needed. Use a bench scraper to assist you.
- Transfer the dough to a large oiled bowl and turn to coat with oil. Cover the dough tightly and set aside to rise in a warm spot until almost doubled, 3 to 4 hours.
- MAKE THE SAUCE
- Combine the olive oil and garlic in a medium pot and stir constantly over medium-high heat until the garlic begins to sizzle, about 1 minute. Add the tomato paste and cook, stirring, for 1 to 2 minutes to smooth the harsh taste of the paste.
- Add the tomatoes, with their juices, the salt, sugar, and oregano, thyme, and/or pepper flakes, if using, and bring to a simmer, then reduce the heat to medium-low and simmer for about 5 minutes, smashing the tomatoes with the side of a spoon as they begin to soften. Partially cover the pot and cook, continuing to smash the tomatoes occasionally as they cook, until they have broken down to a smooth but slightly chunky texture, about 30 minutes total. Remove from the heat and let cool. (The sauce can be made ahead and refrigerated for up to 5 days.)
- MAKE THE PIE
- An hour to an hour-and-a-half before baking the pie, oil an 11-by-17-inch (28 by 43 cm) rimmed baking sheet. On a clean work surface, using a rolling pin, roll the dough out to a rectangle approximately the size of the pan. Fit the dough into the pan, pressing it into the corners (a small straight-sided juice glass can help with fitting the dough into the corners).
- Brush the surface with olive oil. Cover the dough and let it rise until puffy (it should leave a fingerprint behind when pressed), at least 60 minutes, and up to 90 minutes.
- Position a rack in the top third of the oven. Preheat the oven to 500°F (260°C). Press your fingers into the dough to create dimples. Spread a thin layer of the sauce evenly over the entire surface of the dough (extra sauce can be served on the side or reserved).
- Sprinkle with the cheese, if using. Bake until the crust is golden brown and cooked through, 15 to 20 minutes. Remove from the oven and let cool completely. (The pie can be wrapped tightly in plastic wrap and frozen for up to 6 weeks.)
- Cut the pie into squares or rectangles and serve with extra grated cheese to sprinkle on top.
Fresh Ricotta

Ingredients (makes 1 cup / 227g)
- 4 cups (950 ml) whole milk
- ½ teaspoon kosher salt
- 2 tablespoons fresh lemon juice
Method
- Line a small colander with cheesecloth (a paper towel will work in a pinch) and set it over a bowl.
- Combine the milk and salt in a small saucepan and bring to a boil over high heat.
- Add the lemon juice, lower the heat, and stir until the curds coagulate and separate from the whey, 1 to 2 minutes.
- Pour the curd mixture into the strainer and set aside until most of the liquid has drained away, about 1 hour.
- Cover and refrigerate for up to 3 days if not using right away.
A Cook's Legacy is our six-part series with award-winning cookbook author, Lucinda Scala Quinn, exploring the family, food, and cultural memory that inspired her latest cookbook, Mother Sauce, through her beloved culinary voice.

The author of eight cookbooks and long-time food director at Martha Stewart Living, Scala Quinn has spent decades showing home cooks how to bring restaurant-worthy meals to the family table.