How to take rose cuttings – tips for propagating roses
Learn how rose cuttings can help you to propagate new plants from your favorite blooms


Taking rose cuttings is an easy way to create new plants from your favorite roses, and is completely free. In our opinion, you can never have too many roses; the stalwart of a country garden, they bring fragrance and color from June all the way through to December and, with so many types available, there's a variety for nearly every situation.
Planting roses and growing roses from cuttings have the advantage of being free from suckers, however they can grow with less vigor.
Our step-by-step instructions on how to grow roses from cuttings.
How to take rose cuttings

Rose cuttings can be taken at any time of the year, but it will depend on what type of cutting you take. There are two ways to take rose cuttings – as hardwood cuttings or as softwood cuttings.
Hardwood cuttings are taken from mature growth, albeit from that current year, during fall and winter when the rose is dormant. Softwood, stem-tip cuttings are taken in late spring and early summer from new-season growth.
Which method is better is very much up for debate, as various sources recommended different methods. Softwood cuttings are far quicker to root, taking only a couple of months, whereas hardwood cuttings are far slower to root but are generally viewed as more reliable.
How to take hardwood rose cuttings

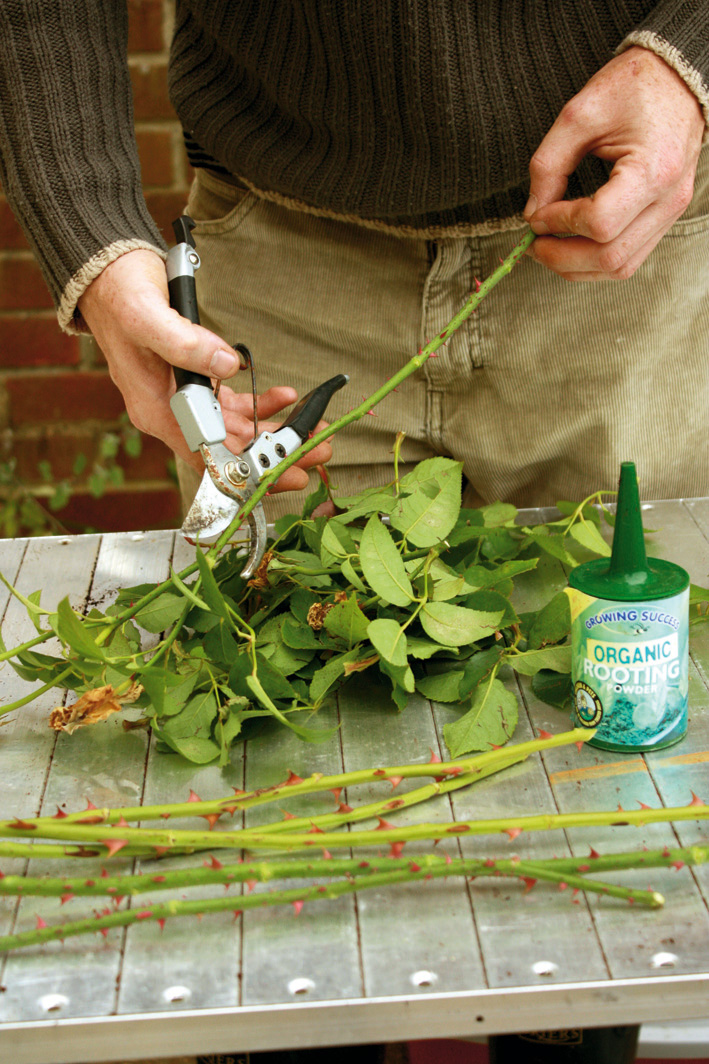
1. In early fall, after flowering, select healthy shoots of about pencil thickness. Remove the flower and cut off a length around 12in.
Design expertise in your inbox – from inspiring decorating ideas and beautiful celebrity homes to practical gardening advice and shopping round-ups.
2. To prepare the cutting remove the leaves and cut the shoot down to around 8in. At the top cut at an angle, just above an outward facing bud, and at the bottom make a straight just below a bud. The bud is the point at which a leaf attached to the stem. Place these in a polythene bag to ensure they don’t dry out.
3. Prepare a bed for your cuttings. Choose an open site, but one that is shaded from the midday sun. To plant the cuttings, make a narrow, slit-like trench and dribble in sand to improve the drainage. Alternatively create individual holes 6in apart using a dibber or piece of bamboo cane and sprinkle sand in each.
4. Place the cuttings vertically into the trench so that a third of the shoot is above the soil. Cuttings will need to be placed at least 6in apart. Infill with soil, firm and water.
5. In a year’s time, the cuttings should have developed a root system and can then be carefully lifted using a fork and planted in their final position.
How to take softwood rose cuttings

1. These should be cut in late spring and summer from new growth. They should be cut in the same way as a hardwood cutting – above a bud at the top and below a bud at the bottom, however they can be shorter, around 7in.
2. Remove all leaves apart from the top leaflets, stripped down to two leaves.
3. Before planting the cuttings, you can at this stage dip the bottoms of the cuttings in rooting hormone, available as a powder or liquid, to stimulate growth.
4. Plant the cuttings into a pot filled with an equal mixture of compost and sand. Create holes with a dibber will help protect the cutting.
5. Water well and cover with the pots a plastic bag secured with a rubber band.
6. By autumn a good root system should have developed, the plants can then be potted on into more nourishing compost and, by the following fall, they should be ready to plant into their final position.
How to root a rose cutting
To root a rose cutting you need to take either softwood cuttings in late spring or summer or hardwood cuttings in early fall to late winter.
If taking hardwood cuttings, plant these into a narrow trench in a prepared bed. Sprinkle in sand before planting to improve drainage and then infill and water.
Softwood cuttings can be done in the same way, but can be smaller and planted into pots filled with an equal mixture of compost and sand and then covered with a plastic bag.
Softwood cuttings should root within a few months, while hardwood cuttings will take longer, however after a year both should have developed a good root system and the plants can then be planted into their final position.
Gardener’s World expert gardener Monty Don reveals a key tip to growing roses from cuttings: ‘One tip to improve rooting is to damage the leaf nodes – you can either nick them with secateurs; you can bruise them… and that will provoke roots from that point, so if they’re buried I’ll get roots all the way up and hopefully a healthier plant.’
You can also try rooting rose cuttings in water to propagate them.
FAQs
Can you root rose cuttings in water?
Rose cuttings can be rooted in water, too. To do this, in late spring select a healthy stem from the current year's growth and cut a 6in section just below a bud.
Remove all the leaves leaving just the top two. Submerge the cutting into a clean jar half-filled with lukewarm water and place it in a sunny spot such as a windowsill. The water should be replaced once to twice a week.
Roots should start to form within a month or two. Once there is a good network of roots the cutting can be carefully potted until into pots filled with compost and some sand. The pot should be kept moist but should not be over watered.
The rose should be ready for planting out into the garden in the following spring.
Landscaping with roses is made easier if you can take rose cuttings to grow from; it will also allow you to ensure that your favorite blooms are repeated across your garden.

Pippa is a contributor to Homes & Gardens. A graduate of Art History and formerly Style Editor at Period Living, she is passionate about architecture, creating decorating content, interior styling and writing about craft and historic homes. She enjoys searching out beautiful images and the latest trends to share with the Homes & Gardens audience. A keen gardener, when she’s not writing, you’ll find her growing flowers on her yard for styling projects.