Growing celery from a stalk – get new plants for no cost
It's so easy to grow celery from scraps and you can get new plants to harvest for free for all your culinary uses

Celery is a cool-season crop grown for crunchy stems that are commonly used in salads and to add flavor to sauces. It is a vegetable that can easily be re-grown by sprouting its base and knowing how to grow celery from a stalk means you get new plants for free.
These plants, that have been re-sprouted from bits of the vegetable that most people simply throw in the trash, can either be grown indoors or planted outside to give yourself a fantastic harvest of stalks.
Once you know how to grow celery you can get a bumper crop of stems, which can then be used in the kitchen and the base easily re-grown into new plants to start growing again for new future stems.


Celery stalks are usually picked once they reach at least six inches

Drew is a former professional gardener who specialized growing edibles. He worked in, and led the planning and growing in, productive kitchen gardens that grew vegetables, fruit, herbs, and microgreens for chefs at local restaurants.
Tips for growing celery from scraps
Celery is commonly grown from seed, however it is a crop that can be easily re-grown from scraps indoors with only a little equipment required. It sprouts quickly and can then be grown on in one of three ways.
The plant can be grown in a pot indoors, or outside as part of a container vegetable garden, or planted in the ground to develop. All of these different options can give you a harvest come the end of the season. Growing celery from scraps can be a fantastic growing project to get a young family involved in too.

The bases will start sprouting quickly in water
How to grow celery from a stalk in water
Celery can be sprouted in water in only a few simple steps:
- Slice the root base off a bunch of celery about two inches from the bottom.
- Place the base in a shallow dish filled with one inch of water.
- Put the container on a windowsill that gets good natural light – a minimum five hours a day of light is ideal.
- Change the water every two days.
- Small leaves should emerge within a few days and then small storks and roots should follow within a week.
- When the roots reach one inch, it is time to grow on the sprouted celery by either planting it in a container or the ground.
On the topic of where to place the container, Bryan Tan, founder of GardenersGrail.com, adds: ‘The best location to sprout celery indoors is a sunny spot with plenty of ventilation. You can place it near a window or use a grow light to provide the necessary light for the plants. For optimal conditions, keep the temperature between 65-75˚F.’
It is possible to grow celery from scraps without needing to sprout them in water. The alternative is to plant the cut-off base directly into moist soil. John Stephens, chief editor and gardener for Totalgardener.com, states: ‘Both methods yield excellent results but require a few conditions: adequate sunlight, constant moisture and warmth are all necessary for successful growth.’

One celery plant can grow happily in a 12 inch pot
How to grow on a sprouted celery stalk
A sprouted celery stalk should be potted up into a container (indoors or outdoors) or planted out into the yard when the roots have developed around one inch in length. Leaving the sprouting celery sitting in water for too long will lead it to rot.
These are the two methods you can choose from:
1. Plant in a container
To plant your sprouted celery stalk in a pot, choose one at least 12 inches wide and ensure it has good drainage holes in the bottom. Fill the container with a good-quality potting compost and mix in some slow-release fertilizer – such as this Miracle-Gro Shake 'n Feed All Purpose Plant Food on Amazon – as celery is a hungry crop. Make a hollow in the center of the compost and push the sprouting celery bottom in and pack more compost around it. Water the pot well and put it in a sunny spot.
Lindsey Hyland, founder of Urban Organic Yield, advises that the plant needs a reasonable level of sunlight to ‘promote even growth’. Celery can be a good vegetable to grow in shade – where it is light but out of the full sun. Growing celery in shade can slow down growth to create tender stems, and the plant can benefit from not losing as much water through evaporation.
‘Celery that is sprouted from scraps can be planted in both pots/containers indoors or out in the garden. For best results, it should be planted in early spring to mid-summer when soil temperatures are between 60-70˚F,’ adds Lindsey.
‘If the celery is grown indoors, ensure it gets at least six hours of direct sunlight each day and keep the soil evenly moist by watering deeply every few days.’

Celery is a crop that requires a lot of water during the season
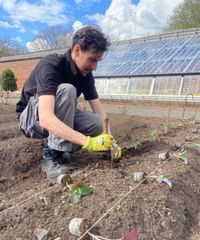
2. Plant it outside in your yard
A root-base can go directly from being sprouted in water to outdoors in the yard. Celery should not be planted outdoors until after the risk of frosts has passed and nighttime temperatures remain above 40˚F. The soil temperature must be at least 50˚F for celery plants to grow healthily outdoors.
It is a crop that is ideally planted outside in early spring or summer, though it could be earlier if you are intending to plant celery undercover, for example if you are growing vegetables in a greenhouse or polytunnel.
Celery likes a moisture-retentive soil and also a more alkaline soil. Test the pH of your soil and make amendments if required, especially to raise the pH if your soil is very acidic. You can get soil pH testing kits on Amazon. It is a hungry crop so work in some well-rotted manure or garden compost into the spot prior to planting the sprouted celery.
Zeeshan Haider from Greenryenthusiast.com, says: ‘Make sure the soil is nutrient-rich and well-draining, and that the location gets plenty of sunlight.
‘When planting out in the garden, space the plantings about 8-12 inches apart and water regularly. The plant should be given plenty of sunlight and should be regularly fertilized, as celery is a heavy feeder. With some patience, you'll soon be harvesting fresh celery from your garden!’
Celery is a crop that likes a regular watering and should never be allowed to dry out. Plan ahead when it comes to watering plants and give celery a good soak before any dry weather is incoming. A celery plant needs lots of water throughout the entire growing season. Celery needs to be fed with a balanced fertilizer at least twice during the growing season, this increases to at least every fortnight during the summer if you are growing the crop in pots.

Celery can provide both flavor and crunch to dishes
How long does it take to grow celery from a stalk?
Growing celery from a stalk is quicker than growing celery from seed. It usually takes from 3-5 months to grow from first placing the cut-off base in water to getting a harvest of a bunch of celery. The desired size for a stick can however vary person-to-person. Celery grown from scraps may produce thinner and tougher stalks than you find in the store, though these will still be perfectly suitable for cooking.
The clump can be removed as a whole and cut off at ground level, or the alternative is to take individual stalks. Smaller stalks can be regularly harvested as required and that will encourage new stalks to grow. You can continue to harvest smaller stalks or leave them to grow into full mature celery. Then you can lift the entire plant and use the base to sprout more celery from again after removing the stalks and using them in the kitchen.