How to remove caulk – 4 steps to remove clinging silicone caulking
Discover how to remove silicone caulk from bathtubs, sinks, showers and baseboards before applying new

Lola Houlton

Design expertise in your inbox – from inspiring decorating ideas and beautiful celebrity homes to practical gardening advice and shopping round-ups.
You are now subscribed
Your newsletter sign-up was successful
Want to add more newsletters?

Twice a week
Homes&Gardens
The ultimate interior design resource from the world's leading experts - discover inspiring decorating ideas, color scheming know-how, garden inspiration and shopping expertise.

Once a week
In The Loop from Next In Design
Members of the Next in Design Circle will receive In the Loop, our weekly email filled with trade news, names to know and spotlight moments. Together we’re building a brighter design future.

Twice a week
Cucina
Whether you’re passionate about hosting exquisite dinners, experimenting with culinary trends, or perfecting your kitchen's design with timeless elegance and innovative functionality, this newsletter is here to inspire
Caulking is an essential piece of kit when fitting a whole range of home essentials – from showers and bathtubs to windows. However, it can discolor or even peel over time, especially if it wasn't applied perfectly the first time.
If you know how to caulk a bathtub, caulk a shower, or even caulk baseboards, you'll know that it is the best way to stop air and water from leaking into places it shouldn't. Fresh caulk should last around five years, but when you notice the caulk is losing its effectiveness or cracking, then it's time to wipe the slate clean and reapply – though to do this you need to remove any existing caulk first.
We asked contractors and DIY experts for advice on how to remove silicone caulk from surfaces easily and effectively.
How to remove silicone caulk
Removing silicone caulk is generally a simple DIY project you can do yourself to instantly elevate your home, though sometimes stubborn bits can stay adhered to surfaces. When this happens, you will need special but simple tools and techniques to remove them – and you must do so thoroughly, or your new caulk will not adhere well or evenly, resulting in a poor finish that will allow water and air leaks to penetrate.

You will need:
- Caulk remover solution – Motsenbocker’s Lift Off Caulk Remover at Amazon will remove spray foam and silicone caulk
- Caulk remover tool – Amazon's top seller is the Saker Silicone Caulking Tool 3-in-1, which can remove old grout and help neaten new
- Glass scraper – this plastic razor scraper is top-rated at Walmart
- Needle nose pliers, such as these from Amazon
- A hook tool, such as this set at Walmart
- Abrasive pads
1. Soften the caulk
One of the biggest decorating mistakes people make is not using the right tools. When removing silicone caulk, trying to pick it away without softening it will only damage the surface and increase your frustration.
Using caulk remover will soften caulk to make the job easier, explains Shlomo Cherniak, professional handyman and owner of Cherniak Home Services:
Design expertise in your inbox – from inspiring decorating ideas and beautiful celebrity homes to practical gardening advice and shopping round-ups.
'Apply a caulk remover or a commercial caulk softener to the caulk line. Follow the product instructions for the recommended dwell time to allow the caulk to soften,' he recommends. ' If the caulk proves difficult to remove, consider using a caulk softening agent overnight to further loosen it before attempting to scrape it off.'
If needed, you can also heat and soften the caulk using a hairdryer, Richard Heaton, home improvement specialist at Cartisan adds. 'If you decide to use the hair dryer, aim the nozzle onto an eight to 10-inch section of caulk while adjusting the heat setting to the lowest possible. To make it more pliable, heat it for thirty to forty seconds.'
To remove water-based acrylic caulk, you can also use isopropyl rubbing alcohol; apply it and leave it to soften the caulk before removing it.

Shlomo Cherniak is a handyman and founder of Cherinak Home Services in Baltimore. He has over seven years of experience in home improvement, with him and his team specializing in everything from installing kitchen cabinets to fixing leaky faucets to hanging pictures on the wall.
2. Cut the caulk
While the caulk is soft, it is time to cut it away, continues Richard Heaton, home improvement specialist.
'Next, carefully cut around the caulk's edges using a utility knife. Take care not to scuff the surrounding material. To further loosen the caulk line, carefully cut along both edges. Use a specialized caulk removal tool with easy access for tight corners.'
This will make it easier to prize away in the next steps.

3. Scrape off caulks remains
Use a glass scraper to peel off any caulk still hanging onto the surface. To make sure you don't damage or scratch the surface the caulk is stuck to during this process, keep the glass scraper as flat and parallel to the surface as possible.
'Removing caulk using gentle scraping motions with a single-edged razor pulls it away consistently without gouging or scratching,' advises Matthew Ferris, Master Plumber and Founder of Ferris Plumbing. 'Moving towards your body keeps your hands away from the sharp edge and maintains control.'
There are always some tricky spots to reach when removing caulk, so we recommend having some needle-nose pliers on hand to remove any remaining caulk. You may also want to use a hook tool to scape out anything that the pliers can't grip, but be very careful not to scrape or scratch the surface beneath the caulk.
4. Scrub away the remaining caulk
Once you have removed all the caulk you can, use an abrasive bathroom cleaning pad (one that's no more abrasive than you would normally use to clean your bathtub or sink since you don't want to scratch the surface) to clean the area of any caulk residue.
When done, clean with white vinegar to get rid of mold or any mildew in the area, for a fresh surface to protect against water leaks, and seal window gaps to stop cold air leaks. Be sure to rinse well and then allow it to dry completely before replying to give the caulk a better surface to cling to.
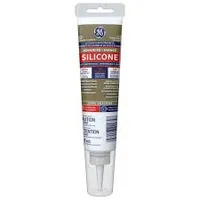
GE Advanced Silicone Kitchen & Bath Sealant | View at Walmart
This all-in-one sealant is great for quick DIY projects and to stop leaks. It is highly rated by pros and DIYers alike for its 10-year mold resistance.
FAQs
What will dissolve caulking?
You won't be able to dissolve caulking, but you can soften it for removal with a caulk removal solution. The best are store-bought and made-for-purpose, though you can try a store cupboard standby such as vinegar, applied and allowed to soak into the caulk, to see if that will soften it. Always do a test patch first to ensure you won't damage or discolor the surface beneath.
How do you remove dried silicone caulk residue?
If your silicone caulk application was a little on the messier side, then you can easily remove overhanging residue with a lubricant such as WD-40. This will easily break down the reside, allowing you to scrape it off with ease.
To ensure the rest of your caulk stays in place, it can help to cover it up with a cloth or some thick tape first (ensure it is fully dry to avoid damaging it), and cut the overhanging residue away for more precision.
'When removing silicone caulk, it is important to follow some safety steps to ensure the caulk softener doesn't irritate your skin or airways,' adds Matthew Ferris, Master Plumber. 'Proper ventilation is crucial when removing silicone caulk. It's important to open windows and create an air draft before beginning the removal process to ensure you and any occupants have adequate airflow and that fumes from solvents are drawn outside. Poor ventilation could lead to inhalation of chemical vapors, which may cause irritation or other health issues. A pair of gloves when working wouldn't go amiss, either.'

Chiana is Homes & Gardens’ kitchen appliances editor. With a lifelong passion for cooking and baking, she grew up experimenting in the kitchen every weekend with her baking-extraordinaire Mom, and has developed a great understanding of how tools and appliances can make or break your ideal relaxing kitchen routine.
- Lola HoultonNews writer
