Your guide to cleaning a wood-burning stove in 8 easy steps
Follow these 8 steps to deep clean a stove to increase its efficiency and longevity


Design expertise in your inbox – from inspiring decorating ideas and beautiful celebrity homes to practical gardening advice and shopping round-ups.
You are now subscribed
Your newsletter sign-up was successful
Want to add more newsletters?

Twice a week
Homes&Gardens
The ultimate interior design resource from the world's leading experts - discover inspiring decorating ideas, color scheming know-how, garden inspiration and shopping expertise.

Once a week
In The Loop from Next In Design
Members of the Next in Design Circle will receive In the Loop, our weekly email filled with trade news, names to know and spotlight moments. Together we’re building a brighter design future.

Twice a week
Cucina
Whether you’re passionate about hosting exquisite dinners, experimenting with culinary trends, or perfecting your kitchen's design with timeless elegance and innovative functionality, this newsletter is here to inspire
When you have a wood-burning stove in your home, you’re probably used to seeing the black marks and ash not only on the stove itself but on the hearth around it. But beyond its unappealing appearance, leaving soot and debris to build up can damage your stove, reduce its efficiency, and even pose a health hazard to you and your family.
That's why keeping your wood burner clean is key to a more aesthetically pleasing space, safer burning, and more cost-effectively running a log burner.
We asked experts for their top cleaning tips to keep your wood-burning stove in pristine condition. Here's what they said.
Cleaning a wood-burning stove
'The buildup of soot and creosote created by constant burning without cleaning can reduce your stove's durability and efficiency, and even become a health and fire hazard,' explains Stephen Talbot, Sales Director at Logs Direct. 'So I recommend cleaning your stove from once every two weeks to once every two months, depending on how frequently it is used.'
What you will need to clean your stove

- Plastic covers or a tarp to protect furniture and the surrounding area from soot and debris (we recommend this 10-piece plastic sheet set from Amazon)
- A metal ash shovel
- A bucket for collecting ash
- A stiff fireplace brush
- An ash vacuum
- Glass cleaner
- Specialized stove cleaning solution or vinegar and baking soda
- Mild detergent
- A few microfiber cloths
- Stove polish (optional)
- Protective gloves, goggles, and mask
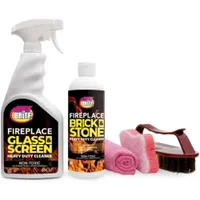
Quick N Brite Fireplace Cleaning Kit | $8.83 from Walmart
This kit includes a fireplace glass cleaner, gel fireplace cleaner, a scrub brush, a sponge, and a microfiber towel.
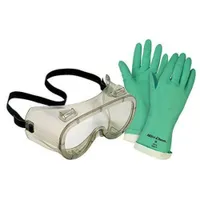
SAFETY WORKS SWX00137 Gloves and Goggles Kit | $24.32 from Walmart
Gloves are essential to protect you from sharp edges, chemical exposure, and ash debris while cleaning your wood-burning stove.
1. Ensure it is safe to clean

'When you’re planning to clean your stove, don’t forget to stay safe,' advises Stephen Talbot. 'Don’t start the cleaning until the metal of the stove is completely cooled to avoid any burns,'
'You should also give your stove a look over for any damage or wear to it, as it could affect its integrity, making it dangerous to deal with. With anything you’re unsure about, consult with a professional for an expert opinion first to guarantee it is safe.'

Stephen Talbot has been involved in wood fuel production for many years and was one of the forerunners of kiln-dried wood in the UK. Maintaining quality and pursuing greater efficiency in both wood fuel production and in the drying and preparation of kiln-dried logs for the UK domestic market is his ultimate goal.
2. Clear excess debris

Begin by removing the ashes and debris from the base of the stove with a hand shovel, such as this Rocky Mountain Goods fireplace shovel from Amazon.
Design expertise in your inbox – from inspiring decorating ideas and beautiful celebrity homes to practical gardening advice and shopping round-ups.
'Be aware that there will likely be dust that easily falls from the remnants and can hang around in the atmosphere or cover your furniture, so carefully placing it into your bucket saves you a bit of cleanup,' says Stephen Talbot.
3. Clean the stove's interior

Next, you want to start cleaning the stove's interior:
1. Use a brush to break down the built-up soot and creosote on the interior walls and corners of your stove. You can use these Eyliden scrub brushes from Amazon.
'The approach to this should be gentle but thorough to avoid damage to the inside while removing all the residue left from previous burning,' says Stephen Talbot. A mixture of water and mild detergent can also be used for the residue that needs some extra attention.
2. 'To remove the remaining ashes from the firebox, and any other areas where ash accumulates, use a vacuum cleaner designed for ash or a shop vac to vacuum the ash pit,' advises Kent Boll, Founder and CEO of Service Today.
BENTISM Ash Vacuum Cleaner | $50.99 from Walmart
This vacuum cleaner for fireplaces, stoves, grills, and BBQs has a capacity of 4 gallons. This investment can make cleaning up ash debris significantly easier and faster.
4. Clean the glass door

1. 'To clean the glass door of the wood-burning stove, use a glass cleaner specifically designed for use on wood stoves,' such as this Meeco woodstove glass cleaner, from Walmart. Apply the product to a soft cloth and gently scrub the glass surface to remove soot and residue. Avoid using abrasive cleaners or materials that may scratch the glass.
2. Leave the cleaner on the glass for five minutes to work through any residue before wiping and rinsing it away.
3. Dry the glass with a microfiber cloth to avoid leaving water marks.
If you would prefer to use natural cleaning solutions, Kent Boll recommends: 'Make a homemade cleaner by mixing equal parts of water and vinegar. Before using the mixture on any surface, test it on a small area to ensure it doesn't cause any damage or discoloration.
'If there are stubborn stains, you can make a paste using baking soda and a small amount of water. Apply this paste directly to the stains, let it sit for 15-20 minutes, and then gently scrub with a soft cloth or sponge.'
5. Clean the stove's exterior
1. To clean the exterior of your stove, begin by using a vacuum with soft-bristle attachments to clean all exterior surfaces, including air intakes, decorative trim, joints, and seams. Pay special attention to any crevices where ash could accumulate over time, and be extremely gentle around heat-sensitive areas.
2. 'Wipe down the exterior surfaces of the stove with a damp cloth to remove
dust and debris,' advises Angela Rubin, a professional cleaner at Hellamaid.
'Use a soft cloth and mild detergent compatible with the material of your stove’s exterior and avoid abrasive cleaners that may damage the finish. For enamel or painted surfaces, use a mild soap solution. Materials like brass, wood, or certain enamels may require specialized cleaners to avoid damage.'
3. Use a damp cloth or sponge to rinse the stove and remove any residue before drying it thoroughly with a clean cloth.
6. Polish the stove

While this is an optional step, applying a thin layer of stove polish using a soft cloth is a great way to restore a stove's finish and protect it from rust and corrosion. This can also help repel dirt and grime and provide a smoother surface less prone to staining, making cleaning easier.
1. You can apply small amounts of polish to the stove using a soft cloth or brush and work in small sections to ensure even coverage.
2. After applying the polish, use a clean, dry cloth to buff the stove's surface, using circular motions. Repeat this process until you have achieved the desired level of shine and protection.
3. Allow the polish to dry according to the manufacturer's instructions before using the stove again.
Choose a polish suitable for your stove's material type (e.g., cast iron, steel, wood, etc.).
7. Hire a professional to check the chimney
'When it comes to cleaning a chimney, I strongly advise consulting a certified chimney specialist to perform an inspection and cleaning of your entire flue system and chimney,' says Steven Talbot.
'How often you need to clean a chimney will depend on how frequently you use your stove. However, having a professional come in to sweep and clean will help to identify buildup and any structural damage that might be there. Catching this as early as possible means you’re saving yourself money on repairs in the long term.'
8. Inspection and maintenance

With the cleaning complete, take the opportunity to inspect the stove for any signs of wear or damage that may not have been visible before when it was dirtier. Check the door gasket for a proper seal, the condition of the glass, and the condition of the body of the stove, and examine any other components that may require attention. For example, you may need to use an essential creosote remover.
Addressing minor issues promptly can prevent more significant problems in the future.
Proper fuel usage in your stove can reduce how often you need to clean a stove. Using clean, dry, untreated hardwood that has been stored under cover for at least 6 months that is appropriate for your stove can help minimize the build-up of soot and residue, reducing the frequency you need to clean.

Lola Houlton is a news writer for Homes & Gardens. She has been writing content for Future PLC for the past six years, in particular Homes & Gardens, Real Homes and GardeningEtc. She writes on a broad range of subjects, including practical household advice, recipe articles, and product reviews, working closely with experts in their fields to cover everything from heating to home organization through to house plants. Lola is a graduate, who completed her degree in Psychology at the University of Sussex. She has also spent some time working at the BBC.
