50 of the best cleaning tips that will leave every room spotless with ease – whether you live alone, with pets, or have a very busy household
Room by room advice, straight from the experts


Design expertise in your inbox – from inspiring decorating ideas and beautiful celebrity homes to practical gardening advice and shopping round-ups.
You are now subscribed
Your newsletter sign-up was successful
Want to add more newsletters?

Twice a week
Homes&Gardens
The ultimate interior design resource from the world's leading experts - discover inspiring decorating ideas, color scheming know-how, garden inspiration and shopping expertise.

Once a week
In The Loop from Next In Design
Members of the Next in Design Circle will receive In the Loop, our weekly email filled with trade news, names to know and spotlight moments. Together we’re building a brighter design future.

Twice a week
Cucina
Whether you’re passionate about hosting exquisite dinners, experimenting with culinary trends, or perfecting your kitchen's design with timeless elegance and innovative functionality, this newsletter is here to inspire
There are endless cleaning tips out there, some helpful, others not so much, so it can be tricky to know where to start. From kitchens to bathrooms, living rooms to bedrooms, the list of chores (and products) can feel never-ending.
Along with expert guidance, we’ve tried and tested 50 of the best cleaning tips for quick, effective chores, as well as non-toxic cleaning essentials along the way to keep every corner of your home looking and feeling fresh.
50 of the best cleaning tips to make your chores easier

These general cleaning tips cover every room, from the entryway to the bedrooms and beyond.
Before you start cleaning any room, a good tidy-up is recommended.
Begin by emptying trash cans, putting away laundry, clearing countertops and surfaces, tidying toys, and generally organizing the space where necessary – our ultimate decluttering tips guide can help you streamline key spaces, so cleaning is easier and quicker.
1. Start with a plan – and write it down
Tackling a deep clean can be overwhelming, particularly if you’re working through every room in the house.
Andrea, founder of Pine & Prospect Home shares a great time-saving tweak for chores, saying, ‘I like to make a list of the things I’d like to accomplish and in what order, so they’re not all floating around in my head. It makes the whole process feel a lot more manageable, and you’re less likely to give up halfway through.'
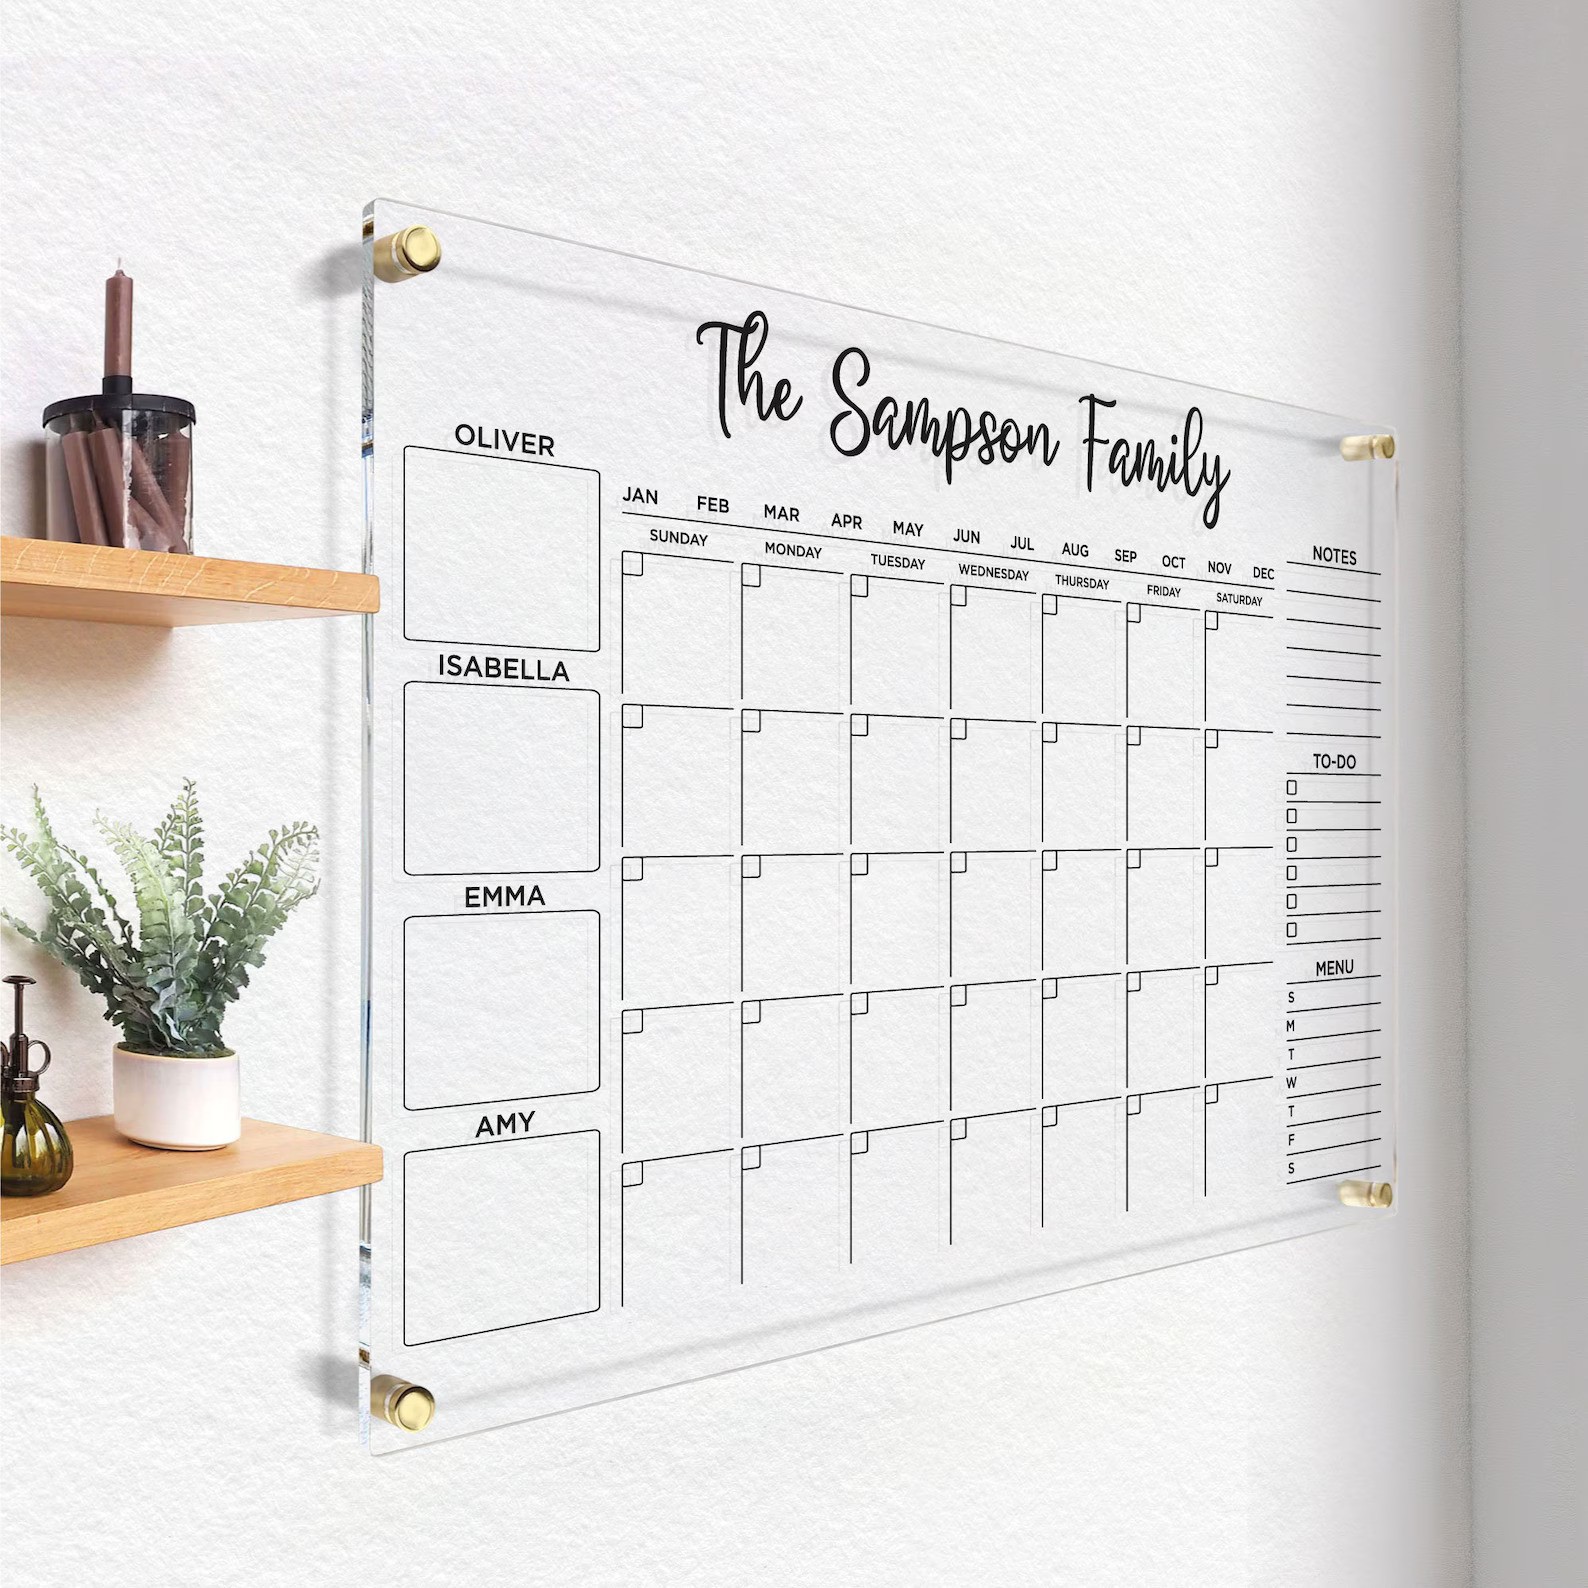
There are several ways to make a to-do list less overwhelming, too, if you need an extra helping hand working out where to start. Otherwise, using a pre-made cleaning planner, from Etsy, can kick-start your chores.
Design expertise in your inbox – from inspiring decorating ideas and beautiful celebrity homes to practical gardening advice and shopping round-ups.
A good cleaning tip for busy households is to use the different-day, different-room housekeeping schedule to avoid mess building up and feeling unmanageable without having to spend hours cleaning at a time.
2. Deal with dust (the right way)
They may be fun to use, but fluffy dusters only spread dust, they don’t collect it.
If you want to keep pesky particles at bay, opt for a damp microfiber cloth, from Amazon instead to help properly remove dust from your home.
Alternatively, we love the Scrub Daddy Damp Duster, for its ability to scoop up dust and remove it without spreading it around. Damp Dusters are available at Walmart.
To help keep dust at bay, it can also be beneficial to invest in a high-quality air purifier, such as our favorite Shark NeverClean Air Purifier from Best Buy, which helps collect microscopic particles from the air and prevent them from settling in the first place. They are a big part of recent cleaning trends for a reason.
3. Work from top to bottom
When cleaning any room in your home, my mom taught me that you should always work from top to bottom, starting at the highest points such as high shelves or the tops of cabinets, and working your way down towards the floor – finishing with vacuuming.
Using a Swiffer duster with an extending handle, from Walmart, makes this process easier and mitigates the need for a ladder.
Working in this order not only ensures that you don't miss anything, as you are forced to work around the room systematically, but also prevents dust and grime from falling onto freshly cleaned surfaces.
This practical cleaning tip means you'll never have to go over the same area twice.
4. Show houseplants some love
Houseplants can help to reduce dust in your home, but only by collecting it on their leaves, rather than having it spread around your space. So, like any other household item, they require regular cleaning to keep them dust-free.
Hardy houseplants can usually handle a rinse in the shower (as long as you stick to lukewarm water), but if their leaves are a little on the large side, the easiest way is to simply wipe them down with a damp microfiber cloth.
Indoor plant specialist Mo Bhula of The Botanical Archive adds, ‘Don’t forget to wipe the undersides of your leaves too, you’ll be surprised how much dust you’ll find there. Maintain this method once a month to keep your plants looking fresh and healthy.'
For more delicate specimens, wrap paper towels around the container to stop the earth from falling out and gently dip them, leaves-first, into a bowl of water – easy.
Don't forget to clean your fake plants, too.
5. Set up a mobile stain station
Experts always tell us to treat stains immediately to stop them from setting, so consider setting up a mobile stain station with detergent, stain removers, and clean cloths ready to use at a moment's notice.
When treating stains around the house, always remember to blot, never rub, adds Vera Peterson, President of Molly Maid.
‘Whether it’s nail varnish, coffee, or a red wine stain, try to avoid panic-scrubbing, you’ll only push the stain deeper into the fibers. Instead, blot the stain gently with your remover of choice using a clean cloth – only ever use a white one to prevent any pigment bleeding into the carpet and making the stain worse.'
One product you should never skip is a powerful oxygen-based cleaner, such as Molly's Suds Oxygen Whitener, available at Amazon. It's a chlorine-free, powerful bleach alternative that works on both color and white fabrics, so nothing will be damaged.
That's why it's one of the secret laundry ingredients that cleaning pros swear by.
6. Go natural where you can
Opting to clean with vinegar, clean with baking soda, clean with lemon juice, or clean with hydrogen peroxide can work just as well as commercial products, but with a fraction of the health repercussions. It all adds up to help you create a non-toxic home.
It is also advisable to cut plastic from your cleaning routine, too. Making DIY cleaning solutions or opting for refillable products also has a profound knock-on effect for the environment.
When selecting cleaning tools to buy well and buy once, opt for natural materials, such as bamboo scrubbing brushes from Target, or sponge cloths (also from Target) over disposable paper towels to avoid creating unnecessary trash at home.
There are some instances where this might not apply, such as cleaning drains, but for the most part, green cleaning is a great way to save money at home and protect your health.
You can start your non-toxic kit by picking up some white vinegar from Walmart, and some Arm & Hammer baking soda, also from Walmart.
7. Harness the power of steam
There are so many things you can clean with a steamer, and the best steam cleaners and mops usually fulfill multiple roles, from cleaning floors without streaks to cleaning upholstery, steaming clothes and grime-busting stubborn residue, such as baked-on oven messes.
Steam is also one of the best eco-friendly ways to clean your home, using high temperatures to melt grease, loosen stains, and kill bacteria without the need for harsh chemicals that could damage your property or impact your health. Not to mention that high-pressure steam means you don't have to scrub anywhere near as much as you would with a cloth or brush. This can be especially helpful when cleaning with chronic illness, pain or injury.
We suggest the Black & Decker 7-in-1 steam mop, from Amazon, as it has attachments that can clean every surface in your home, from floors to upholstery to tiles.
Note that there are some things you should never steam clean in your home; however, before you accidentally melt something, such as your heat-intolerant memory foam mattress.
8. Clean as you go
Angela Lee, cleaning expert at HellaMaid, recommends, 'Make daily cleaning a habit by wiping down surfaces and putting items away as soon as you use them. This will prevent mess from building up and make cleaning faster and easier going forward.'
This will help make it easier to prep your home when guests are due, too. Learn more about the dirty things professional cleaners spot in people's homes, dining rooms, and kitchens to help target your cleaning to common problem spots.
9. Don't forget woodwork
Save yourself both time and effort scrubbing scuffs and stains from doors, baseboards, and woodwork by investing in a Magic Eraser, available at Walmart. They don’t call it magic for nothing; it makes light work of fingerprints, pen marks, paw prints, and more.
This humble white sponge can also be used for cleaning walls, but be aware that they can leave faint marks behind on certain paint finishes, particularly matt ones, so test in an inconspicuous spot first to be on the safe side.
10. Look up to lights and ceiling fans
Turning on your lights or ceiling fan only to see specks of dust flying through the air is no good for anyone, especially if you suffer from allergies.
Cleaning pro Beth McCallum, contributor for Oh So Sportless, suggests, ‘A great ceiling fan cleaning tip is to simply place a pillowcase over each blade, pulling it tight, so there’s no gaps. Gently pull the pillowcase towards you to contain the dust neatly in the case.'
When cleaning lampshades, use a lint roller from Walmart, to collect dust, or run them over with the brush attachment of a vacuum cleaner. Metal lighting can benefit from a quick wipe-down with a slightly damp microfiber cloth.
11. Deodorize your washing machine
There is no point putting linens and clothing in a dirty washing machine, especially if your goal is to make a home smell nice. It is a good rule of thumb to clean your washing machine at least once per month, warns Laurel Hess, laundry care expert at hampr.
'To prevent product buildup and odors, it's recommended to run a cleaning cycle every 30 cycles or about once a month,' she advises. 'Neglecting to clean your washing machine can lead to unpleasant odors and the growth of bacteria. But don't worry, we have a solution! Our go-to cleaning agent is Affresh, available at Walmart.
'Simply toss one of the tablets into your washing machine drum and start a self-clean cycle. If your machine doesn't have a self-clean option, just choose a heavy cycle with hot water. These convenient tablets effectively clean the drum and inner workings of your machine, leaving it fresh and clean for many more loads to come.'
12. Buff steaks from screens
When cleaning a living room, tackling the TV screen regularly (at least once a week, ideally) is a must, but knowing how to clean a TV screen the right way is essential if you want to avoid any damage.
The main thing to remember is to avoid excess moisture at all costs. Using a dedicated screen cleaner, such as Screen Mom from Amazon, is your safest bet, spraying the solution on the cloth and then buffing the screen to have better control over the moisture.
13. Use the right tools for pet hair
If your home plays host to a furry friend or two, you’ll want to keep stray hairs at bay; if not every day, at least before guests come over.
Use a lint roller, available from Walmart on soft furnishings and lampshades. For more routine cleaning, run a damp rubber squeegee or rubber gloves over carpets before vacuuming with the best vacuum for pet hair.
Alternatively, try a pet hair remover from Amazon, which is like a small rake designed to grip the hair and pull it up from the carpet roots. Say goodbye to matts!
14. Clean your cleaning tools
Keeping your cleaning supplies clean is just as important as cleaning your house, and if you're a Friends fan, you'll know Monica Gellar's cleaning lessons were funny, but also held true. Without clean, well-maintained tools, your home will only get dirtier, and your hard work will be wasted.
From cleaning a vacuum to washing microfiber cloths correctly, it all makes a difference in how much dirt is removed from your space.
How you organize cleaning supplies and store cleaning supplies for maximum efficiency will also affect how long your essential cleaning tools last before needing replacements.
15. Automate tasks
One of the best smart habits to spend less time cleaning is investing in smart home cleaning tools that will automate your cleaning and allow you to spend more time relaxing.
The most obvious for this is to invest in the best robot vacuum, ticking one task off your to-do list right off the bat.
The Eufy S1 Pro Omni Robot Vac, from Best Buy, sits at the top of our recommendation list for both vacuuming and mopping, and is more than worth the price, according to our head of Solved, Punteha van Terheyden, who has tested it out thoroughly in her family home with two shedding cats and found the bot reduced her canister vacuum use by 90%.
16. Use closing shifts
An evening shift helps you to close down your home so it's tidy when you wake up, helping you better organize your morning routine.
I typically follow the same steps – locking the doors, closing down the kitchen by washing up (or at least stacking the last few dishes neatly), and cleaning the counters, clearing the coffee table, and fluffing up the couch cushions, ready to sink into with breakfast early the next day.
It might seem like a lot of effort to start cleaning before you go to sleep, but I find that putting on some soft lighting and relaxing music provides me some time to wind down from screens, knowing my home will be easy to navigate come the morning.
17. Try body doubling
Body doubling is the act of working alongside someone else doing the same task, either physically or virtually, to help hold yourself accountable and feel like you are working towards a shared goal.
I usually use a YouTube video to help spur me on to complete my household tasks. Doubling has even helped me overcome a cleaning roadblock, and find the motivation to maintain a tidy garden – it has truly become my ultimate secret weapon.
18. Work one tool at a time
The one-tool cleaning method does what it says on the tin. Rather than just vacuuming the living room, for example, I will vacuum the whole house in one go. Similarly, I will dust every room of the house in one go, not just one at a time on different days.
Working this way actually speeds cleaning up as I bound from one surface to the next between rooms before returning the tool to the cleaning cabinet, reducing how often I have to stop and start, which makes cleaning less overwhelming.
19. Balance time when living alone
Balancing all your chores with free time and work or studying can be enough to make anyone feel overwhelmed.
Avoid pushing yourself for perfection. This is a slippery slope that can lead to feeling overwhelmed when cleaning, making your job harder, and your chores increasingly stressful.
Set laundry schedules, clean as you go (prioritizing quick clean-ups that slot into your existing routines), and de-prioritize the rooms or areas you rarely use to save time. Things can change throughout the year, for instance, during fall when lots of hosting may push a guest room to the top of the list.
Multitasking can also be beneficial, such as wiping down your bathroom mirror while brushing your teeth or washing up while dinner cooks, to kill two birds with one stone.
You don't have to do it all alone, either. If you simply do not have the time or energy for cleaning, or you simply hate it, consider hiring a cleaner.
20. Get family involved
It’s easy and quite common for one person to take charge of the home’s cleaning, but unless everyone is on board, it’s hard to make routines, schedules, and maintenance stick.
If you do not live alone, start motivating your family to clean alongside you. Even children can get involved, just be sure to check the right age for children to start chores, so they are not overwhelmed. Involving your kids with age-appropriate jobs is one of the things people with tidy homes never skip.
Being on the same page as a family or household also means your hard work isn't undone, either, as everyone can help maintain cleaning routines.
Kitchen cleaning tips

Kitchen cleaning can be tedious, but these grease-beating cleaning tricks make it a little more manageable.
21. Start with naturally degreasing
You may think you know how to clean an oven already, but this easy cleaning tip for cleaning with lemon juice might just revolutionize your method.
Place a slice of fresh lemon into one and a half cups of water in an oven-proof bowl, then place it into a 250-degree oven for 20 minutes. Turn the heat off and let the water cool slightly before wiping the floor, walls, and racks with a cloth or sponge dipped in the hot lemon water until they shine.
This ‘steam-cleaning’ method can be used to clean a microwave, too. Place half a lemon cut side down on a microwaveable plate with a little water, and heat on high for about 30 seconds (or until it produces steam). Leave to stand for a few minutes, then use a damp cloth to wipe down the walls.
For tougher, baked-on greasy areas in either appliance, try rubbing in some baking soda with half a lemon (squeezing it as you go so the juice mixes in to form a paste), or try bleach-free Barkeepers Friend cleanser, at Walmart.
Angela Lee, cleaning expert, adds, ‘To lessen your workload in the future, consider lining the bottom of your oven with aluminum foil, then place a baking sheet on top. This will catch any spills or drips so you don’t waste time scrubbing baked-on food. Replace the foil when it gets dirty.'
You can even add lemons to your dishwasher to bolster the process.
22. Leave your sink spotless
Even if the rest of the room isn’t quite up to scratch, a sparkling sink will give the impression it is.
How you clean a kitchen sink (or a bathroom sink, for that matter) will depend on what it’s made of, but if you’re looking for a quick fix, a mixture of mild washing-up liquid (such as Dawn from Walmart) and warm water is generally safe to use. If you’ve got chrome taps, try rubbing with a little whitening toothpaste squeezed onto a dry cloth to restore their original shine.
Rubbing faucets with wax paper will also help decrease mineral buildup.
23. Keep cutting boards hygienic
Caring for wooden cutting boards is a full-time job if you want to mitigate the risk of cross-contamination, but it can be made easier by cleaning with lemon juice.
Sprinkle the surface with grainy rock salt and then scrub with half a lemon to help shift any stains; otherwise, use a brush and a bottle of lemon juice from Walmart, before rinsing.
24. Don't forget to descale
After that perfect brew? Be sure to clean your coffee maker regularly with… denture cleaning tablets from Walmart. Yes, really.
Containing many of the same ingredients as basic household cleaners, they dissolve into water, making them an expert-approved hack for appliances with hard-to-reach crevices.
Simply fill the reservoir with water, drop in a tab or two, and run a cycle. Discard the water and run through again to rinse away any loose limescale.
25. Remember vertical surfaces
They may look clean enough, but the doors and handles of your kitchen cabinets are high-frequency touch points in our homes, making them a hotbed for germs.
That's far from ideal in a room made for cooking.
A quick wipe-down with a microfiber cloth and some warm water or an anti-bacterial spray, such as Attitude from Walmart, is all it takes to remove sticky marks daily and stop unhygienic grime from building up over time.
If the door is greasy, you can always add in a small amount of dishwashing liquid – just be sure to wipe off the residue afterward to avoid a streaky finish.
26. Don't forget cabinet tops
Cabinet tops collect grease, dust, and grime, especially in kitchens without adequate ventilation.
We suggest vacuuming first to remove loose dust and debris, then using the Method Heavy Duty Degreaser from Amazon for its eco-friendly, plant-based powerhouse formula that cuts through tough grease.
Apply the solution with a microfiber cloth and allow it to sit for several minutes before wiping clean.
27. Deep clean the dishwasher
Cleaning a dishwasher is not something you need to worry about day-to-day, but a monthly MOT is a good idea if you want to avoid food debris and soap residue from building up – it’ll last longer, too.
Start by running an empty hot-wash cycle. Remove any baskets or trays and soak in hot, soapy water. Using a toothpick, clear debris from the filter (and the water holes on the spinning arms whilst you’re at it), soak it in soapy water and rinse clean.
Pull out the bottom drawer so you can get to the drain, and give it a good scrub with an old, clean toothbrush (or a scrubbing brush) and a multipurpose cleaner. Wipe down the door with a cloth, not forgetting the rubber gasket around the sides, and run a short cycle (you can optionally add Affresh dishwasher cleaning tablets from Walmart) to finish the job. Done!
28. Don't forget behind appliances
The spaces behind refrigerators, ovens, and washing machines are magnets for dust, dirt, crumbs, and other debris.
Steven Ip, owner of Cleanzen Boston Cleaning Services, says, 'It's really no wonder areas like behind refrigerators are frequently neglected, given they're so difficult to access. But dust and debris build up here, affecting both cleanliness and appliance efficiency.
'To clean, pull the fridge away from the wall, and use a duster, such as the Swiffer Duster from Target, which has an extendable handle to help reach those tougher spots. Follow up by sweeping and mopping the floor.'
To maintain, aim to clean behind appliances at least every three months. Toner recommends these X-Protector Felt Furniture Sliders from Amazon to make accessing these areas easier.
29. Deodorize your fridge and pantry
Even if you always store food correctly in your refrigerator and when organizing a pantry, they will still get dirty over time. Not only can this make your kitchen smell musty, but it can also attract pests and make food turn bad more quickly.
When cleaning a fridge or pantry, empty everything first, disposing of anything that has expired or you know you will not use, before cleaning the shelves and other surfaces with an anti-bacterial spray.
Wipe to dry and restock with the tallest and freshest items at the back, and the smallest items with those you need to use up soonest at the front.
To keep odors at bay, consider using coffee grounds and salt to deodorize a fridge without harsh chemicals. You can also use plastic fridge organizers, available at Walmart, to keep things tidy.
30. Treat your trashcan
The easiest way to banish bad kitchen smells is to clean a trash can every time you empty it. Wiping it down with paper towels, such as Bounty from Walmart, and a nicely scented anti-bacterial spray, or killing mold with vinegar, will instantly make your home smell nicer.
Bedroom cleaning tips

Keeping a bedroom clean can improve sleep quality.
31. Switch out sheets regularly
We have all been tempted to leave our bed sheets on just one more day before battling to change them, but it is essential to swap them out and wash bed sheets regularly to improve your sleep hygiene, stop your skin breaking out, and make bedrooms smell nicer.
Lucy Ackroyd, bedding expert at Christy, says, 'Regularly washing your bedding is key to avoiding sharing a bed with pesky dust mites. Although microscopic, dust mites can cause itchy skin and a dry cough, symptoms often confused with allergies.
'Although higher temperatures are more likely to kill dust mites, lower temperature washing is favored for environmental reasons, so around 40°C [around 100° Fahrenheit] is the sweet spot to get a proper clean, yet still help cut down your household energy usage.
'Depending on the material of the bedding, there may be specific guidance around temperatures to wash your sheets at. For example, linen may differ from Egyptian cotton to waffle, make sure to always check the washing label and laundry symbols for guidance,' Lucy explains.
When washing, opt for a gentle detergent, such as the Tide Free & Gentle from Target, to avoid skin irritation. You can also skip detergents with optical blue coloring to enhance whites, as they're often not good for the environment.
32. Let your mattress breathe
Before making your bed each morning, get into the habit of drawing the duvet or comforter back for 20 minutes or so. Airing out your mattress and bed sheets like this will stop stale smells from permeating the surface, saving you from having to use strong chemical solutions further down the line.
Even though it does not need to be part of your regular cleaning routine (every six months is a good guide), knowing how to clean a mattress the natural way is beneficial. Use the upholstery attachment on your vacuum to clean all sides, then spot clean stains individually.
Bicarb of soda is a handy natural deodorizer – combine with a few drops of lavender essential oil and sprinkle over your mattress, leave for an hour, then vacuum it away.
Turn your mattress every three months or so to prolong its life and evenly distribute wear, but do not flip it unless it is a model that requires this. Some mattresses have a very particular layering model inside, and only one surface can be their 'up' side.
33. Don't neglect comforters and pillows
Bedding expert Lucy Ackroyd continues, 'In addition to washing your sheets, you should also be washing your comforter and wash pillows – ideally twice a year at a minimum.
Lucy says, 'If you choose to use a tumble dryer, there should be room for the duvet and pillows to move around in the machine freely, and if there isn’t, or if your duvet is a high tog (13+) you’re better off taking it to a launderette or dry cleaners.
'Be sure to check the care label for instructions before proceeding to wash, as not all duvets and pillows are machine washable, and temperatures will differ for each. To keep your duvet fresh between washes, shake it every day before you make it and air it in direct sunlight once a month, as this helps to naturally disinfect it.'
34. Remember under the bed
One spot you definitely aren't cleaning but need to is under the bed, cleaning experts advise.
This area is a hotspot for dust, debris, and hair, and can contribute not only to worsening allergy symptoms but skin problems and musty bedroom smells, they warn.
Try to remove any under-bed storage and vacuum beneath the bed regularly to prevent this. Aim for every few months at the very least to stay on top of build up.
35. Freshen up your clothes storage
You might only ever put clean clothes away in your closet and dresser, but these storage spots can be a lot dirtier than you think.
To clean a clothes closet, start by removing all of your garments (decluttering clothes as you do so). With everything out of the way, start at the top and dust the shelves, rail, and other storage nooks, remembering to wipe down the walls and doors too.
Then, vacuum the base or floor to collect any fallen dust or debris. Then you can add your clothes back in.
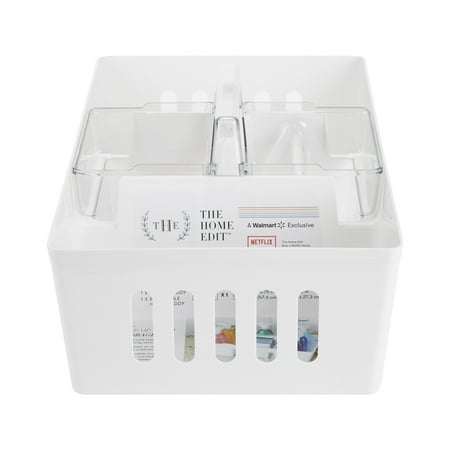
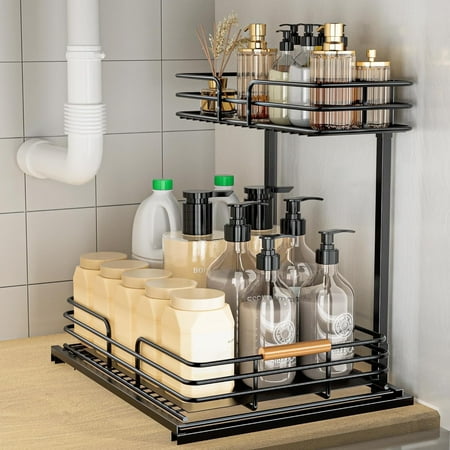
You likely do not want to keep cleaning products in your bedroom. This caddy is designed to maximize under-cabinet storage and comes with a removable inner caddy that can be removed and carried around the home for smaller tasks such as bedroom refreshes.
Bathroom cleaning tips
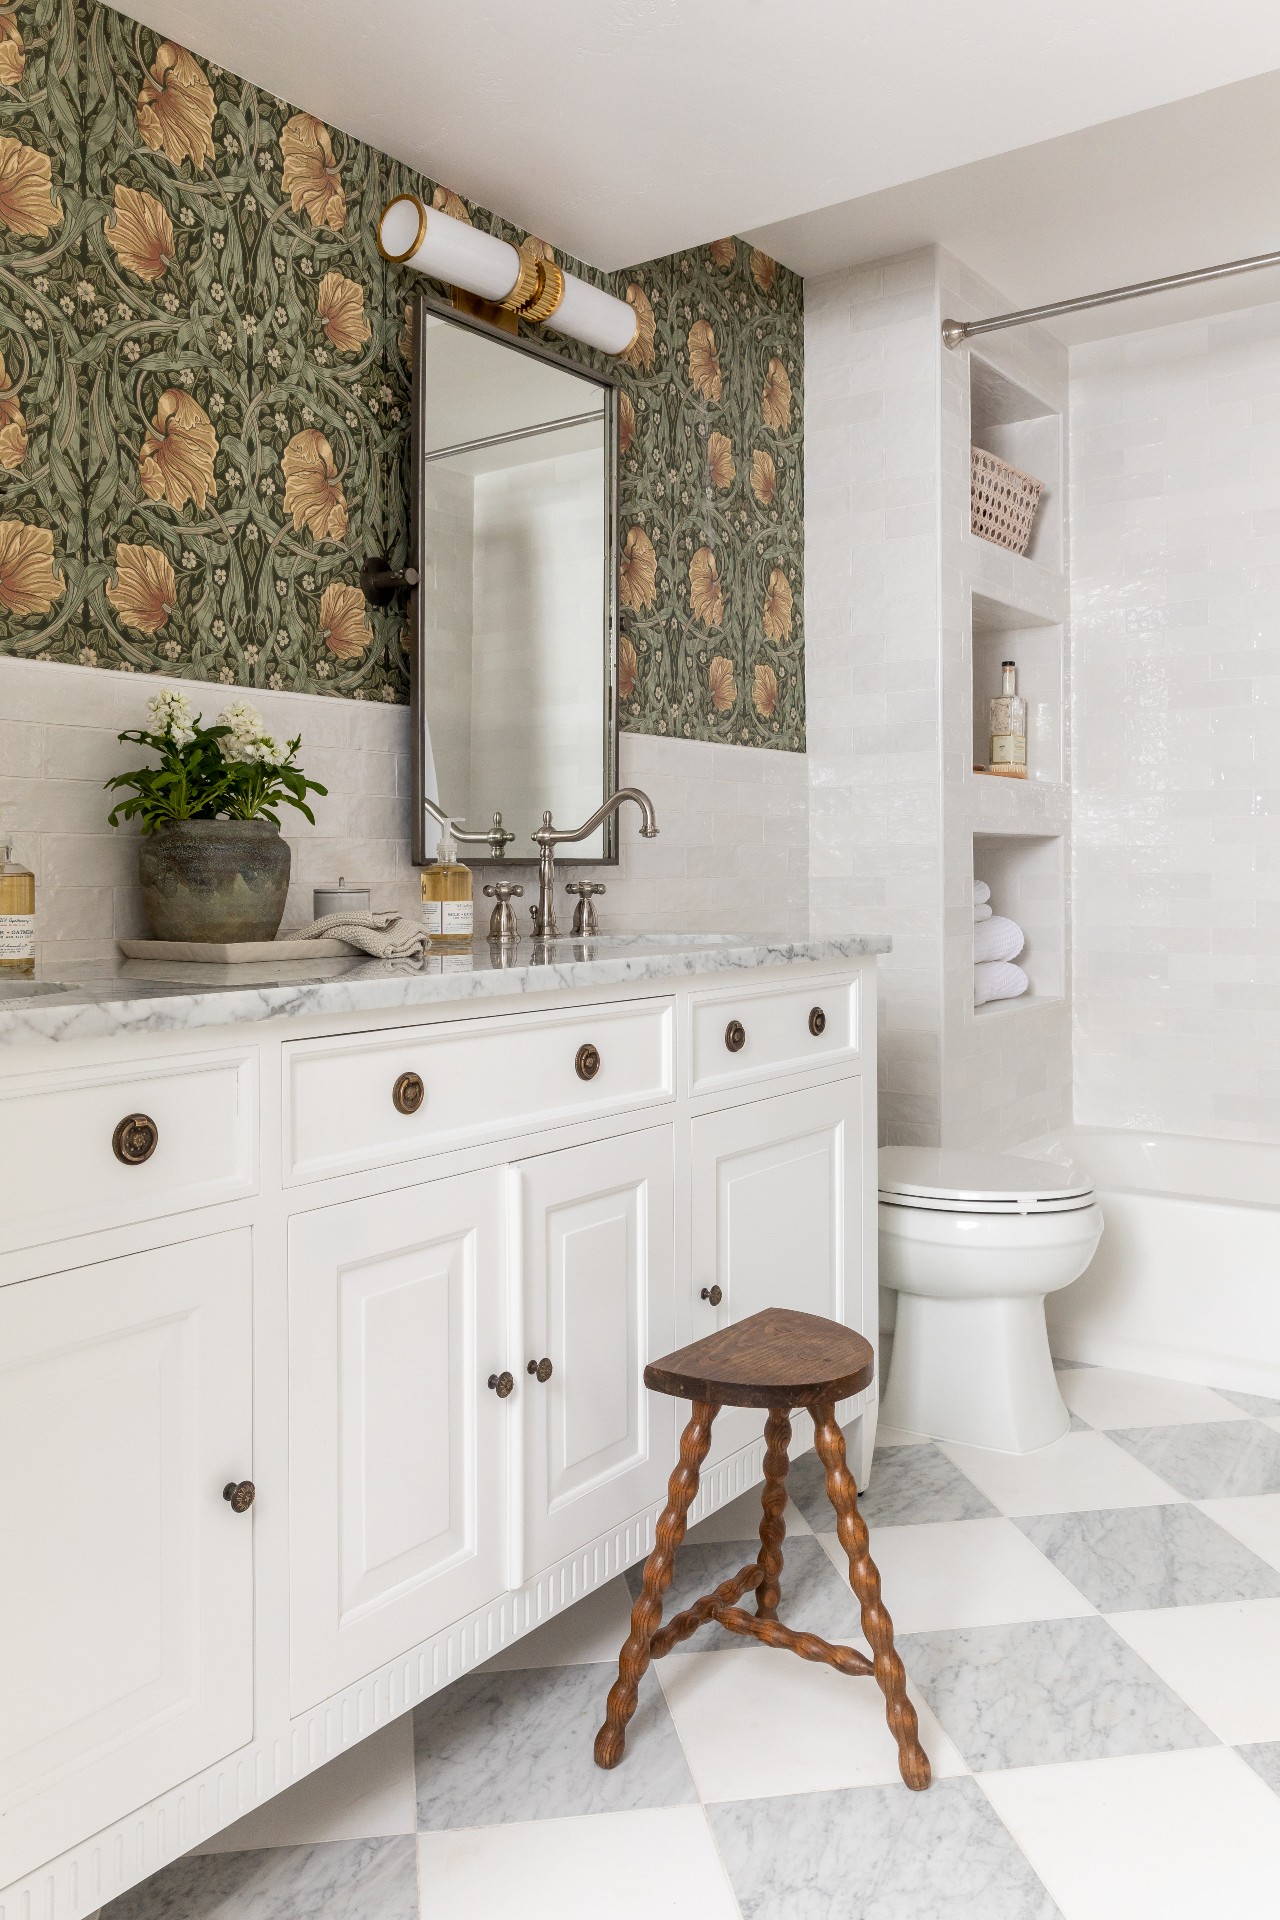
Clean your bathroom every week to prevent mold and bacterial build-up.
36. Start with the shower
The best place to start when cleaning a bathroom is the shower or bathtub. This way, you can put tough cleaning products in place and leave them to sit to work their magic and minimize scrubbing, says Jen Stark, founder of the homemaking blog, Happy DIY Home.
'Whether you’re using all-natural remedies or store-bought cleaners, you’re guaranteed a better result if you give them enough time to work. This will give the cleaning agents time to soften up and break down any stains while you get on with other cleaning tips.
'When you get to them, they’ll be much easier and quicker to wipe away.'
37. Scrub the toilet
If you want to keep a toilet hygienically clean, harsh bleach doesn’t always have to be the answer. Swap it out in favor of a few store-cupboard ingredients, instead, as professional cleaners reassure you don't always need harsh chemicals to clean well.
Pour a cup of white vinegar into the toilet, followed by two tablespoons of bicarbonate of soda. Let the combination fizz for a few minutes, then give the bowl a good scrub with a toilet brush, getting right up inside the rim. Silicone toilet brushes, available at Amazon, are great and robust.
Flush to see gleaming results.
38. Rid grouting of grime
Stubborn black mold found in grouting and silicone can be quickly eliminated by scrubbing with a toothbrush dipped in bleach. If you’re after a more natural route, make a paste with ½ cup of bicarb of soda, two cups of white vinegar, and scrub the grout with an old toothbrush, then buff until it’s clear of grime.
We have found that steam cleaners are one of the best ways to clean shower grout, too. This approach minimizes scrubbing while using high-powered steam to break down limescale and kill odor-causing bacteria.
Switch to the squeegee head, and you can quickly swap over to cleaning shower glass at the same time. Using clever tools like this to make cleaning tasks less energy-intensive is a great way to help with adaptive pacing when cleaning.
39. Buff up tiles to a shine
There’s nothing like squeaky-clean tiles to give a bathroom that hotel-luxe feel. Mix up a solution of one part white vinegar to two parts cold water in a spray bottle, then spritz over your tiles. Leave to work for 30 seconds before wiping with a damp cloth.
40. Be aware of your bath mat
One of the things in your bathroom you might be forgetting to clean is your bath mat. Just like towels, they spend a good deal of time damp, which makes them a breeding ground for bacteria.
Shake out to remove any dust or hair, and wash on a hot cycle at least once a week to keep it hygienic.
41. Refresh your shower curtain
Shower curtain liners are susceptible to toxic mold, soap scum, and mildew, and make your bathroom smell and look unclean.
To clean your shower curtain, Karina Toner, operations manager at Speckless Cleaning, says, 'Remove the liner and wash it in the washing machine with mild detergent and baking soda, then hang to dry or run a low-heat dryer cycle. For stubborn mildew, soak in a baking soda and vinegar solution or your preferred milder remover before washing.'
Toner adds, 'For better maintenance, always stretch the liner out fully after a shower to avoid mildew, and replace liners every six months if they show wear.'
Regularly cleaning or replacing liners keeps your shower sanitary and inviting. Supporting your cleaning with good ventilation in these high-moisture areas will help reduce the risk of mold spores building up.
42. Finish with the sink
Finishing sanitizing in this area by cleaning the bathroom sink. This allows you to use the sink to clean off any tools or clean cloths as you work around the room without getting dirt on your freshly polished porcelain.
Just as you would when sanitizing the toilet, you can use a baking soda paste to buff the sink. This will remove limescale and hard water marks.
43. Clear out drains
For a fresh-smelling space and to prevent drain flies, clean and deodorize drains.
While you can use natural methods for this step, it is often more effective and safer to use commercial products designed for breaking down hair without damaging pipes, such as Drano Dual-Force Foamer, from Walmart.
Alternatively, if you are just looking to freshen up odors, you can simply sprinkle the baking soda in, pour vinegar over it, and let the fizz do its magic before flushing with hot water.
44. Clear exhaust fans
Bathroom fans trap dust and moisture, reducing efficiency and potentially spreading mold spores.
First, disconnect the power and remove the cover, spraying it with a degreasing spray. We suggest using the Seventh Generation Lemon All-Purpose Cleaner from Target for its powerful yet gentle formula. The cover should soak for 15-20 minutes before gentle scrubbing with a soft brush.
From there, dust monthly and clean the fan cover quarterly. For more, check out 'How often should you clean and replace a bathroom extractor fan?'
Window cleaning tips
45. Buff away smears
To clean windows without streaks, be sure to avoid the task on a hot day – they’ll dry too fast and leave streaks.
Before you start on the panes, give the frames a good dust down using a soft, dry cloth.
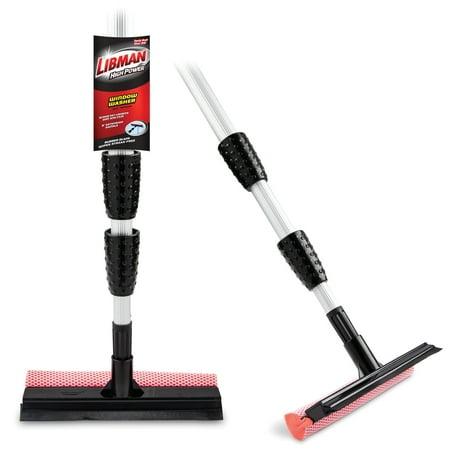
You can use a solvent-free glass cleaner such as Method, from Target, but a spray bottle with warm water and a drop of washing liquid (swirled in gently to avoid suds) works just as well. Add a splash of white vinegar to help cut through the grime. Spray onto the glass panes using a microfibre cloth and wipe dry, or use a double-sided squeegee for the outside.
This solution will work on any glass surface in the home, from picture frames and coasters to the glass panels in your wood-burning stove, and is also the recommended method for cleaning a mirror without streaks, as well.
A good hack is to wipe horizontally indoors and vertically outside, or vice versa, so you know which side any smears are on. If you spot any, try using a newspaper to wipe them away – the paper and ink act as a light abrasive.
46. Use The Pink Stuff on outdoor grime
There are several things you can clean with The Pink Stuff, but windows are one of our favorites (I call it my 'Pink & Blink' window cleaning hack).
I start by wetting the window with warm water, before scooping up a good amount of Pink Stuff Cleaning paste, from Walmart, on a Scrub Daddy Scrubber, also from Walmart, dampened with hot water to make it soft.
Then, I work in small, circular motions to melt the grease and dust away from the exterior of the window.
Finish up by rinsing the paste away and buffing the glass dry with a clean towel for a spotless shine.
47. Clean windows treatments
Struggling to keep slatted blinds and shutters dust-free? We’ve got a handy hack to solve the problem. Wrap a pair of tongs with a microfiber cleaning cloth and secure it in place with rubber bands. Spritz with household cleaner before grabbing a slat and swiping right the way across.
The same technique can be achieved by putting old socks on your hands, something to bear in mind when organizing a sock drawer!
If you’re after a deeper clean, restore plastic and metal blinds with a mixture of warm water, white vinegar, and a few drops of washing up liquid; wood blinds with furniture polish, and fabric blinds with the vacuum.
‘The one cleaning treatment that’s safe for virtually every window treatment, from blinds to curtains, is the humble vacuum – just pop an upholstery or brush attachment onto the end and you’re ready to go’, says Julia Dorn, executive director for Graber.
Finally, when cleaning curtains, opt for steaming to avoid having to take them down and risk them getting crumpled or stained. A handheld garment steamer from Amazon makes this task easy on the arms.
48. Polish window sills
It sounds obvious, but you’d be surprised how clearing even just a few things off a windowsill can make all the difference to the levels of sunlight that stream into your home.
It’ll make cleaning feel more worthwhile, too, if you can actually see the results! On that note, be sure to wipe down the sills regularly to keep them looking neat.
49. Remove cobwebs
After summer, it's commong to find lots of dusty cobwebs built up around windowframes, eaves and overhanging areas, including around your porch. You don't need to get up close and personal, or have any special equipment to tackle these from arm's length.
A simple DIY cleaning tip for cobwebs is to fix an old sock on the end of a broom handle (you can use a rubber band or sticky tape), then clear the webs and dust. You can dump the sock straight in the bin.
50. Use essential oils
Not only can you add a few drops of essential oil (such as pure peppermint oil from Walmart) to your sock-on-a-stick cleaning tip to deter pests with scents they hate, you can also add a few drops to make your own cleaning spray.
It's especially good for cleaning windows without streaks, and also works brilliantly to clean stainless steel for a smear-free finish.
Cleaning must-haves
If we had to start our cleaning arsenals all over again, these are the six things we would immediately pick up:
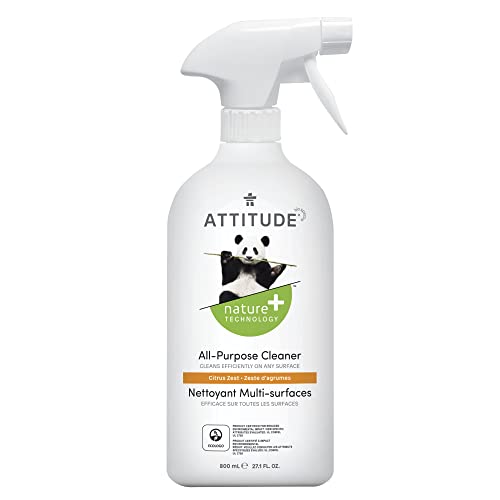
The Environmental Working Group (EWG) has certified Attitude products as non-toxic, meaning they contain no harsh chemicals or artificial compounds.
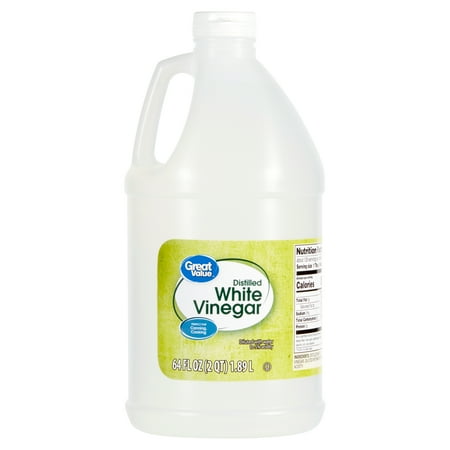
Distilled white vinegar is a fantastic non-toxic cleaning tool for any home. When used correctly, it can help to kill mold and bacteria, as well as tackle odors and lighten stains, all without harsh chemicals.
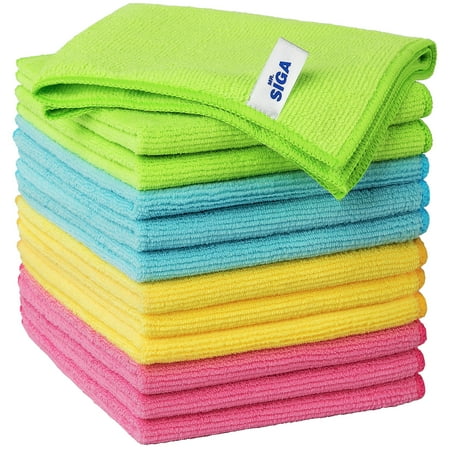
Microfiber cloths are machine washable, meaning you can reuse them for years with proper care. Simply wash after use on a warm water cycle and gentle detergent (skip the softener) to sanitize.
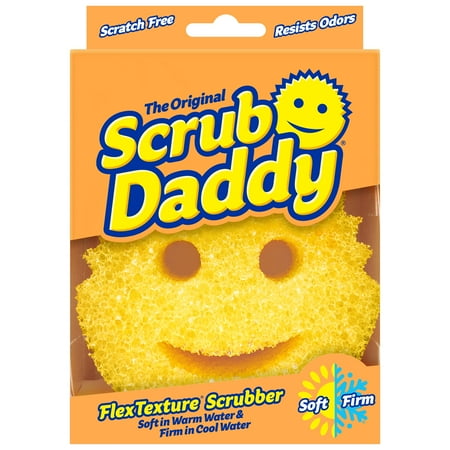
The Scrub Daddy sponge softens under hard water and toughens under cold water, allowing you to adjust the level of abrasive you need depending on the task at hand.
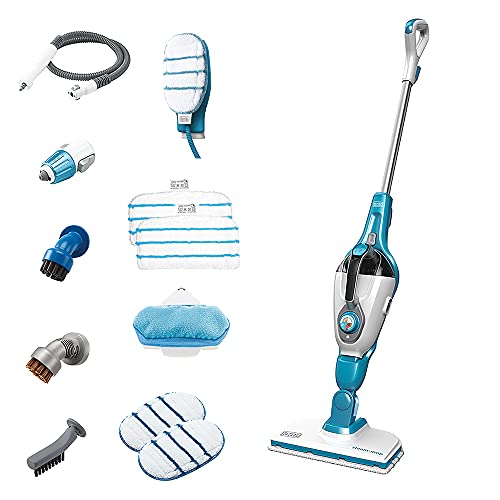
This seven-in-one steam cleaner has attachments to clean everything from hard and carpeted floors, to appliances, soft furnishings, tiles and grout, and more. It is the best multi-functional tool for any home.
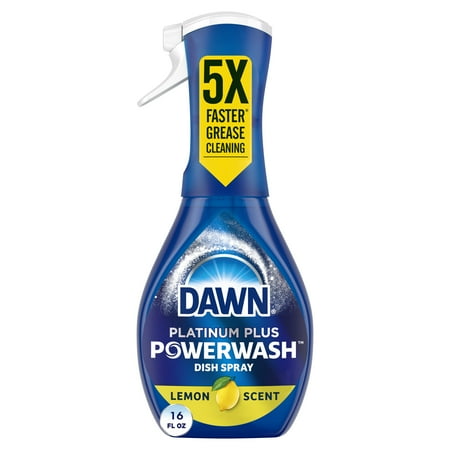
With a fresh lemon scent and a concentrated soap formula, Dawn Powerwash works five times faster than regular Dawn dish soap to break down grease, limiting how much you need to scrub.
Next, learn how to banish chore procrastination so you can get on with the jobs you need without cleaning making you feel overwhelmed.

Chiana is Homes & Gardens’ kitchen appliances editor. With a lifelong passion for cooking and baking, she grew up experimenting in the kitchen every weekend with her baking-extraordinaire Mom, and has developed a great understanding of how tools and appliances can make or break your ideal relaxing kitchen routine.
