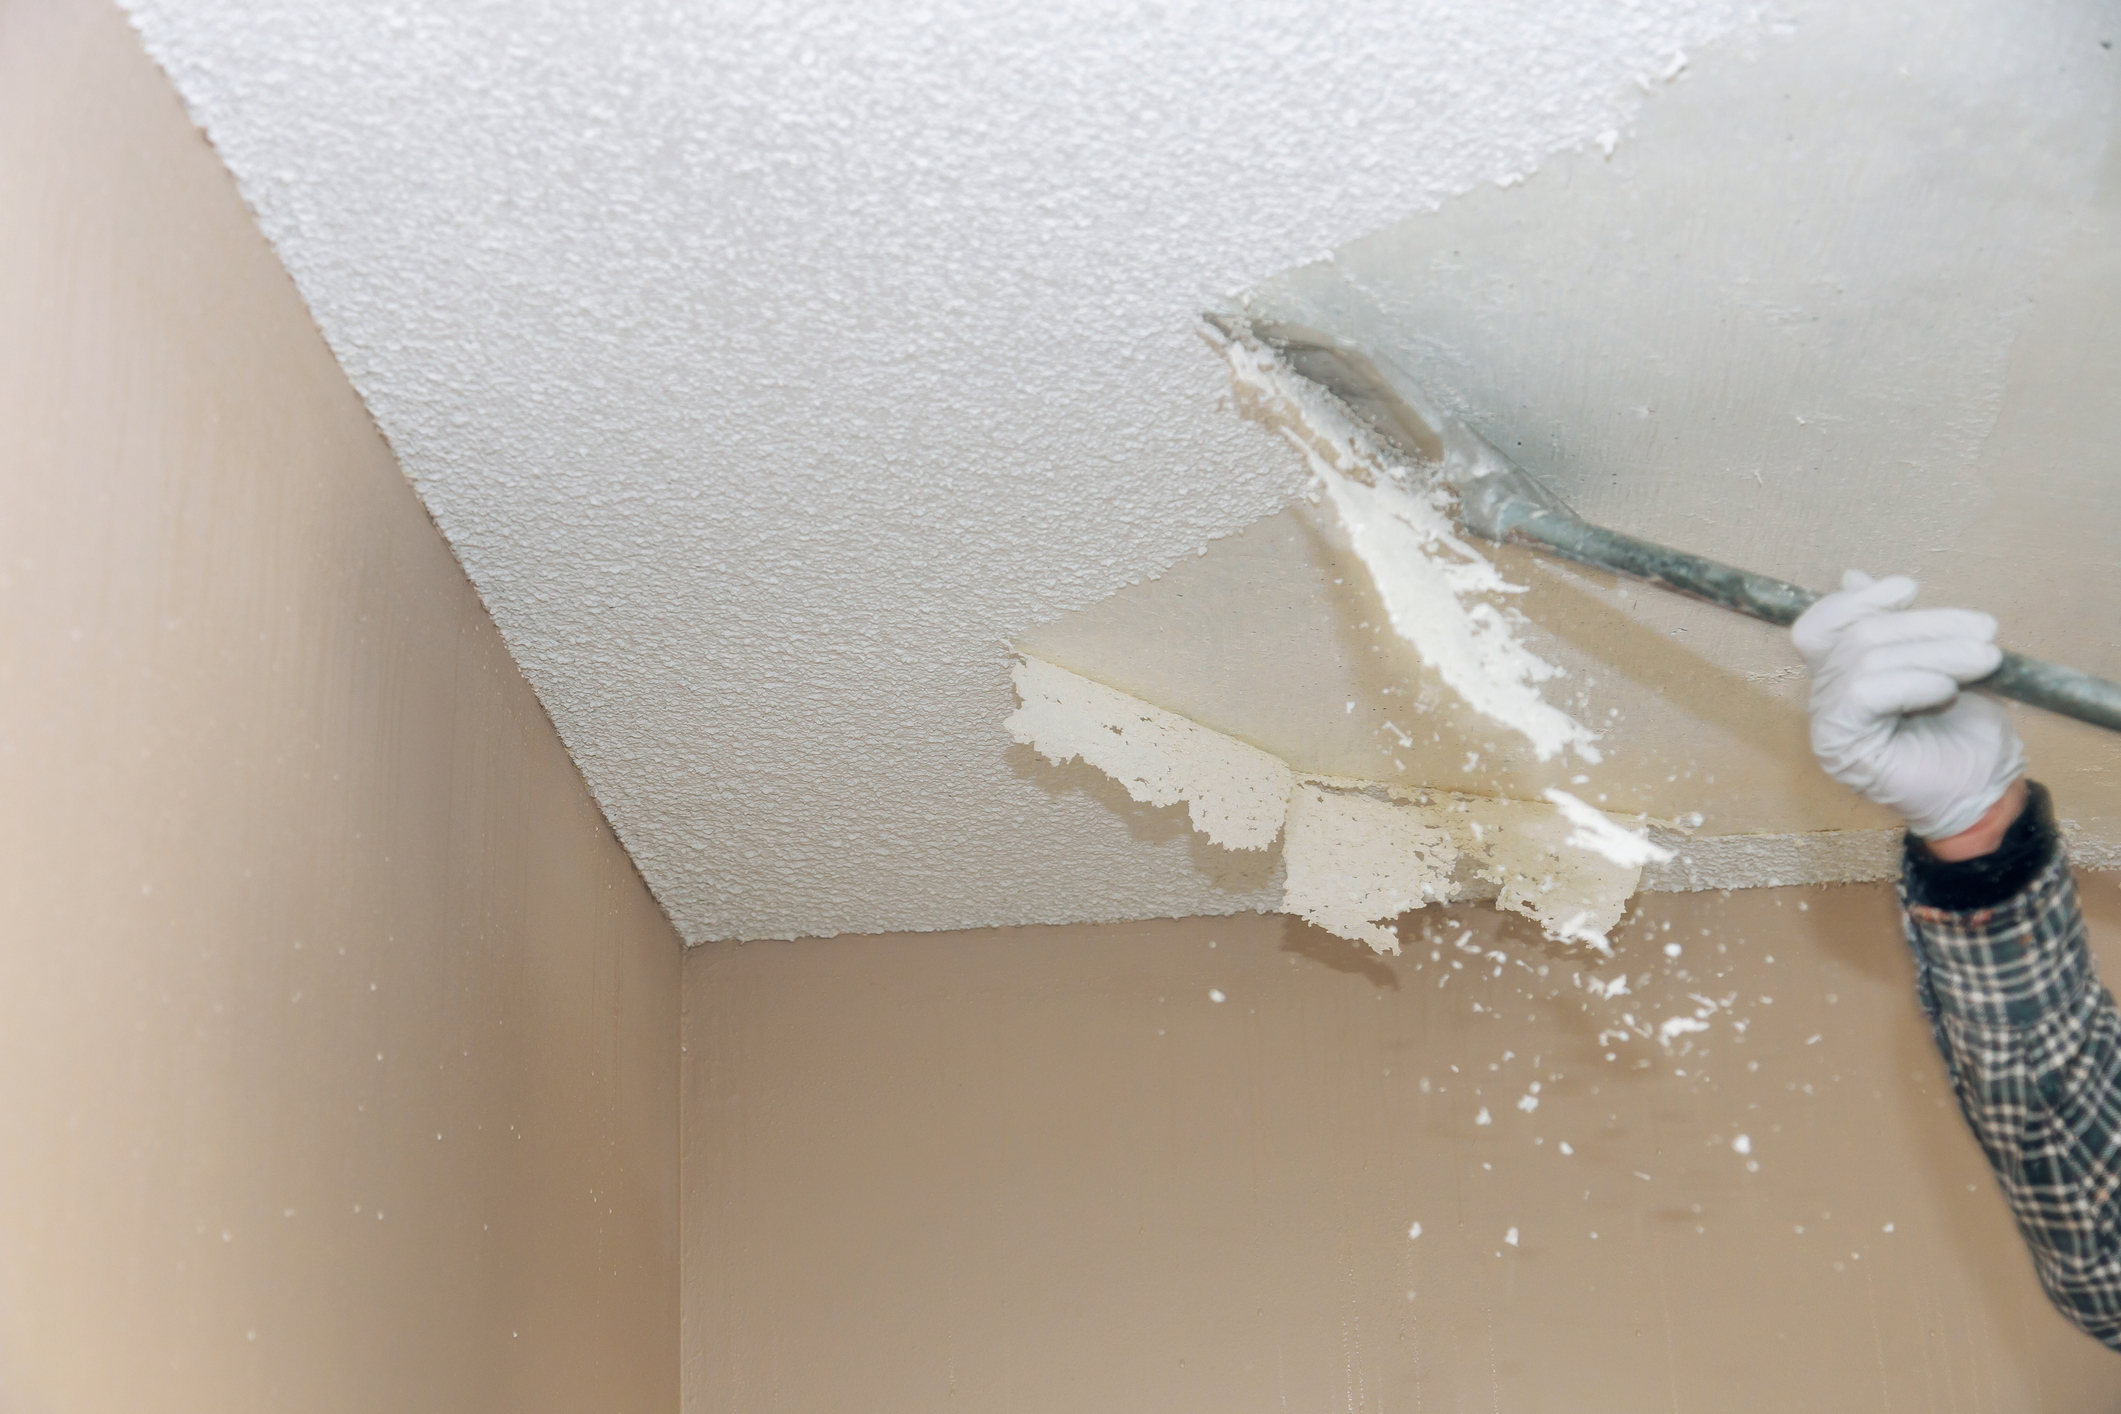
How to remove texture from a ceiling
Often thought to be a difficult task, we’ve asked the experts for advice on how to remove texture from a ceiling


Removing texture from a ceiling is a laborious job, but it is one that DIYers can take on easily themselves.
A textured or ‘popcorn’ ceiling was a popular feature in many mid-century homes, providing an aesthetically pleasing finish and helping to disguise imperfections in the plasterwork beneath.
However, practically speaking, textured ceilings can be tricky, as they also hide complex problems such as leaks and damp issues.
If you’re ready to remove your textured ceiling, take a look at our expert guide. We guarantee the process is a lot easier than you might expect.
How to remove a textured ceiling
You may want to remove a popcorn ceiling – in which case you may want to consult our dedicated guide – or perhaps you just want to remove a textured ceiling you previously installed or inherited from your home's previous owners. Whichever, these easy step-by-step instructions will help you complete the task with ease.
1. Prepare to remove a textured ceiling
Because of its unique coating, removing the texture from your ceiling will create plenty of dust. Therefore, certain steps and preparative measures must be taken. It is important that you cover the entire room in protective sheets or painter’s plastic before you start.
‘Protective gear is a must’, explains Nicholas Smacchia from Westchester-based company Plastering by Nicholas, so ensure you have goggles and a face mask to hand.
Design expertise in your inbox – from inspiring decorating ideas and beautiful celebrity homes to practical gardening advice and shopping round-ups.
2. Consider any harmful chemicals
Before embarking on the project, it is advisable to take a small sample from your ceiling and have it tested for both lead and asbestos content. Trying to sand or remove either of these materials can be hazardous to your health.
However, there are some dedicated products which are safe to use, even if harmful chemicals are present.
Andrew Chviers from Eco Solutions suggests using their X-Tex product as it ‘encapsulates the fibers and prevents them getting airborne.’ ‘It is called a working wet system,’ he confirms.
3. Use the right tools
Whatever method you use, you’ll need a good quality scraper or putty knife.
Sharad Gaurav, product manager at paint suppliers Purdy suggests using their Bent Pole Scraper. ‘This 3-inch stiff blade will help remove texture from a ceiling and can be attached to the Purdy PowerLock Extension pole to easily reach various ceilings heights.’
4. Use a dedicated product
As with texturing a ceiling, application is key when it comes to working with a specific texture removing product.
Andrew Chivers recommends using a product. ‘It can be applied to the (ceiling) surface, covered with plastic film and left overnight.’
This process will soften both the textured paint and the textured ceiling. The next morning you can start removing the texture ‘using a long handled blade scraper’, confirms Andrew.
5. Remove texture with a scraper
If you'd rather avoid chemicals you can, of course, use traditional methods to remove a textured ceiling. Start by spraying the ceiling with water to soften the material, though bear in mind that if you have previously painted the ceiling, the water may not penetrate the paint to soften the texturing material beneath.
Plasterer Nicholas Smacchia suggests ‘scraping off the high points’ first. Then work with your scraper from the middle of the ceiling and move towards the walls.
Be careful not to use too much force as it can lead to cracks and damage.
‘Be sure not to gauge the ceiling with the blade edges (of your scraper) as they can be sharp.’ confirms Sharad from Purdy.
6. Repair and sand
Once all the texture has been removed it’s important to repair all cracks with a joint compound. Then you are ready to sand and start painting.
However, to achieve a really smart finish, Nicholas Smacchia suggests ‘applying two coats of premixed drywall compound then sand smooth prior to painting.’
Can a textured ceiling be smoothed?
Although it is likely to be more expensive, you can hang drywall ceiling to cover texture, and then plaster a ceiling, choosing to take on the tasks yourself or calling in a professional.
Another option is to use a dedicated finishing plaster product. Be sure to assess your project first, as many of these products only hide small bumps and contours, and may not be able to smooth over deep texture.

Steph Hendries is a freelance journalist who has contributed to many different interiors websites including Homes & Gardens, Ideal Home and Livingetc. She has also worked on a range of social content for property brands such as Zoopla and Boomin. Steph writes for Homes & Gardens Solved section, concentrating on DIY, how to, cleaning and organizing content.