Pine cone Christmas craft ideas – 21 seasonal makes
Get creative and bring rustic charm into your home with these Pine cone Christmas craft ideas

Pippa Blenkinsop
Design expertise in your inbox – from inspiring decorating ideas and beautiful celebrity homes to practical gardening advice and shopping round-ups.
You are now subscribed
Your newsletter sign-up was successful
Want to add more newsletters?

Twice a week
Homes&Gardens
The ultimate interior design resource from the world's leading experts - discover inspiring decorating ideas, color scheming know-how, garden inspiration and shopping expertise.

Once a week
In The Loop from Next In Design
Members of the Next in Design Circle will receive In the Loop, our weekly email filled with trade news, names to know and spotlight moments. Together we’re building a brighter design future.

Twice a week
Cucina
Whether you’re passionate about hosting exquisite dinners, experimenting with culinary trends, or perfecting your kitchen's design with timeless elegance and innovative functionality, this newsletter is here to inspire
If you’re looking for some festive makes to get stuck into over the holiday season then these pine cone Christmas craft ideas are perfect.
Easy to forage on a winter walk, the humble pine cone can be transformed into an array of beautiful pine cone decorations for bringing rustic charm into the home. They can be spray painted to match your decor and used to embellish sideboards, mantelpieces, and Christmas tables, strung up on garlands, and even used to create statement chandeliers, plus they can also be used in outdoor Christmas decor ideas.
To help spark your creativity, we’ve rounded up an array of inspiring pine cone Christmas craft ideas from simple styling and display techniques to how to make a pine cone wreath.
Pine cone Christmas craft ideas
The beauty of pine cone Christmas craft ideas is that with careful prepping of your cones, they will last for more than one holiday. Store them carefully and you can bring them out year after year to fill your home with natural beauty each Christmas.
Or, if you love the idea of making these pine cone decorations fresh each year, you can simply recycle the used cones (with any trimmings removed) in your garden or compost heap, where they will return to nourish nature's natural cycle.
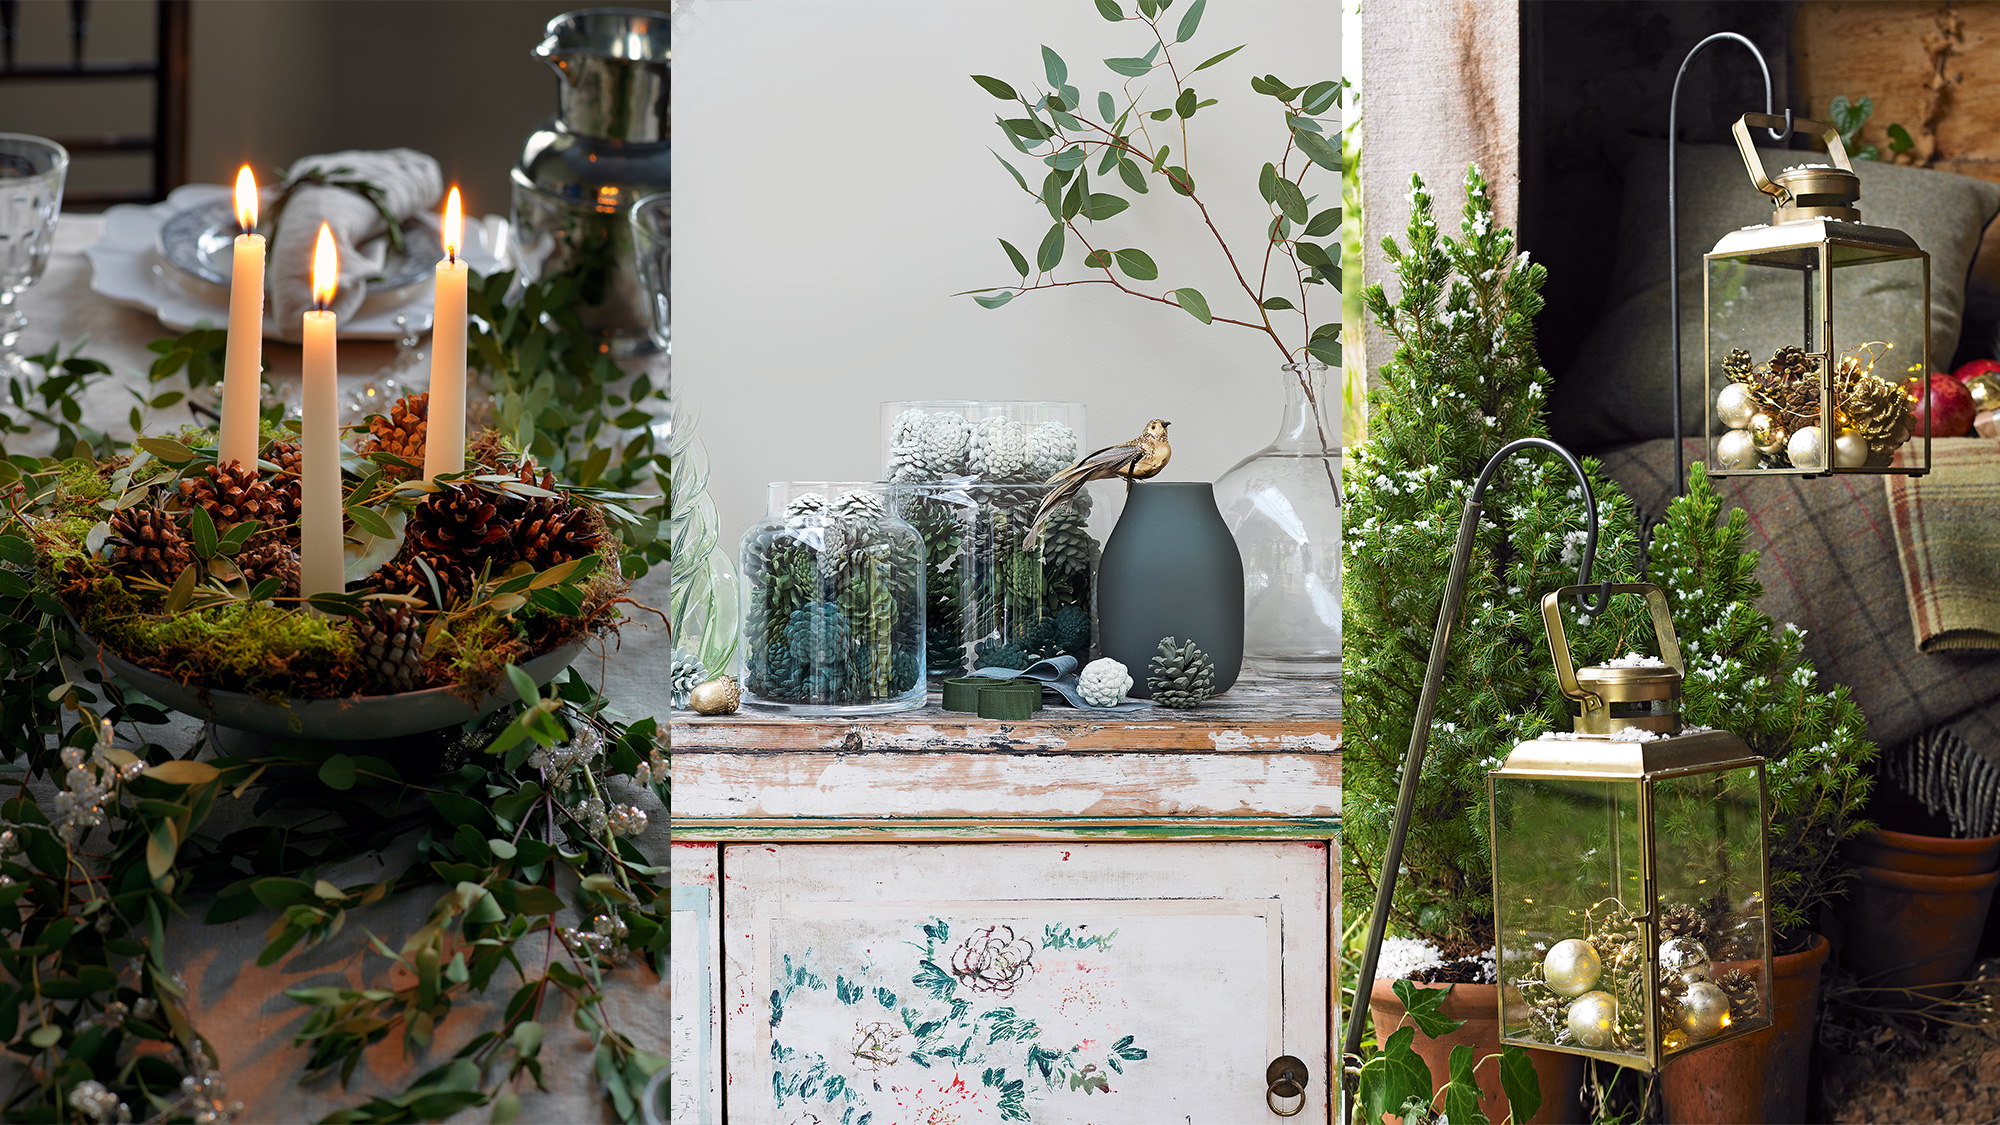
1. Spruce up lanterns with pine cones for a pretty outdoor display
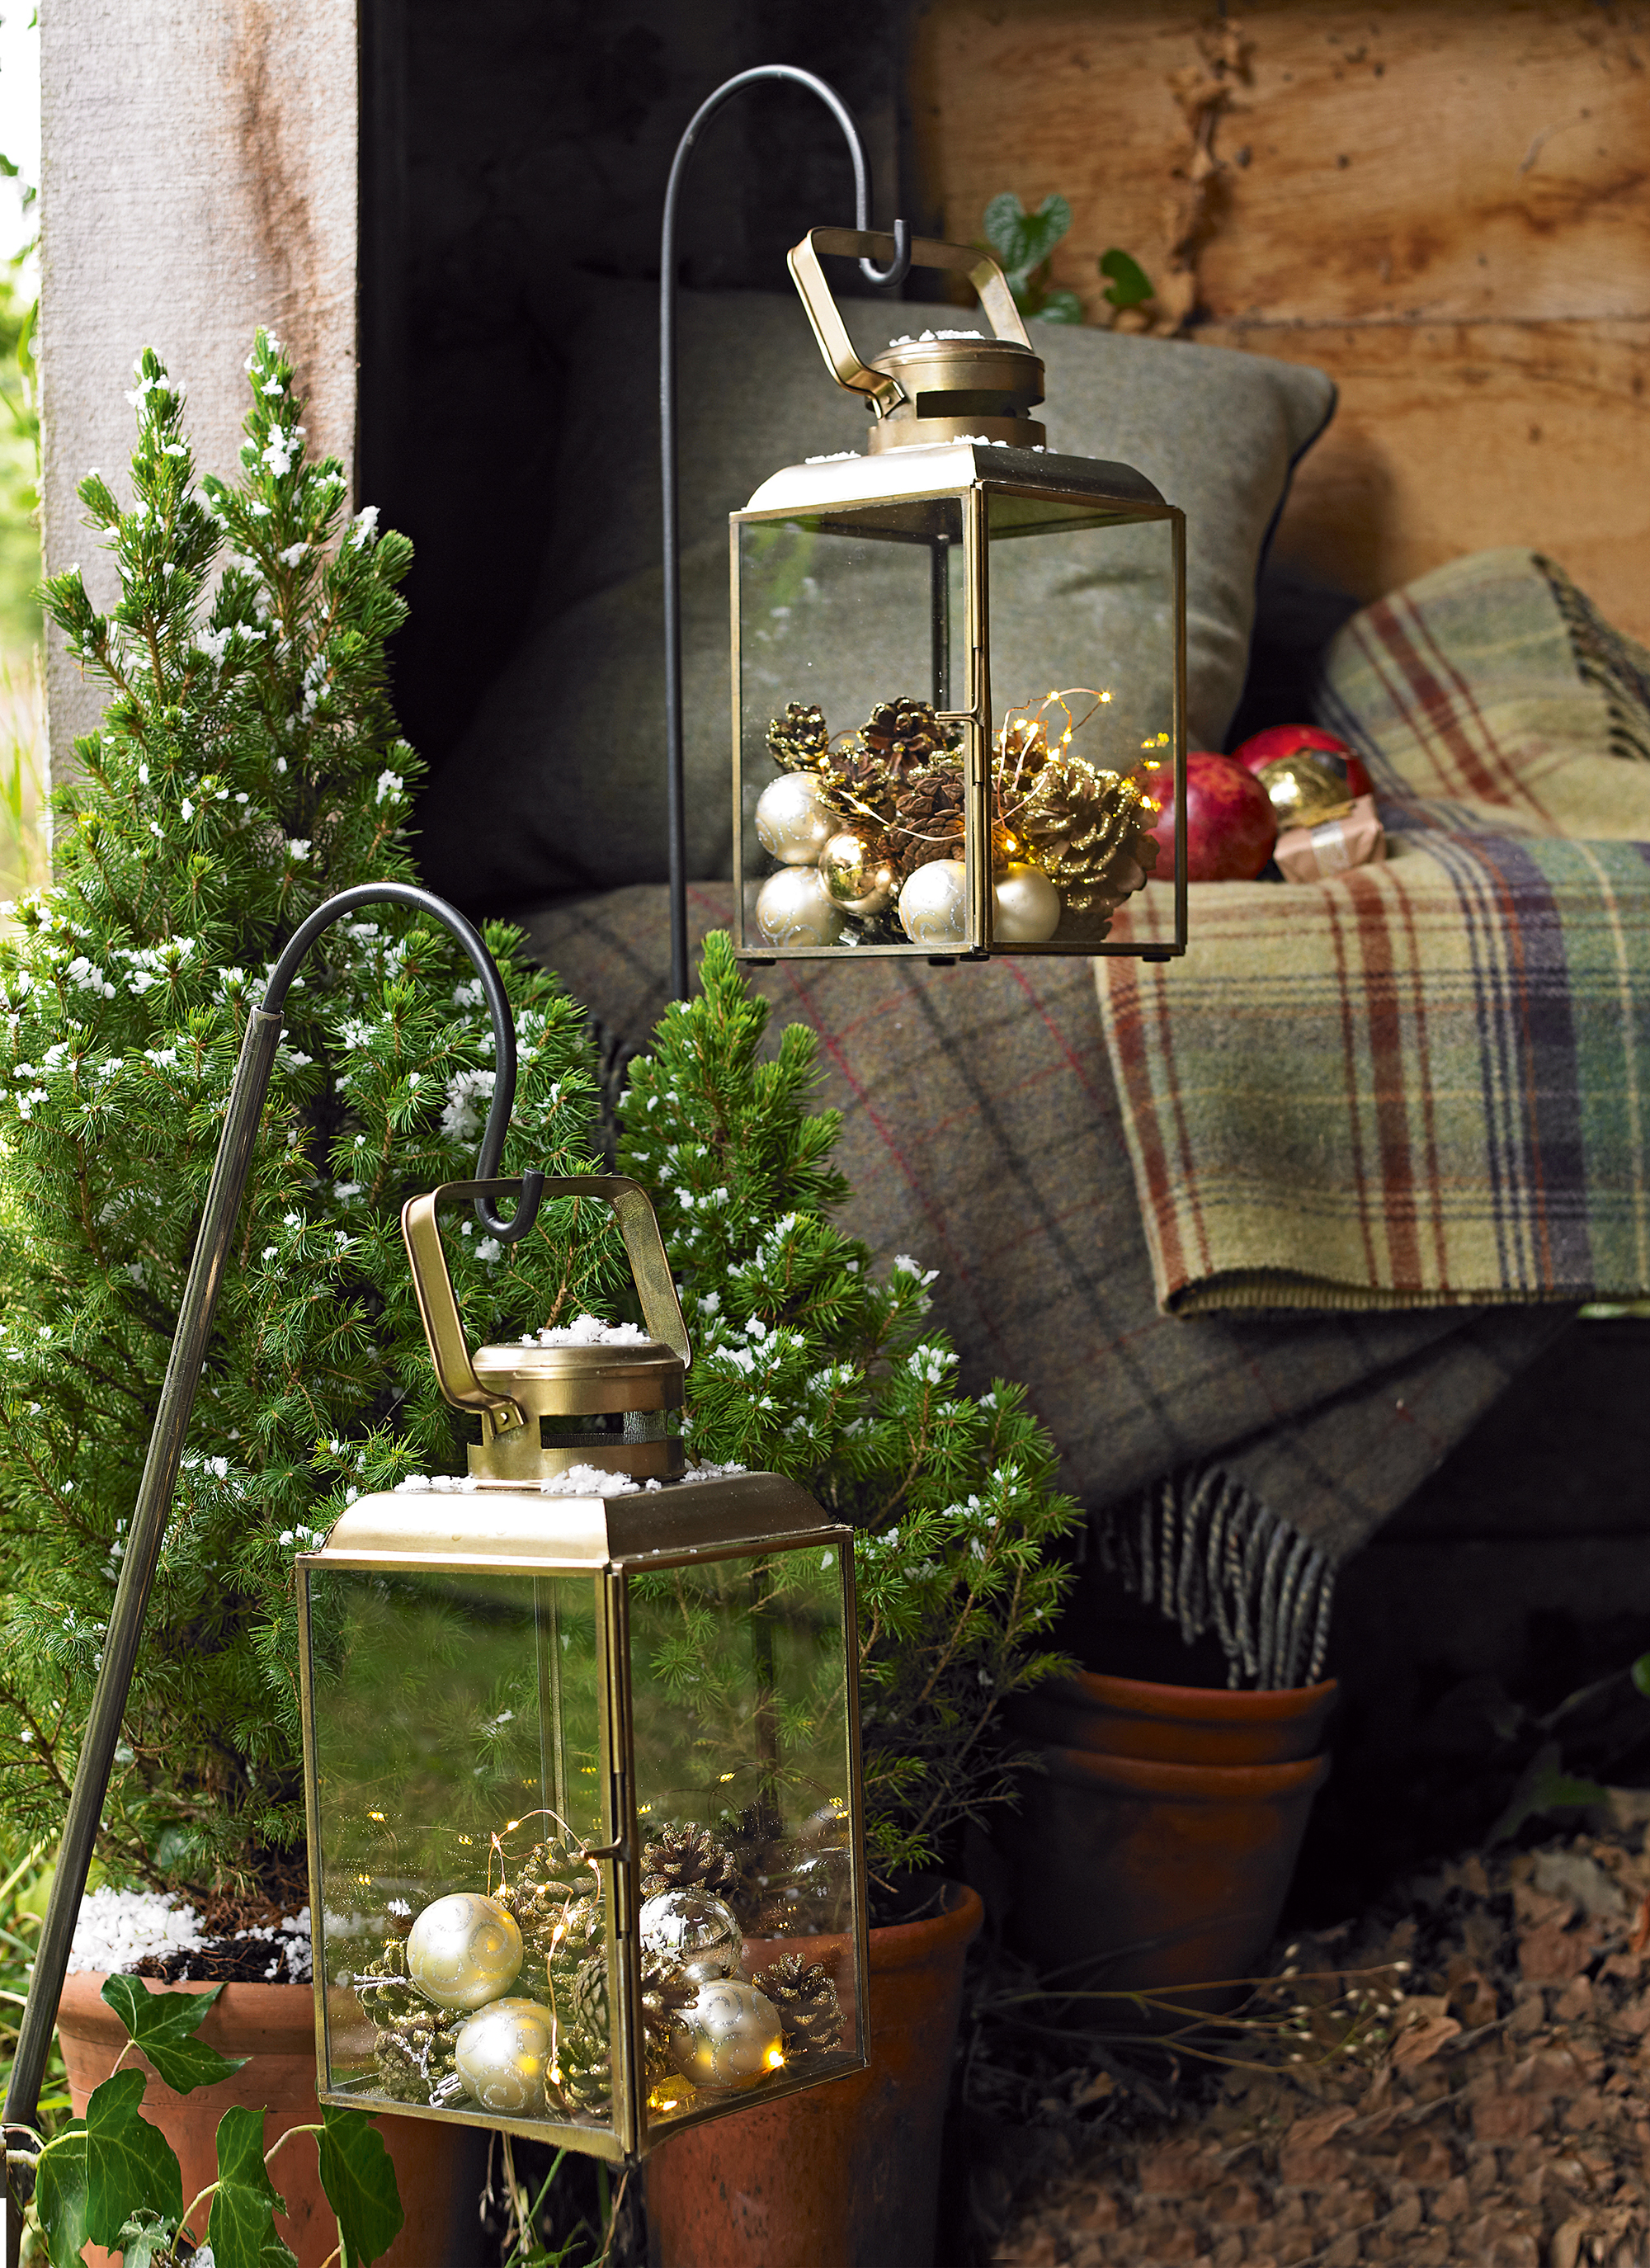
The view out of the window can be bleak at this time of year, so why not brighten up your outdoor spaces with pretty decorated lanterns? They make a lovely Christmas porch decor idea to welcome guests or would be perfect for Christmas patio ideas. Simply fill lanterns with a selection of pine cones and baubles in different sizes and weave through battery-powered LED lights to bring them to life after dark. Be sure to keep them under cover to protect from rain and weather damage.
2. Use pine cones to elevate a wreath
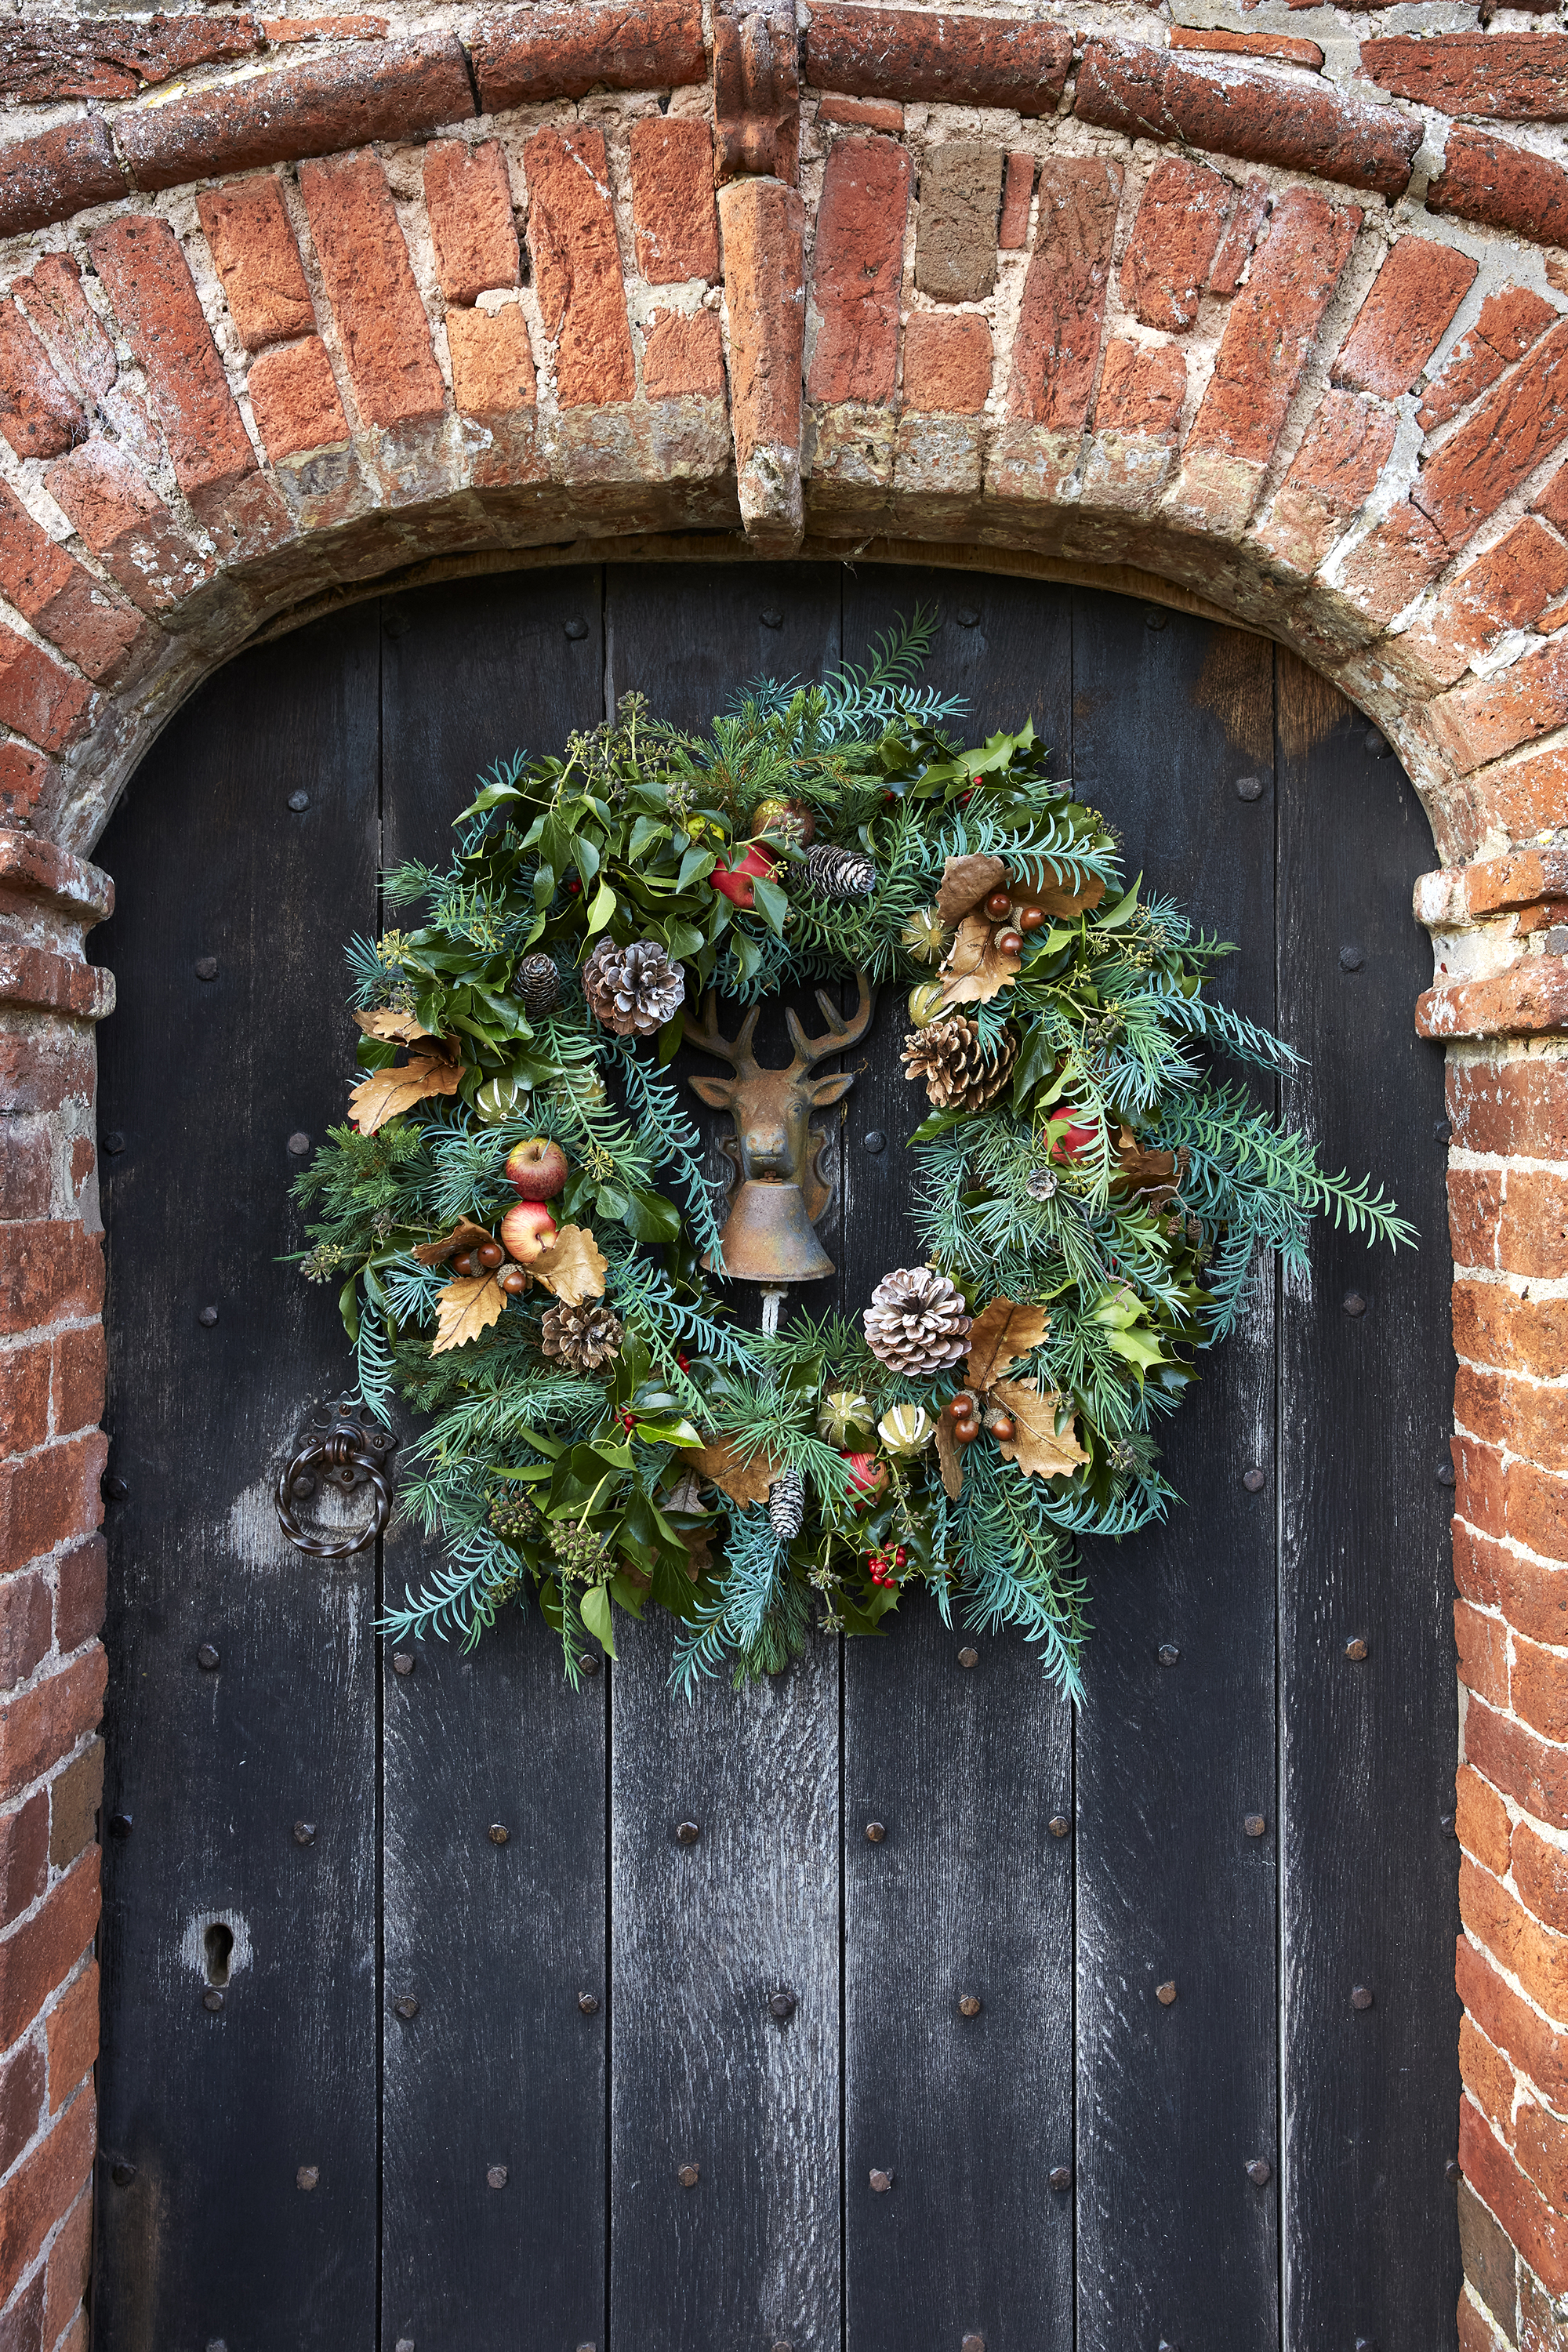
Adding pine cones to your Christmas wreath ideas is easy to do and perfect if you love rustic, farmhouse Christmas decor. 'Simply attach to branches using garden twine or reusable wire, wrapped around the base of the pinecone, and secured carefully to branches,' says floral designer Philippa Craddock. For more impact go for large pine cones, or for something more whimsical and delicate you could try weaving in birch branches with small birch pine cones.
Design expertise in your inbox – from inspiring decorating ideas and beautiful celebrity homes to practical gardening advice and shopping round-ups.
Pine cones can also be used in other Christmas door decor ideas including pine cone kissing balls which make a fun alternative to mistletoe – read on to see how to make them.
3. Use pine cones in a winter table centerpiece
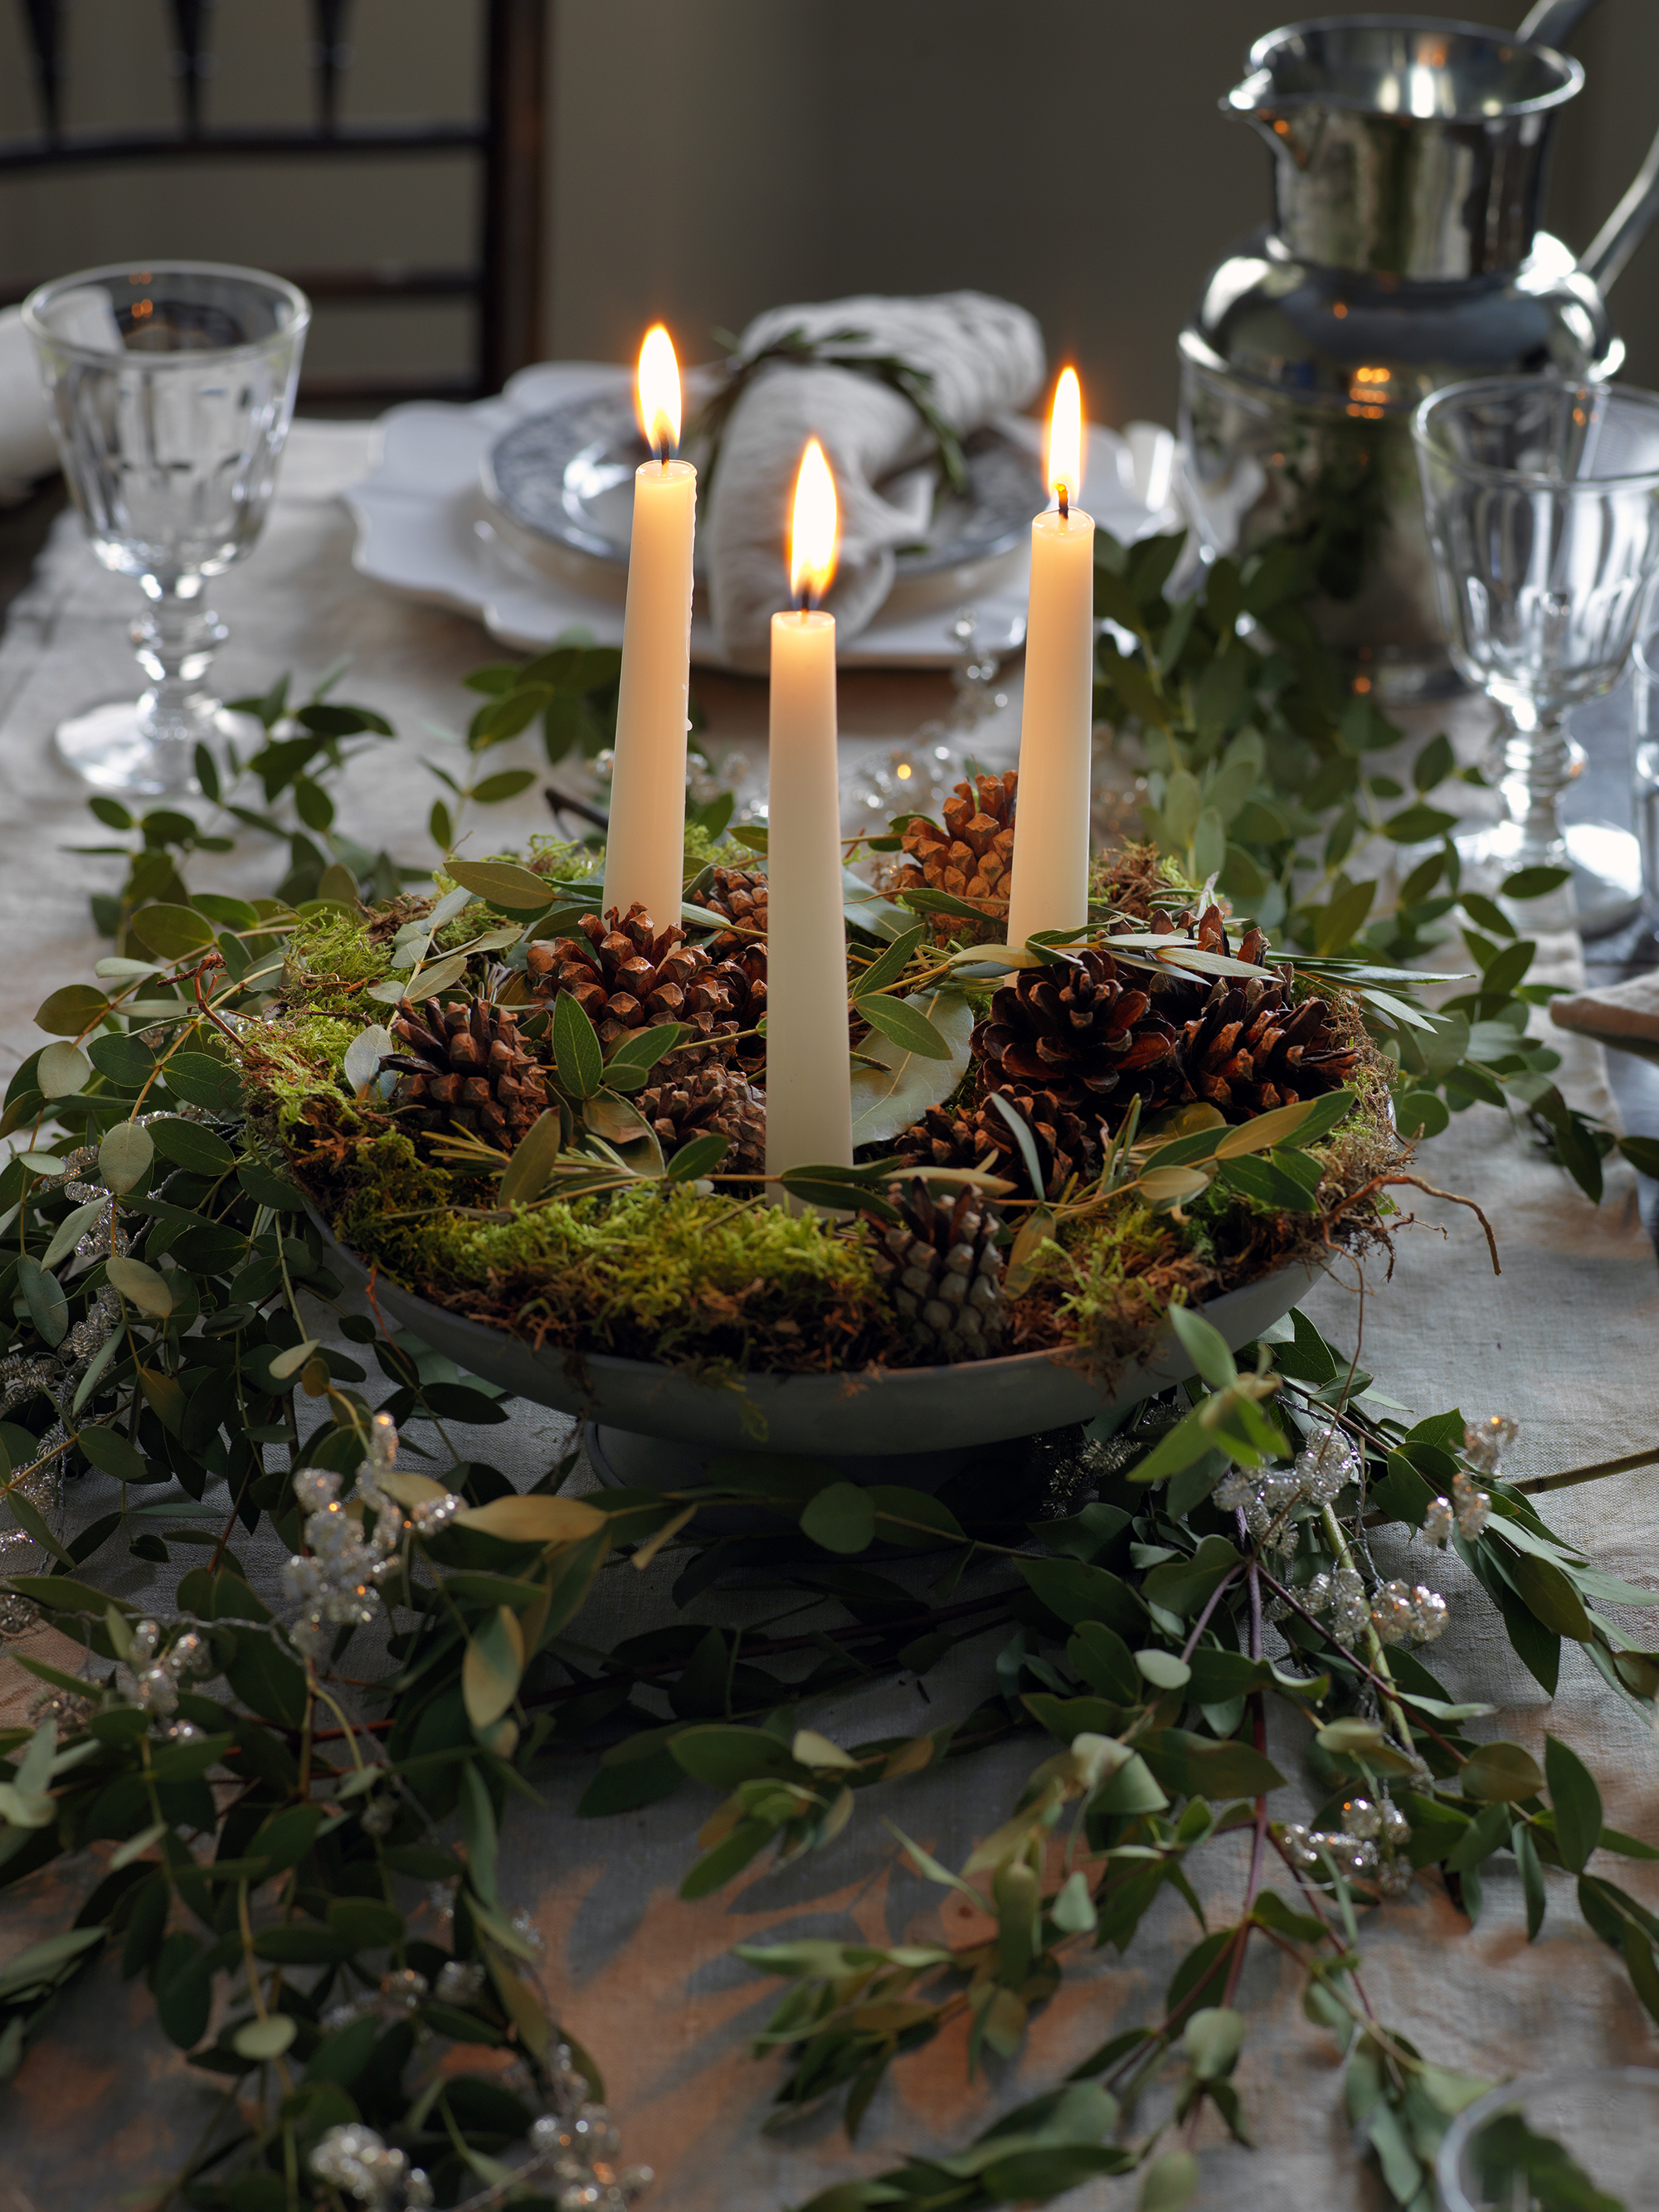
Anyone who's played host at Christmas knows what a stressful time it can be, leaving limited time for crafting. Simple and straightforward to make, this pine cone Christmas table centerpiece will wow dinner guests with little effort.
First start by selecting a beautiful vessel for your arrangement such as a low, footed bowl. Sit a circle of soaked florist's foam in the bowl and then push in stems of Christmas foliage such as eucalyptus or ivy. Position a candle ring in the middle, or three florist's candle holders on spikes, then finish by covering exposed areas with moss and decorating with an assortment of pine cones. For a pop of color you could also add in dried orange slices – see our guide on how to dry orange slices.
4. Create a pine cone place setting
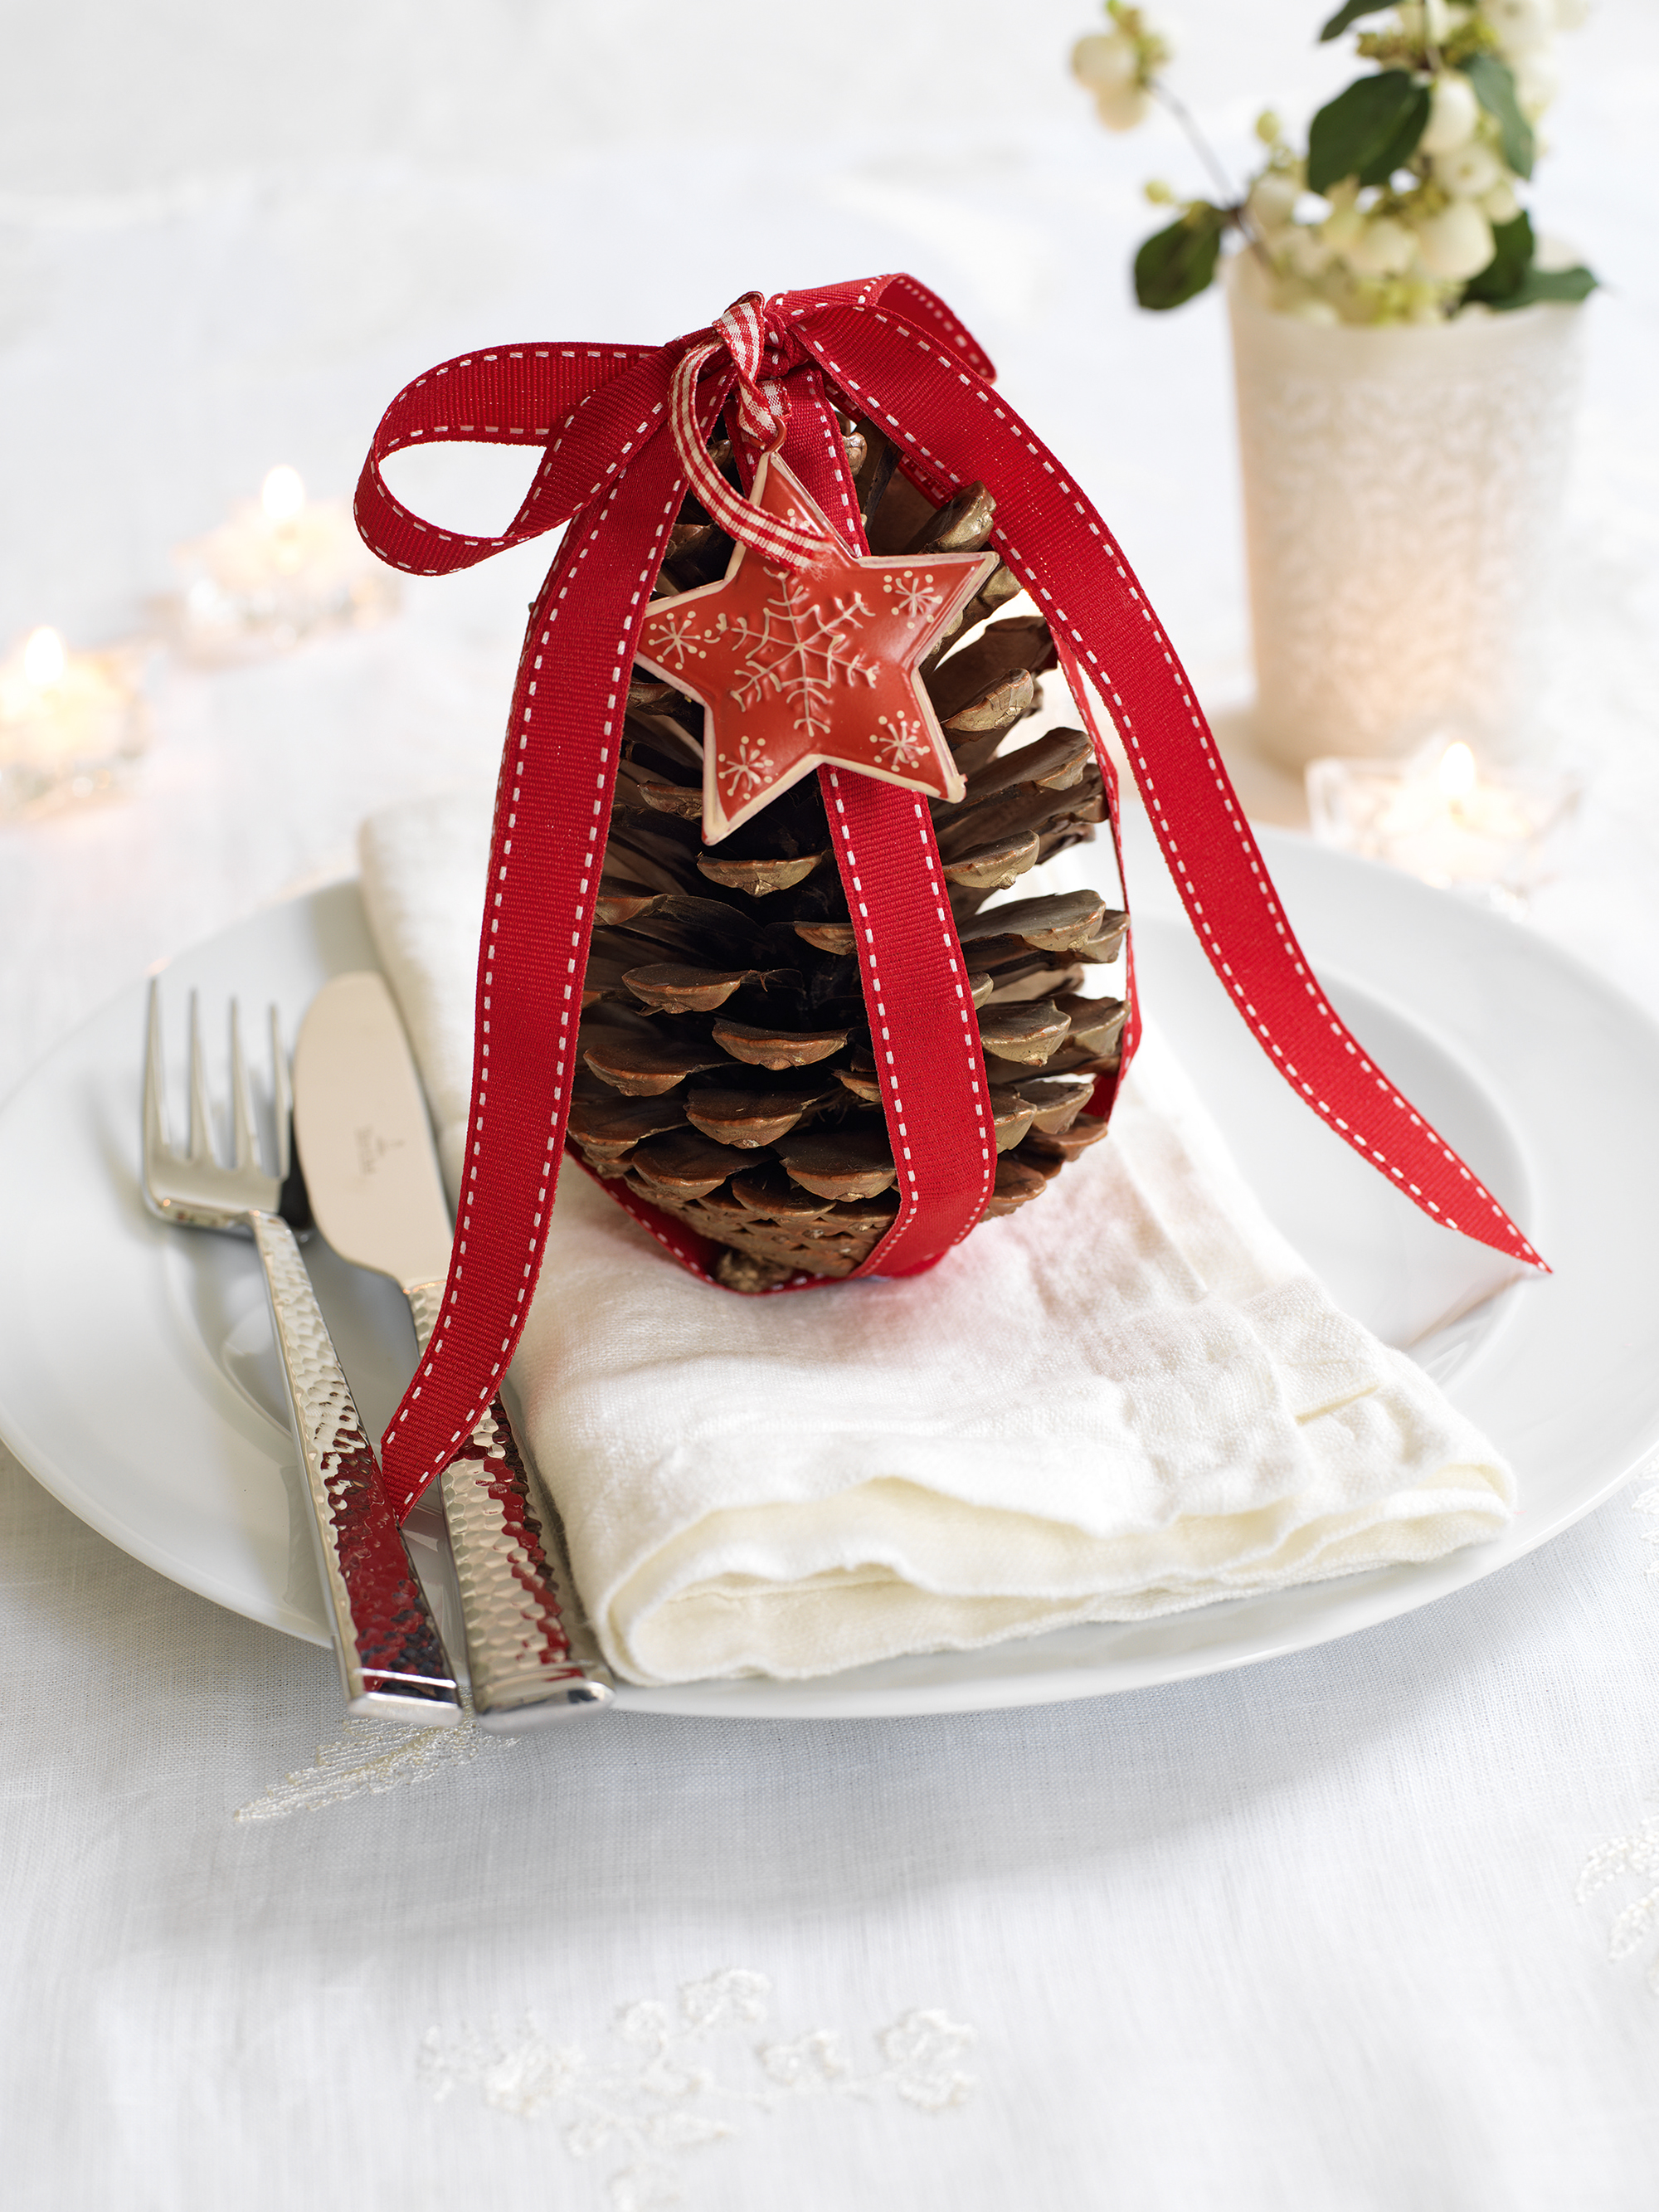
Help guests find their seats at the dinner table and give your Christmas table decor a beautiful flourish with a pine cone place setting. Simply wrap the pine cone in a festive ribbon like a gift and attach a name tag at the top. If you tie in a way to create an additional loop at the top the pine cone can then double as a Christmas table gift that guests can take away and hang on their tree.
5. Decorate pine cones with glitter
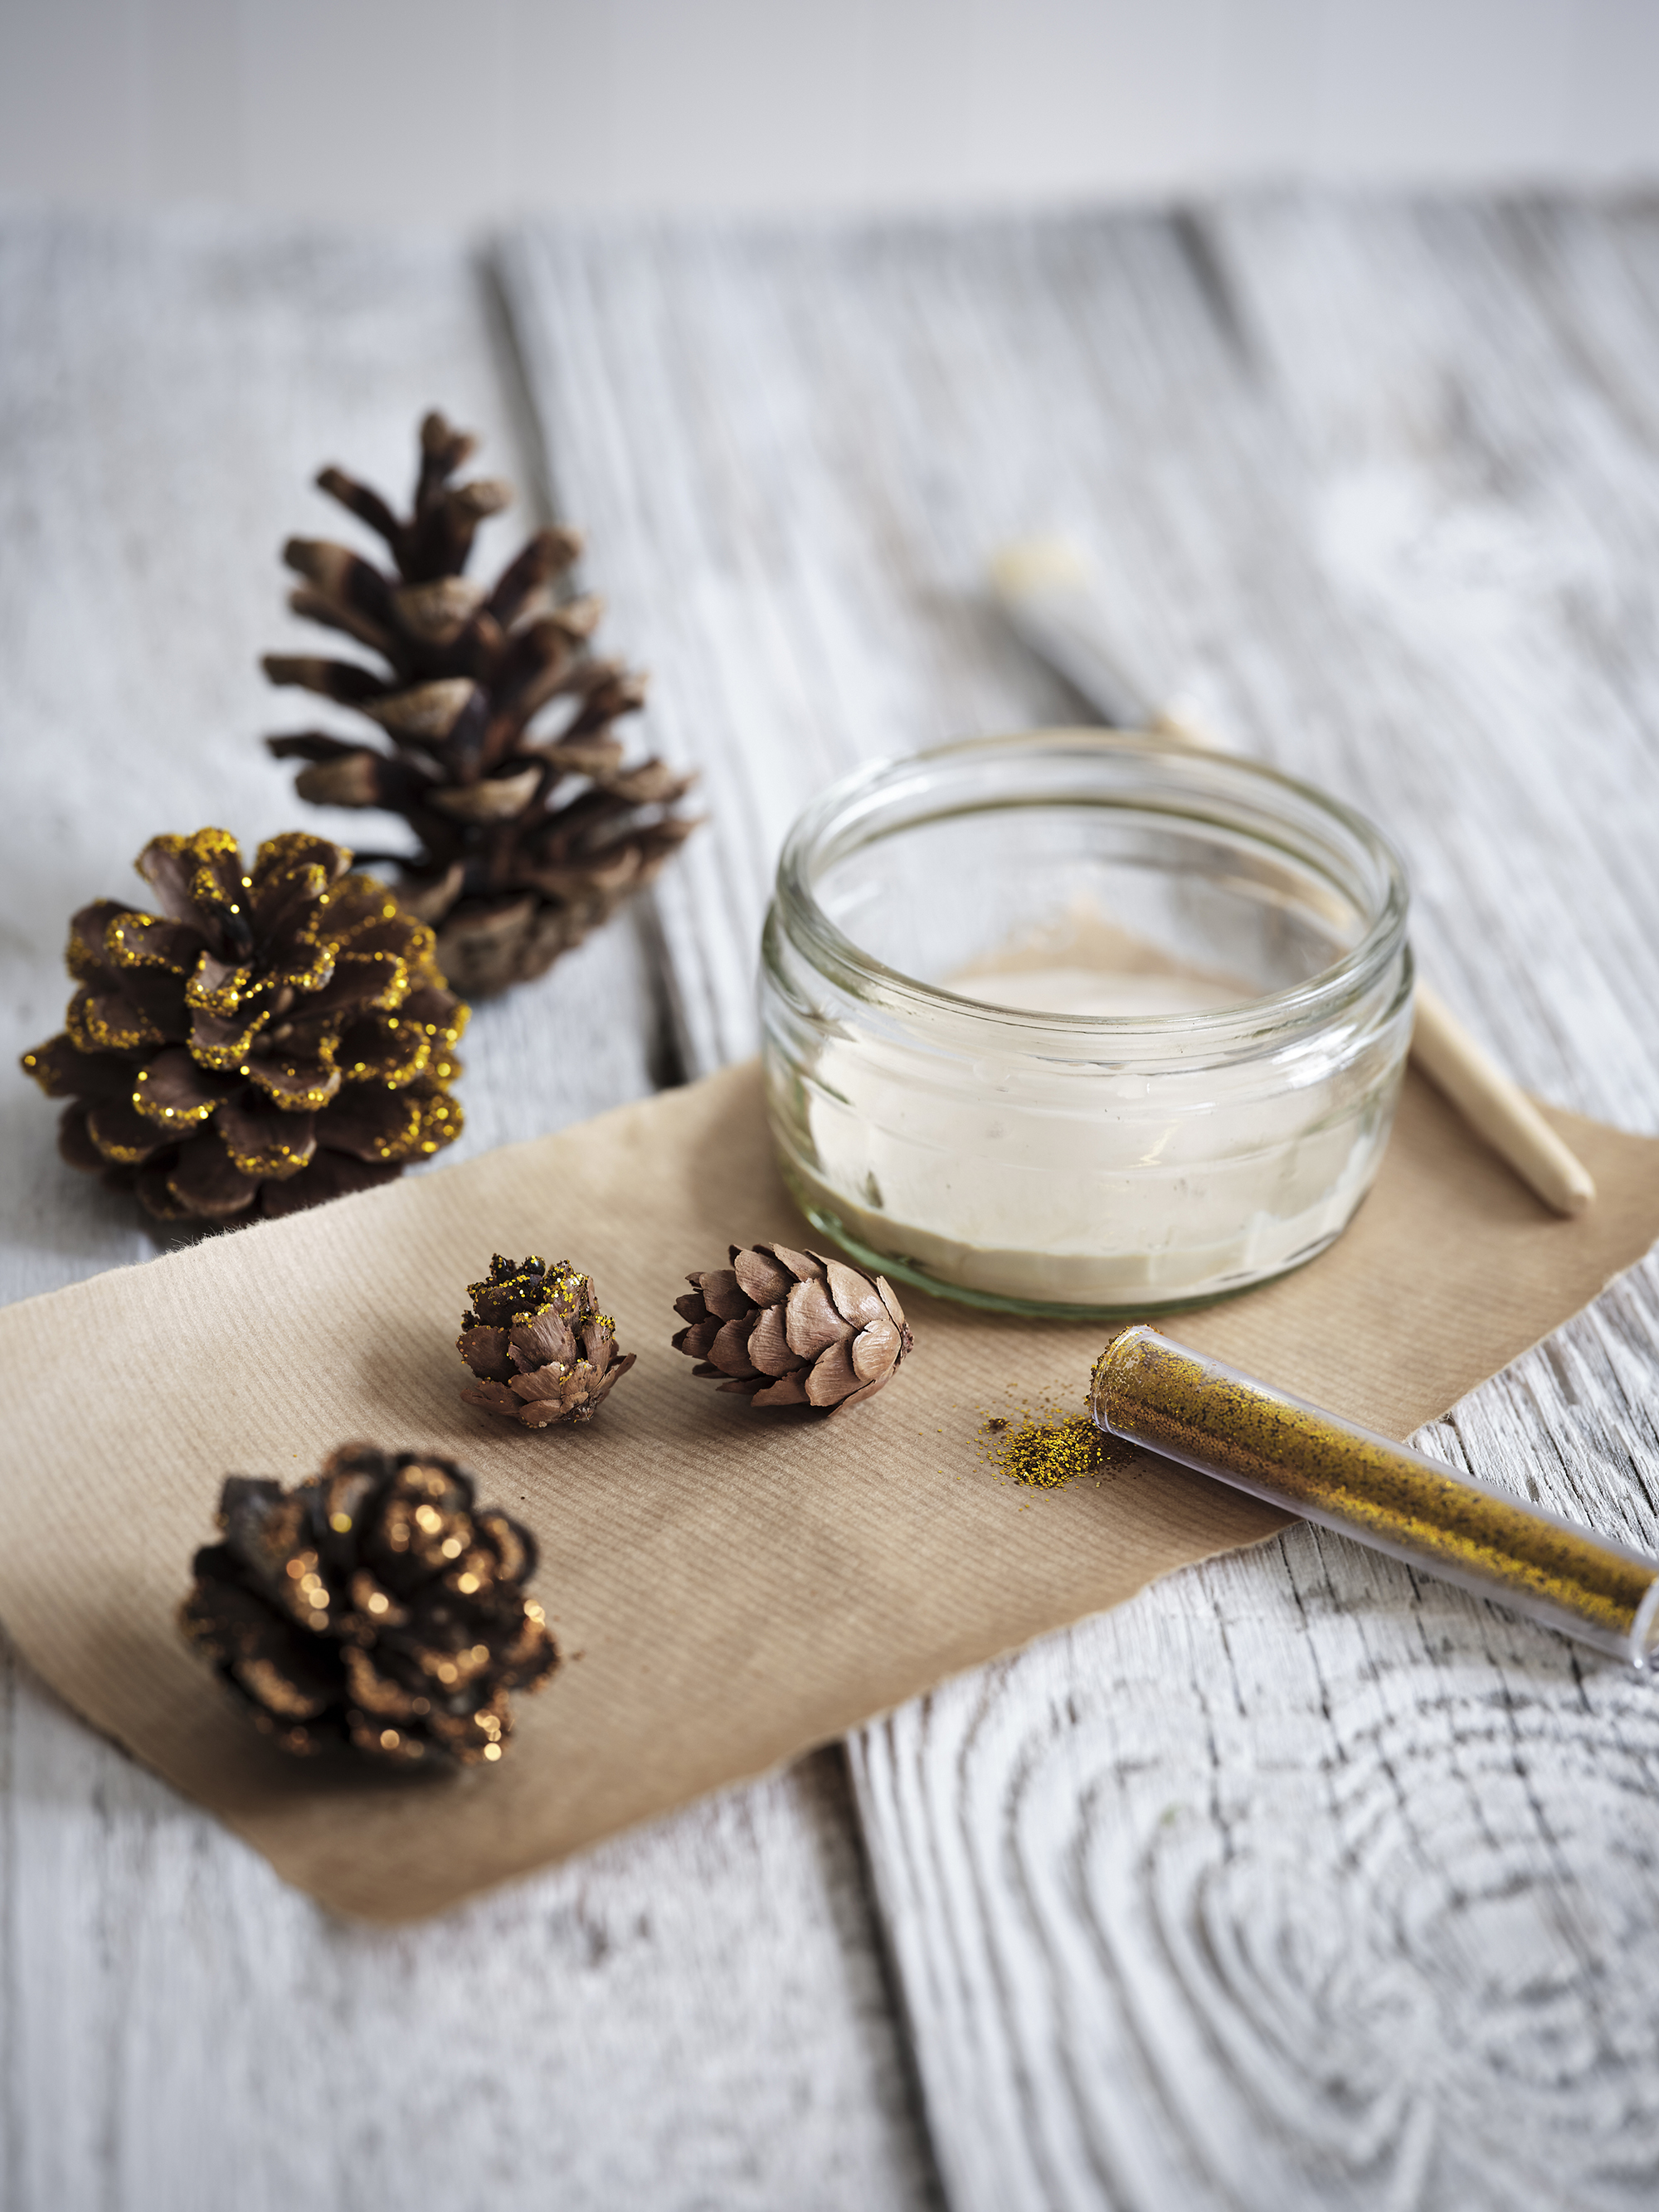
Decorating pine cones with glitter is a fabulous way to bring sparkle to your festive displays, plus it's a fun activity to do with children.
Simply brush PVA glue onto the edges of dried pine cones, roll in glitter and leave to dry. Be sure to do this on a laminated tablecloth or sheet of old newspaper so that the glitter is contained in one place and easy to clear up – anyone who has crafted with glitter before knows that it can get everywhere.
6. Spray pine cones for use in Christmas styling
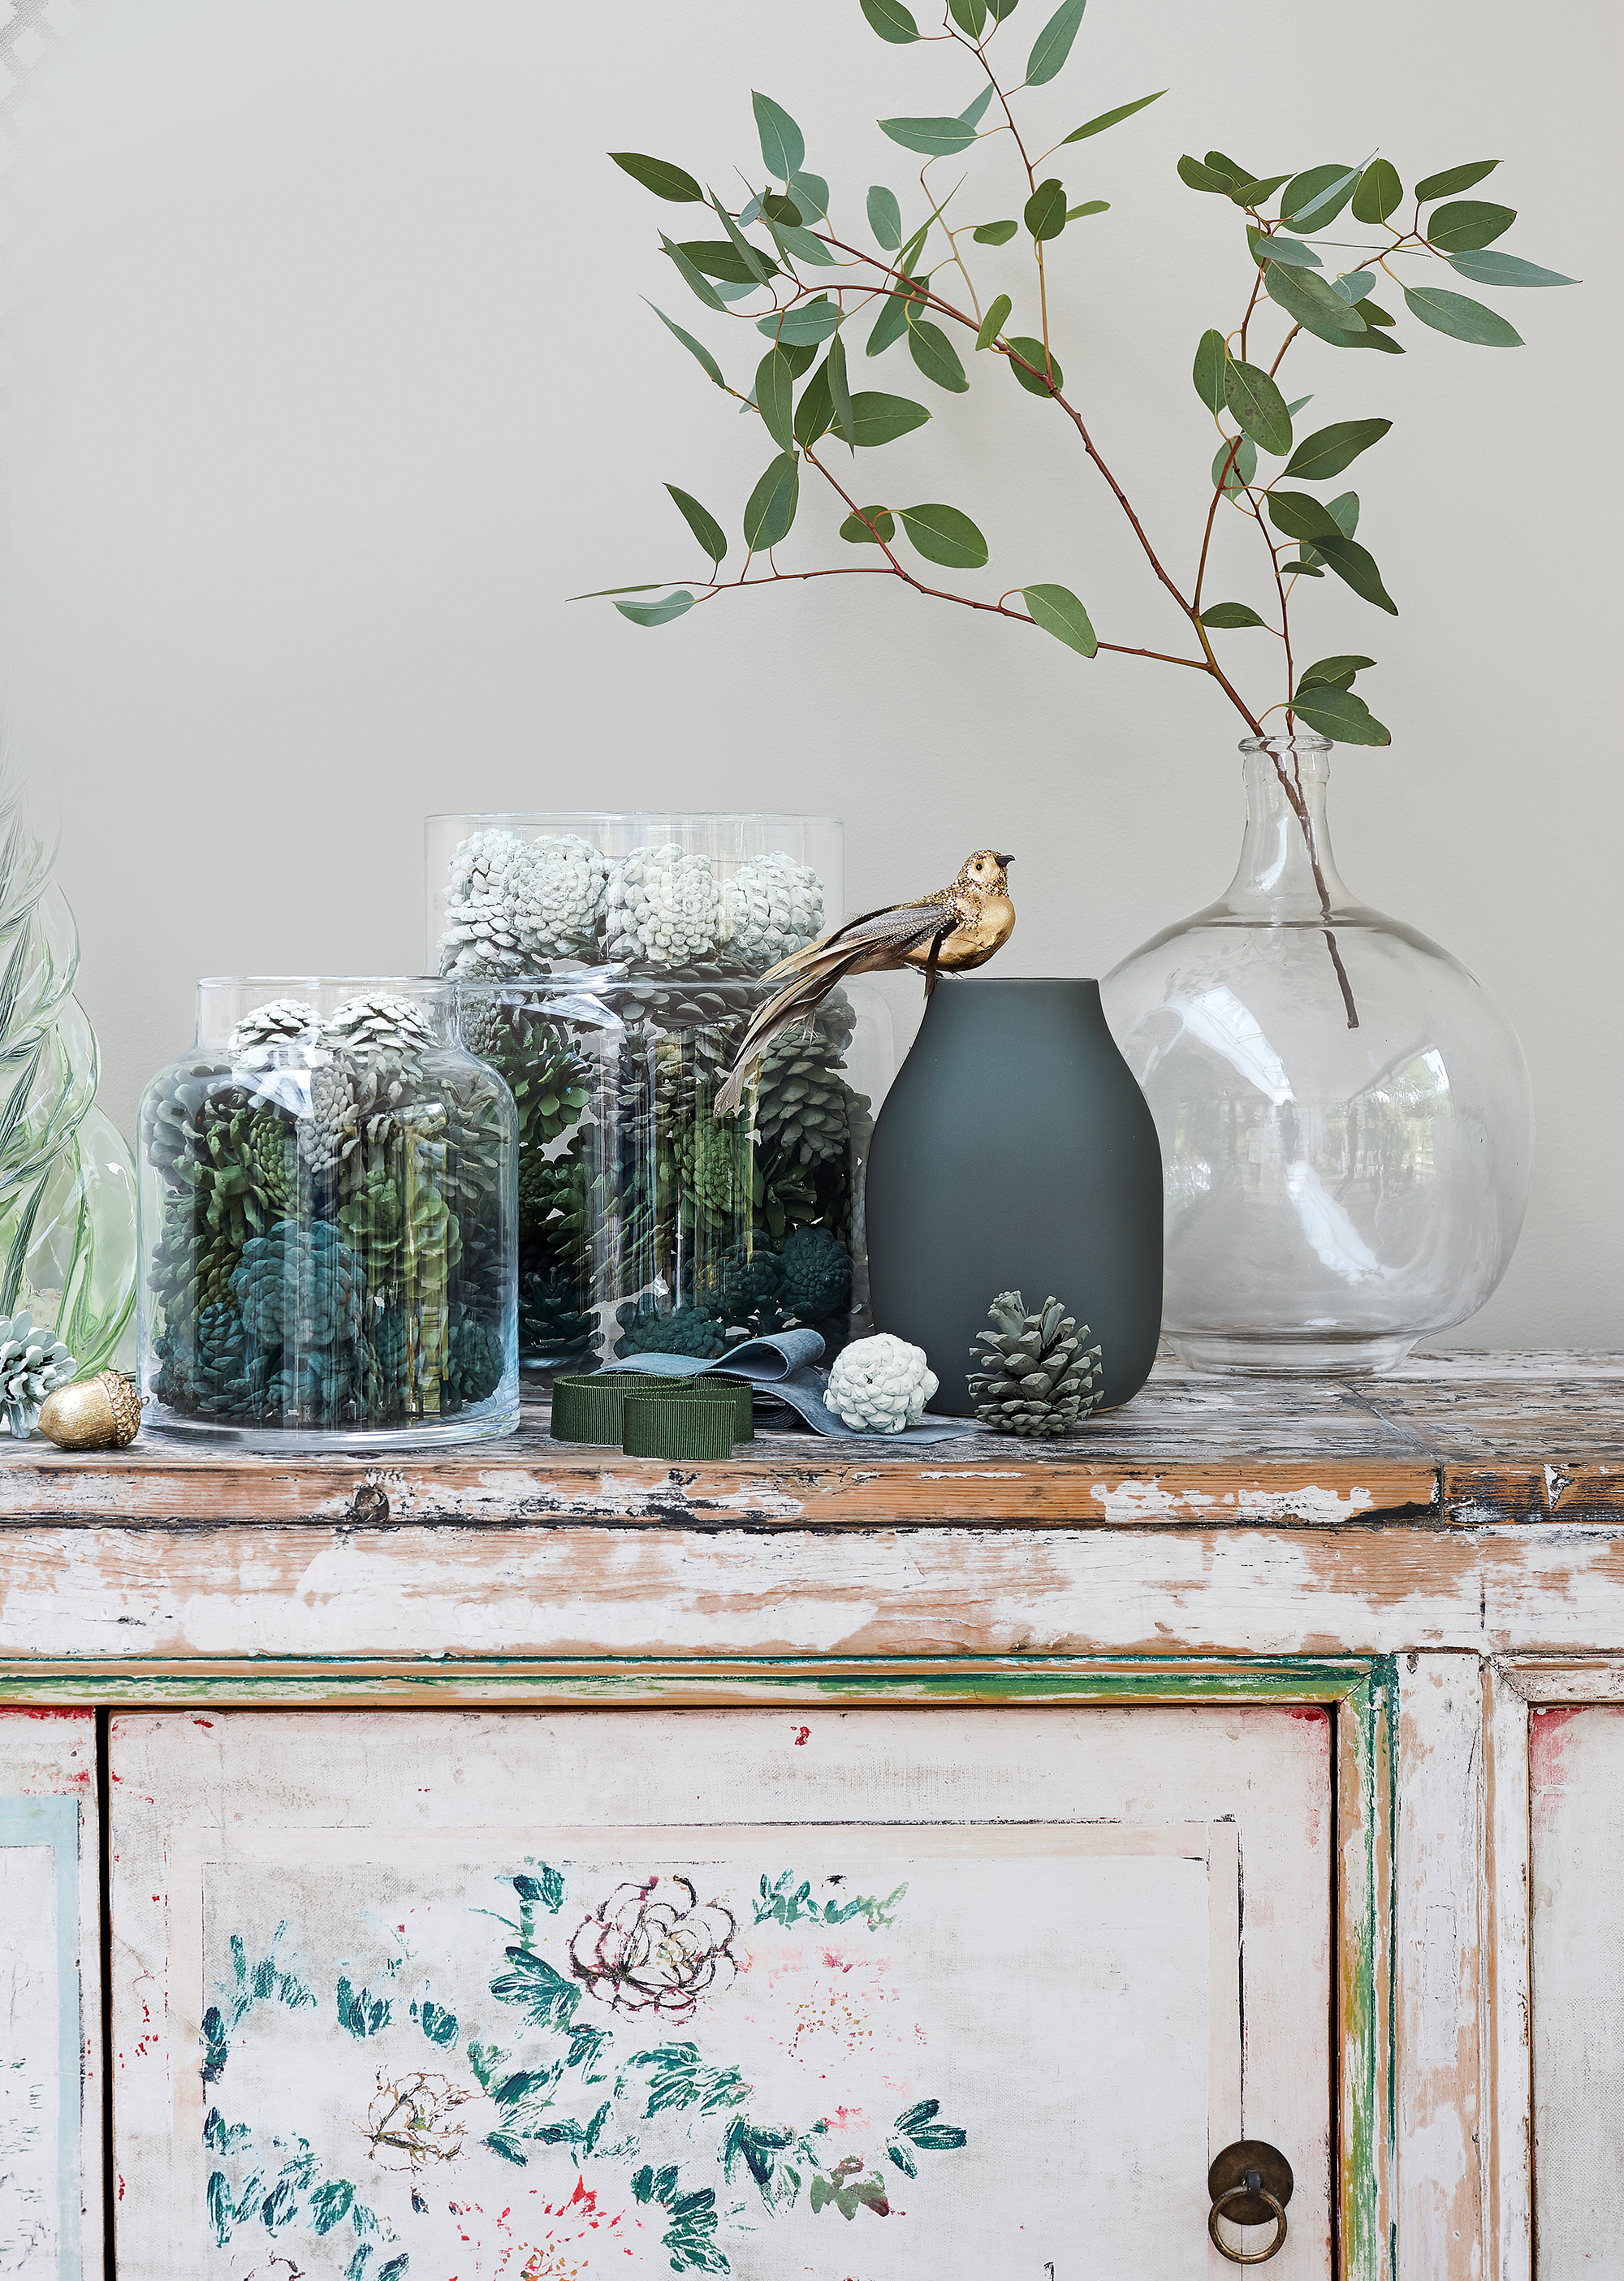
Displaying pine cones in tall glass votives is a wonderful Christmas styling idea for bringing height to displays on sideboards or for use on mantelpiece decor ideas, and by spraying them you can easily tie them in with the rest of your Christmas decor ideas.
To spray paint pine cones they need to first be washed and completely dried out. Leaving them to air dry can take several days – to speed up the process wash them in warm water, dry them with a towel, and then bake them in an oven at 390 degrees Fahrenheit (200 degrees centigrade) for around an hour. Be sure to leave them to cool completely before crafting.
To create an ombre effect like the display above separate your pine cones into three or four different batches. Then, in a well-ventilated area and wearing a face mask, lay each batch out onto sheets of newspaper and spray with your chosen colored spray paint. Once dry, turn the pine cones and spray again so that all sides are covered. Once dry assemble your votives working from darkest tone to light.
7. Fill a dome with pine cones

This Christmas mantel idea is such a simple way to bring pine cone decorations into your living room, yet displaying them beneath a glass dome adds an extra element of specialness and glamor.
Fill a dome – or a glass jar – with pine cones, with battery-operated LED lights twisted through to add a touch of sparkle.
Place the dome among your mantel decorations, perhaps adding a second dome at the opposite end of the fireplace for a symmetrical touch.
8. Suspend pine branches
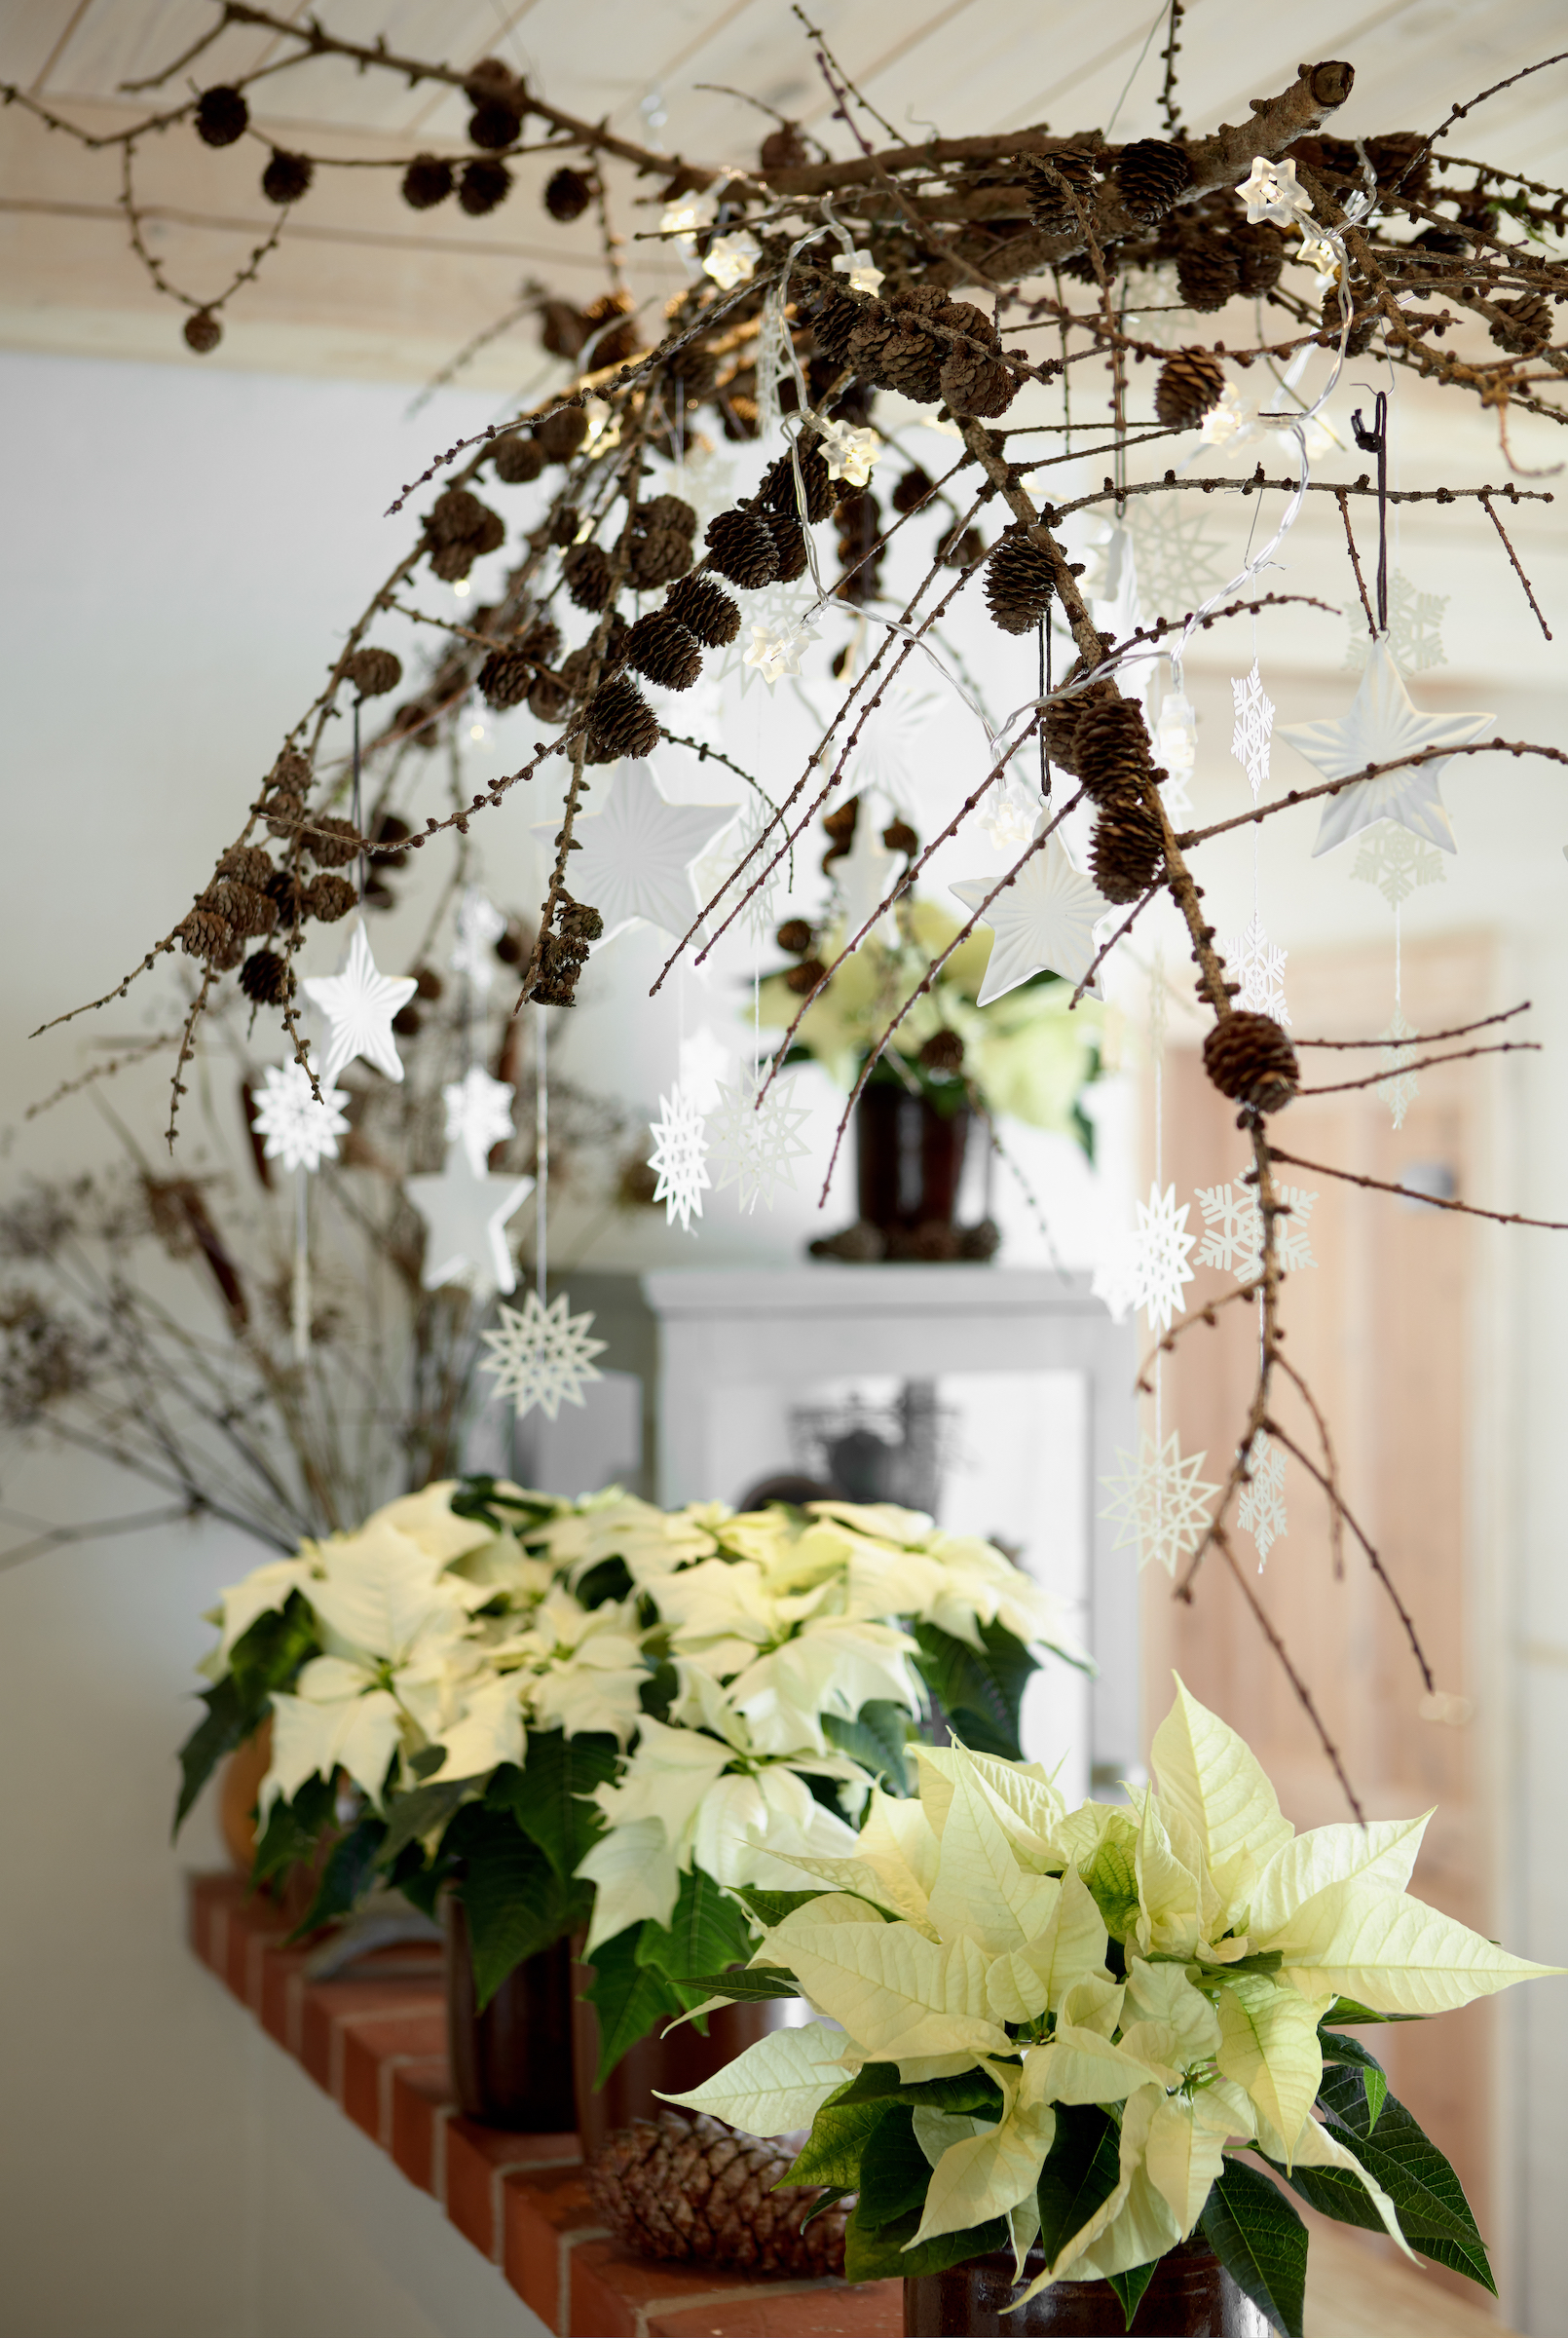
While leafy pine fronds studded with cones bring rich color and texture to festive trimmings, don't overlook the charms of bare branches with the pine cones clinging to their delicate form. They will bring a more contemporary touch to a natural pine cone decoration.
Hold your first branch in one hand, then gradually add more, arranging them so that they curve at each end of the display. Tie with twine to secure.
Create a second pine branch bundle, then tie the two together to create a cross shape. Suspend them above a dining table or in the recess of a bay window.
9. Make a frosted tablescape
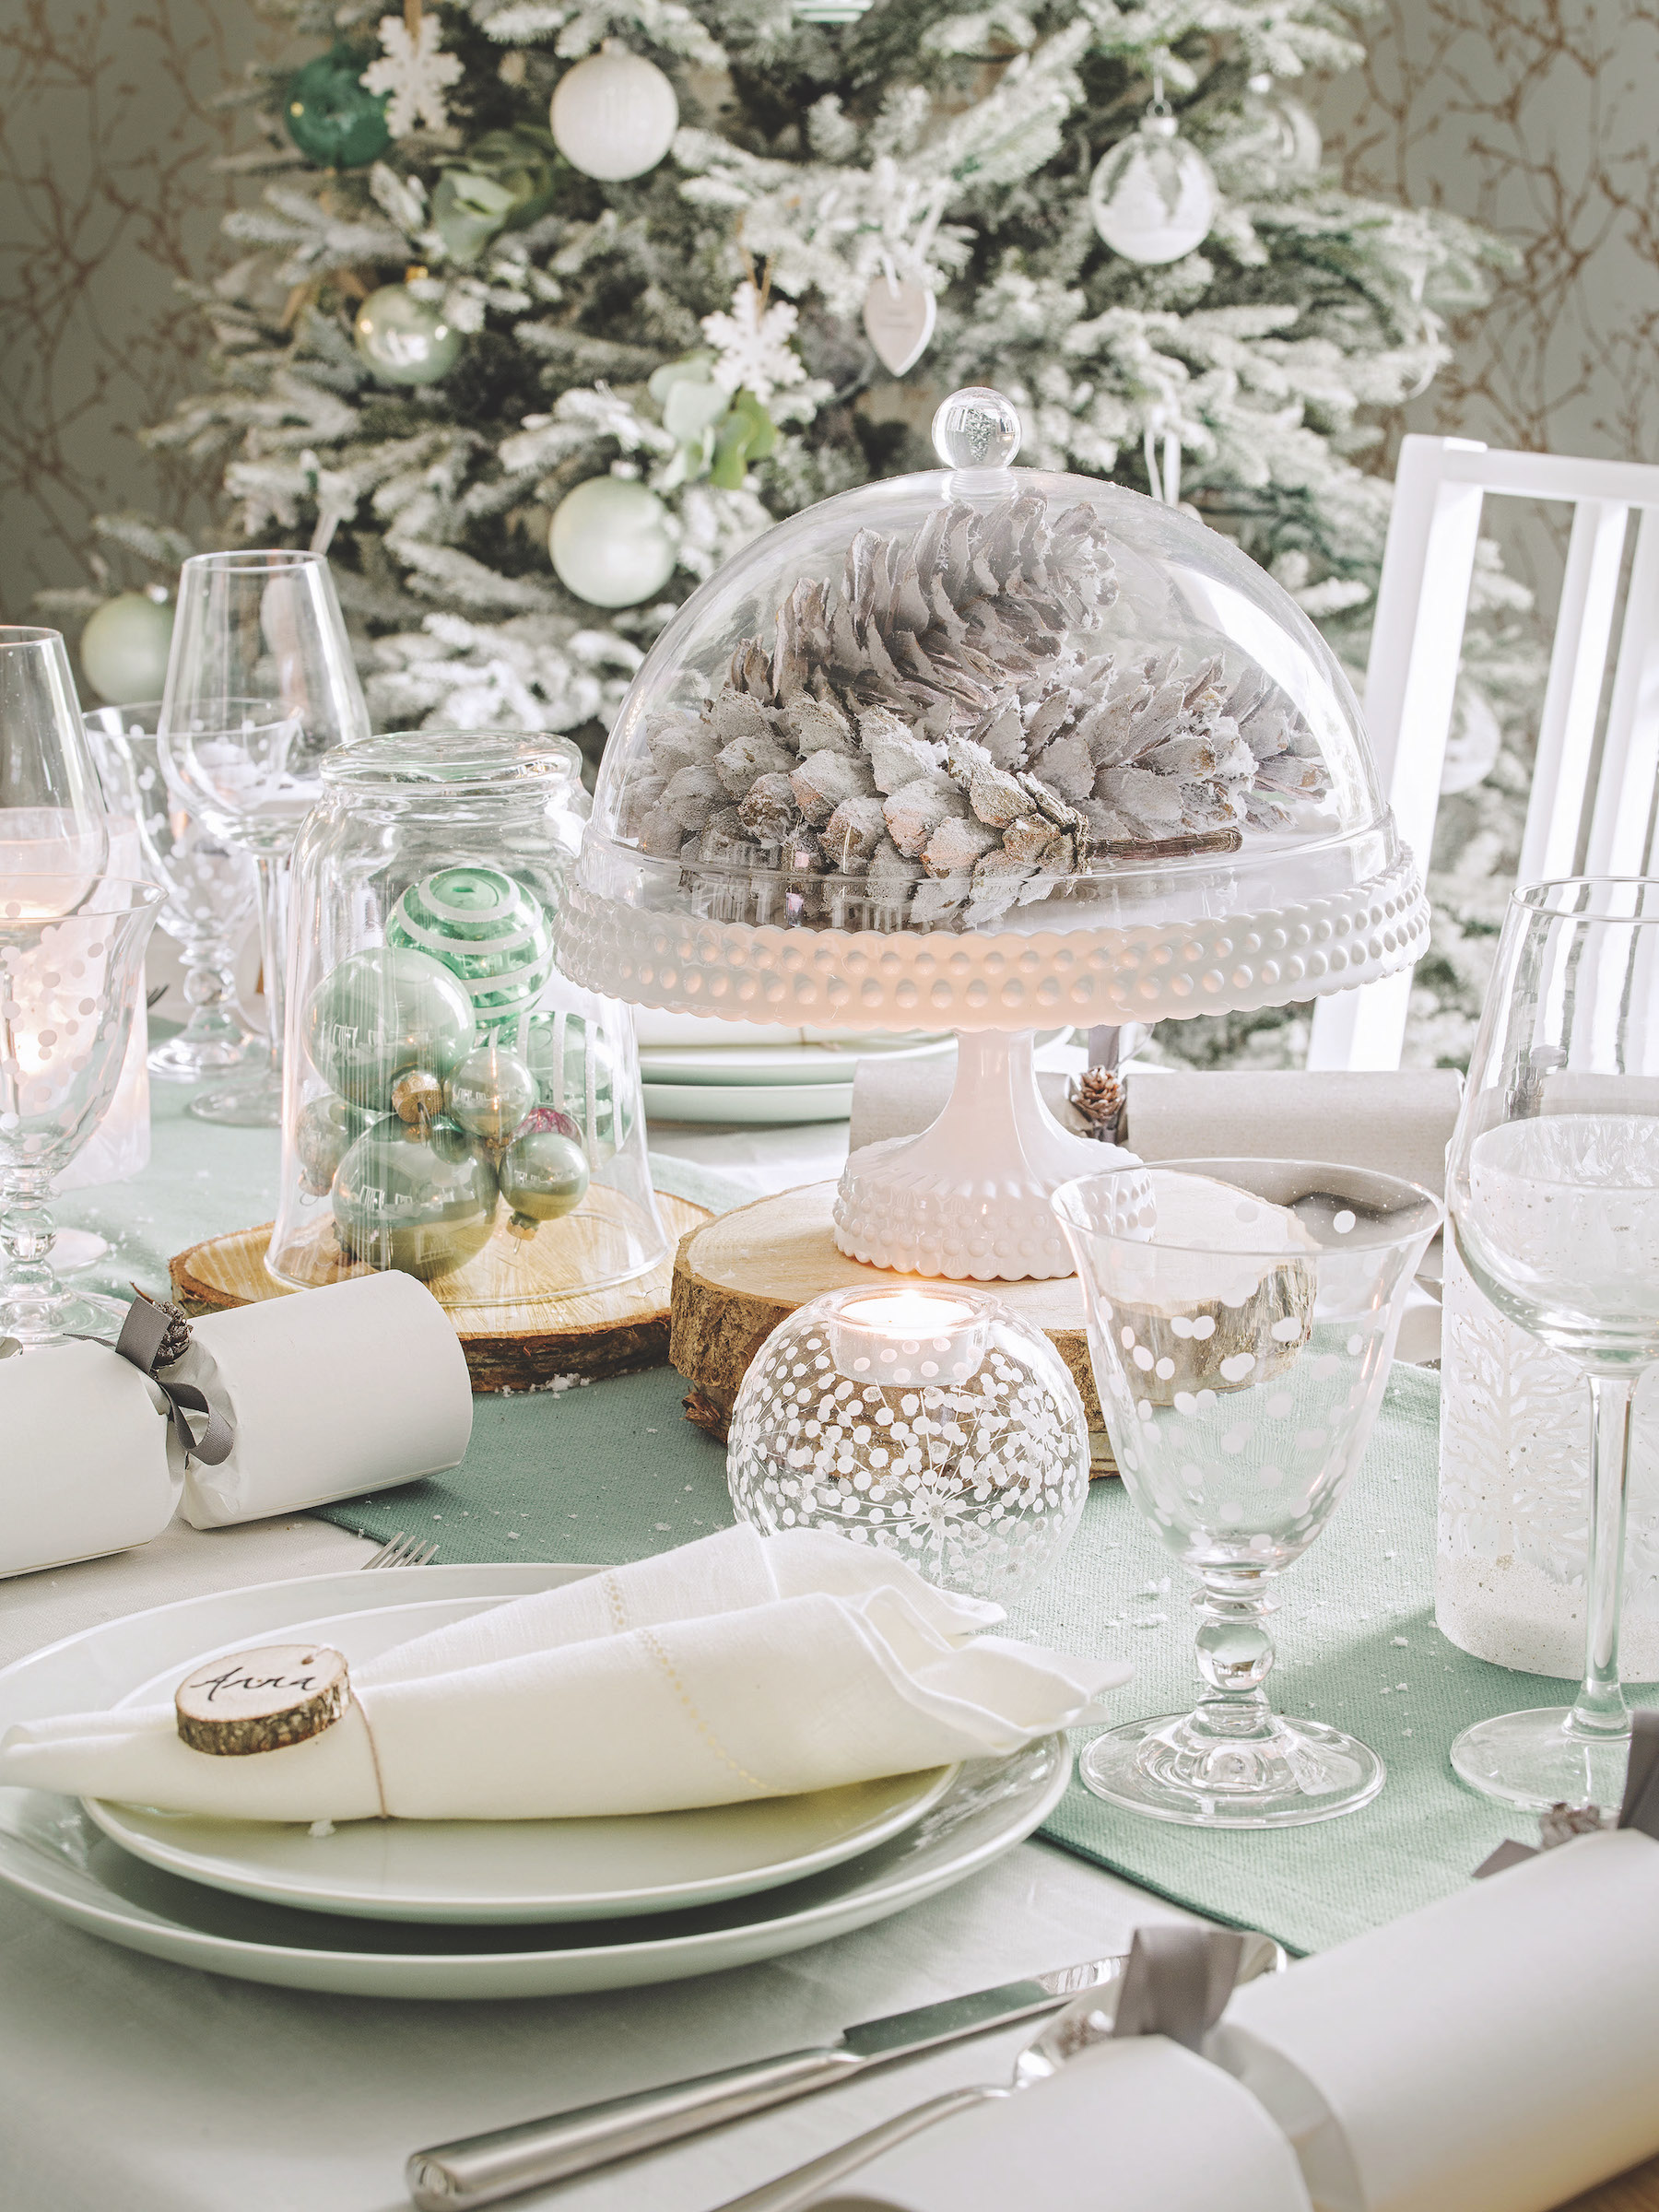
'Repurpose a domed cake stand and fill it with pine cones that you've painted or sprayed with white paint to create a magical centerpiece for your Christmas table ideas,' suggests Andréa Childs, Editor of Country Homes & Interiors magazine.
'A successful tablescape relies on having decorative pieces at different heights, so you could elevate your cake stand further by placing it on a wooden tree trunk disc.
'Repetition is also a trick stylists use to create flow and continuity in a scheme, so either place other cake stands along the table. Or complement your pine cone decorations with vases filled with baubles and even colorful candies.'
10. Craft a pine cone 'kissing ball'
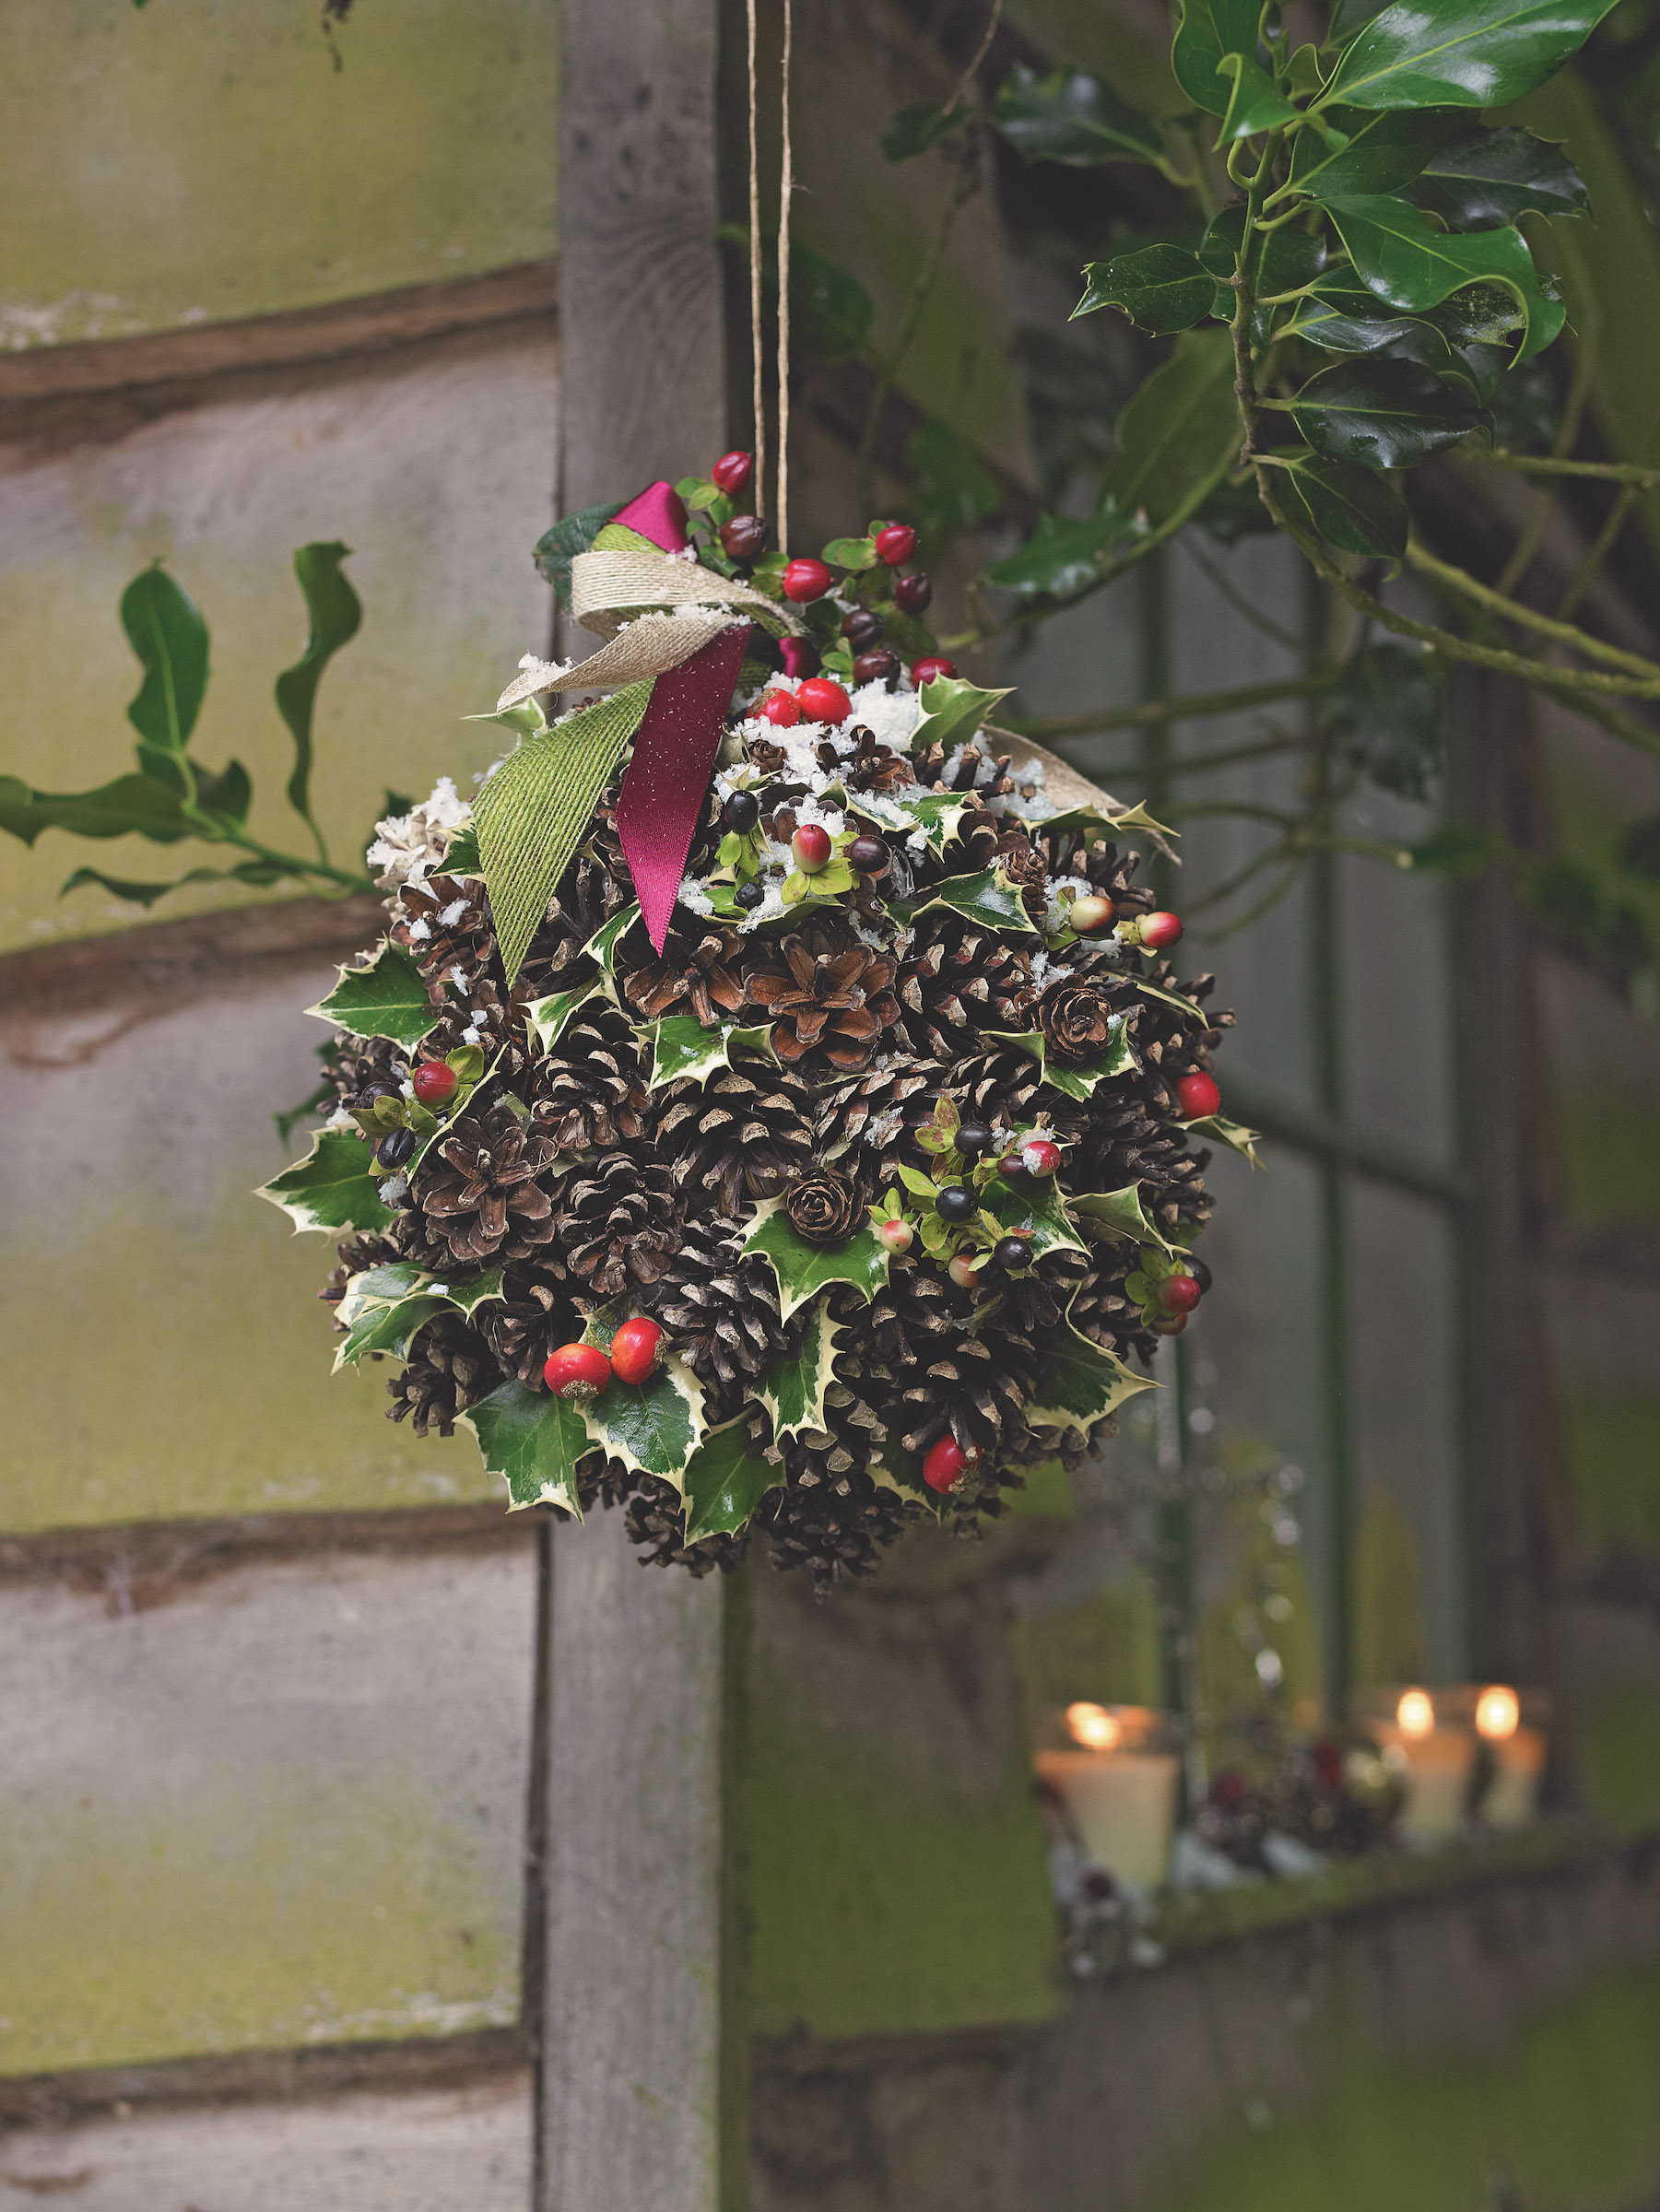
Originating from the tradition of hanging foliage – not just mistletoe – above the door to welcome guests, this is a pretty reinvention for your Christmas pine cone craft ideas.
Push a thick piece of wire through the center of a large polystyrene ball. Bend the wire to form a loop at each end, trimming with wire cutters.
Using a hot glue gun, attach the pine cones around the ball. Spread the glue between the pine cones so they stick to each other, as well as the ball, for stability.
Cover any gaps with berries or foliage, gluing them into place.
Attach twine or a length of ribbon through the top metal loop, then suspend your kissing ball above the doorway.
11. Make a pine cone and poinsettia candelabra
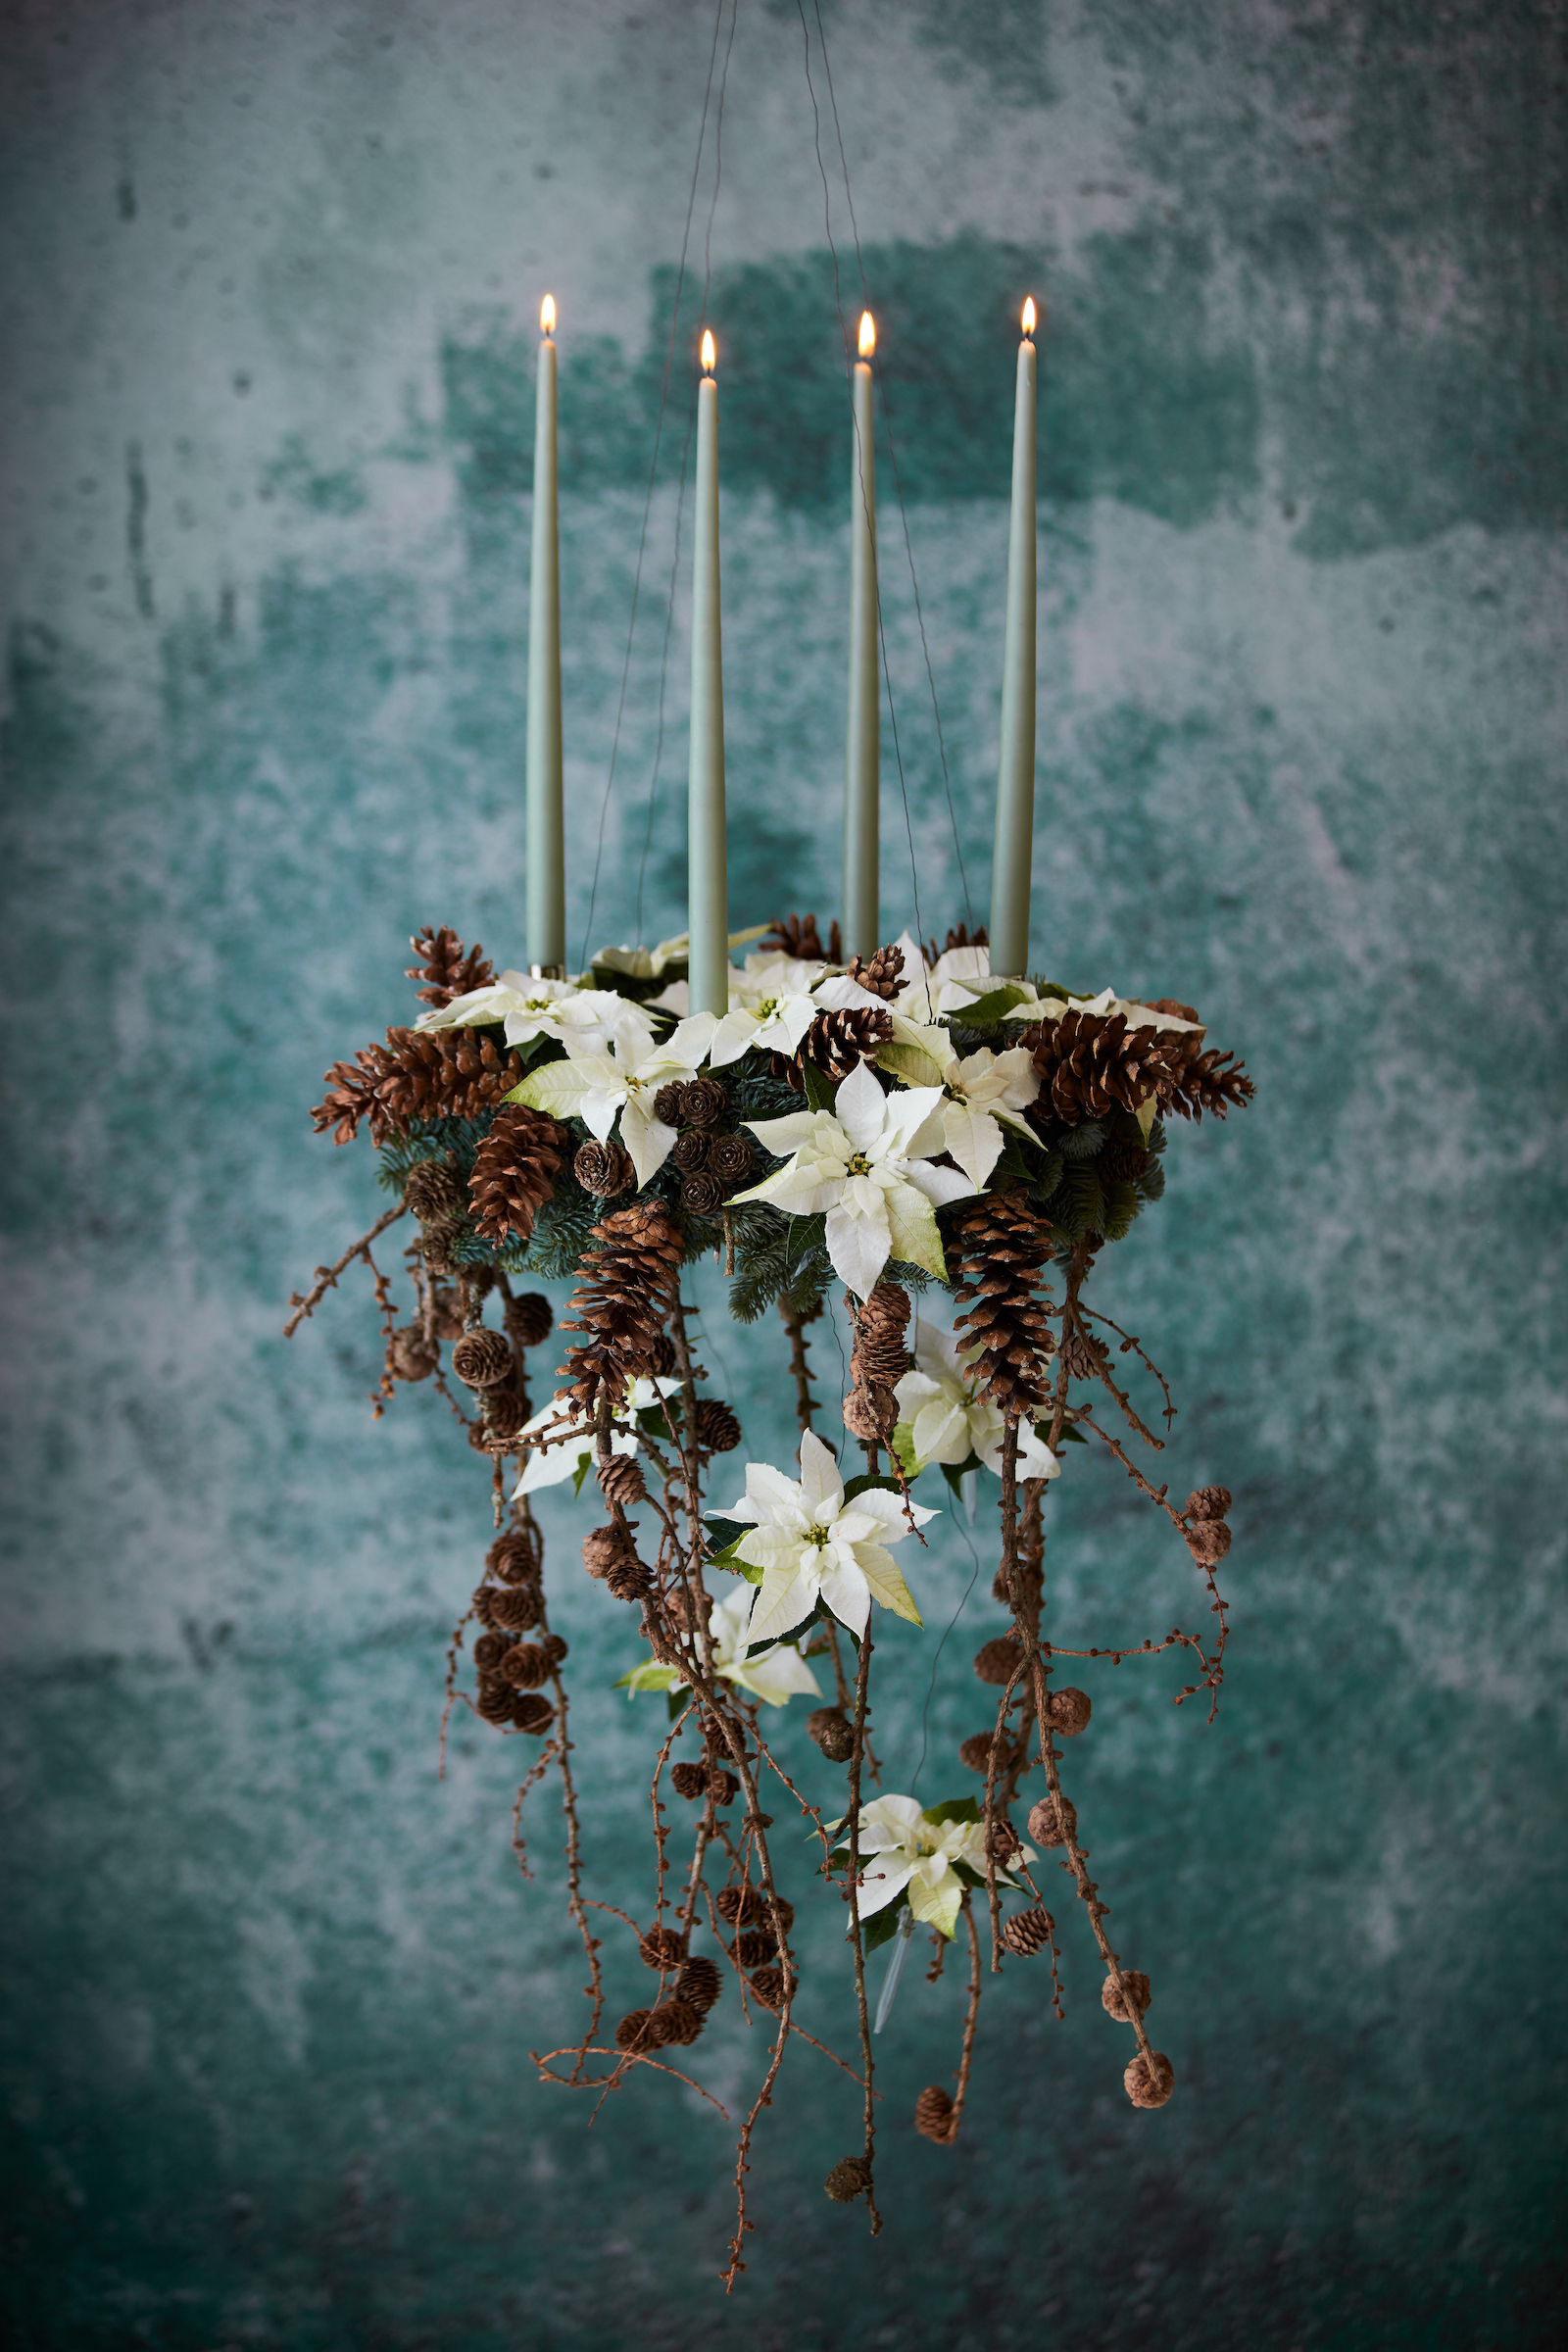
This eye-catching display is beautiful but easy to make yourself. And the pairing of rustic pine cone decorations with elegant white poinsettia is beautiful. It's also an interesting way to rethink your design when you're making a poinsettia wreath.
The base is a Nobilis fir wreath with four candleholders and candles fixed on top.
Cones, hanging larch twigs and cut poinsettias are all wired onto the wreath – the cut flowers can be replaced as they begin to wilt.
Extra poinsettias are attached in flower tubes filled with water.
12. Style a magnificent entrance
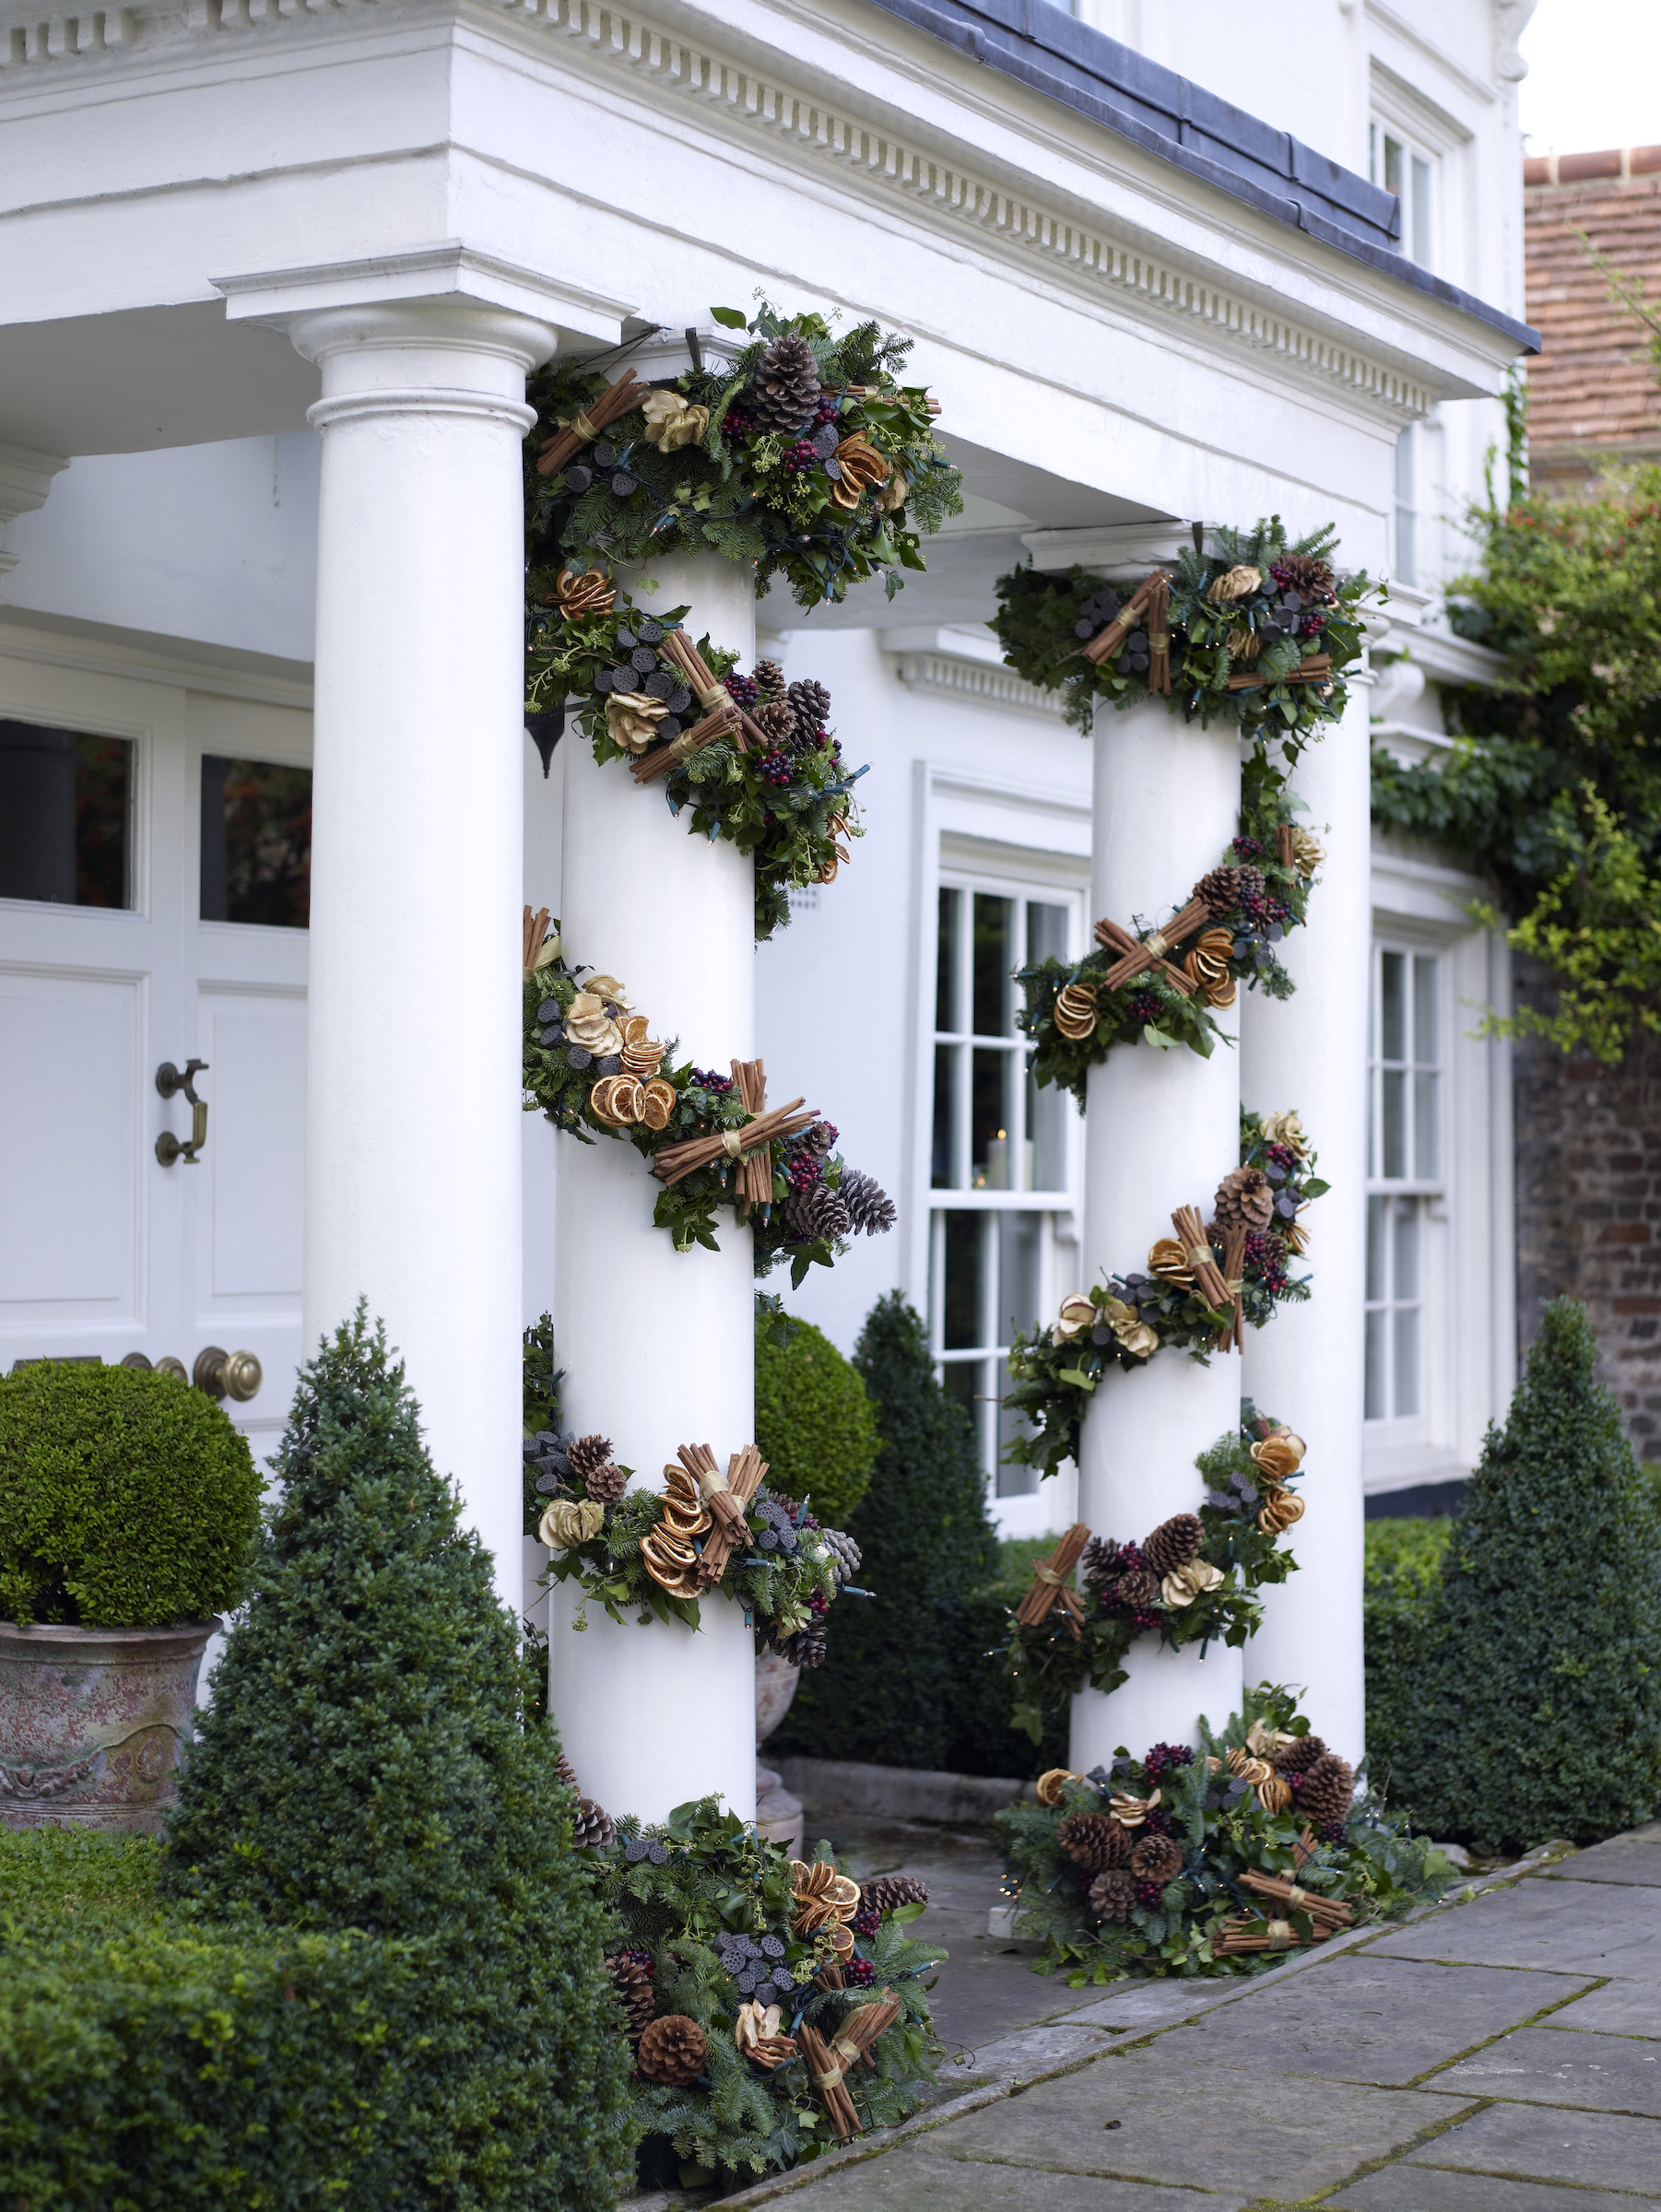
Looking for festive front porch ideas? Wrap pine cone-studded garlands, made from real or faux branches, around your porch pillars and take your Christmas door decorating to next-level fabulous.
'Lush green pine branches enhance the beauty of your door and spell out Christmas,' agrees Anas Awais, co-owner of Viapu.
The size of your garlands should suit the scale of your entrance, so don't skimp with skinny trimmings if your porch is on the large side.
Twining two garlands around each other will create thicker decorative bands. Wire pine cones dried orange slices and berries into the garlands for additional interest.
Finish your pillars with a collar of garland at the top and bottom of each column.
13. Mix up a pine cone pot pourri
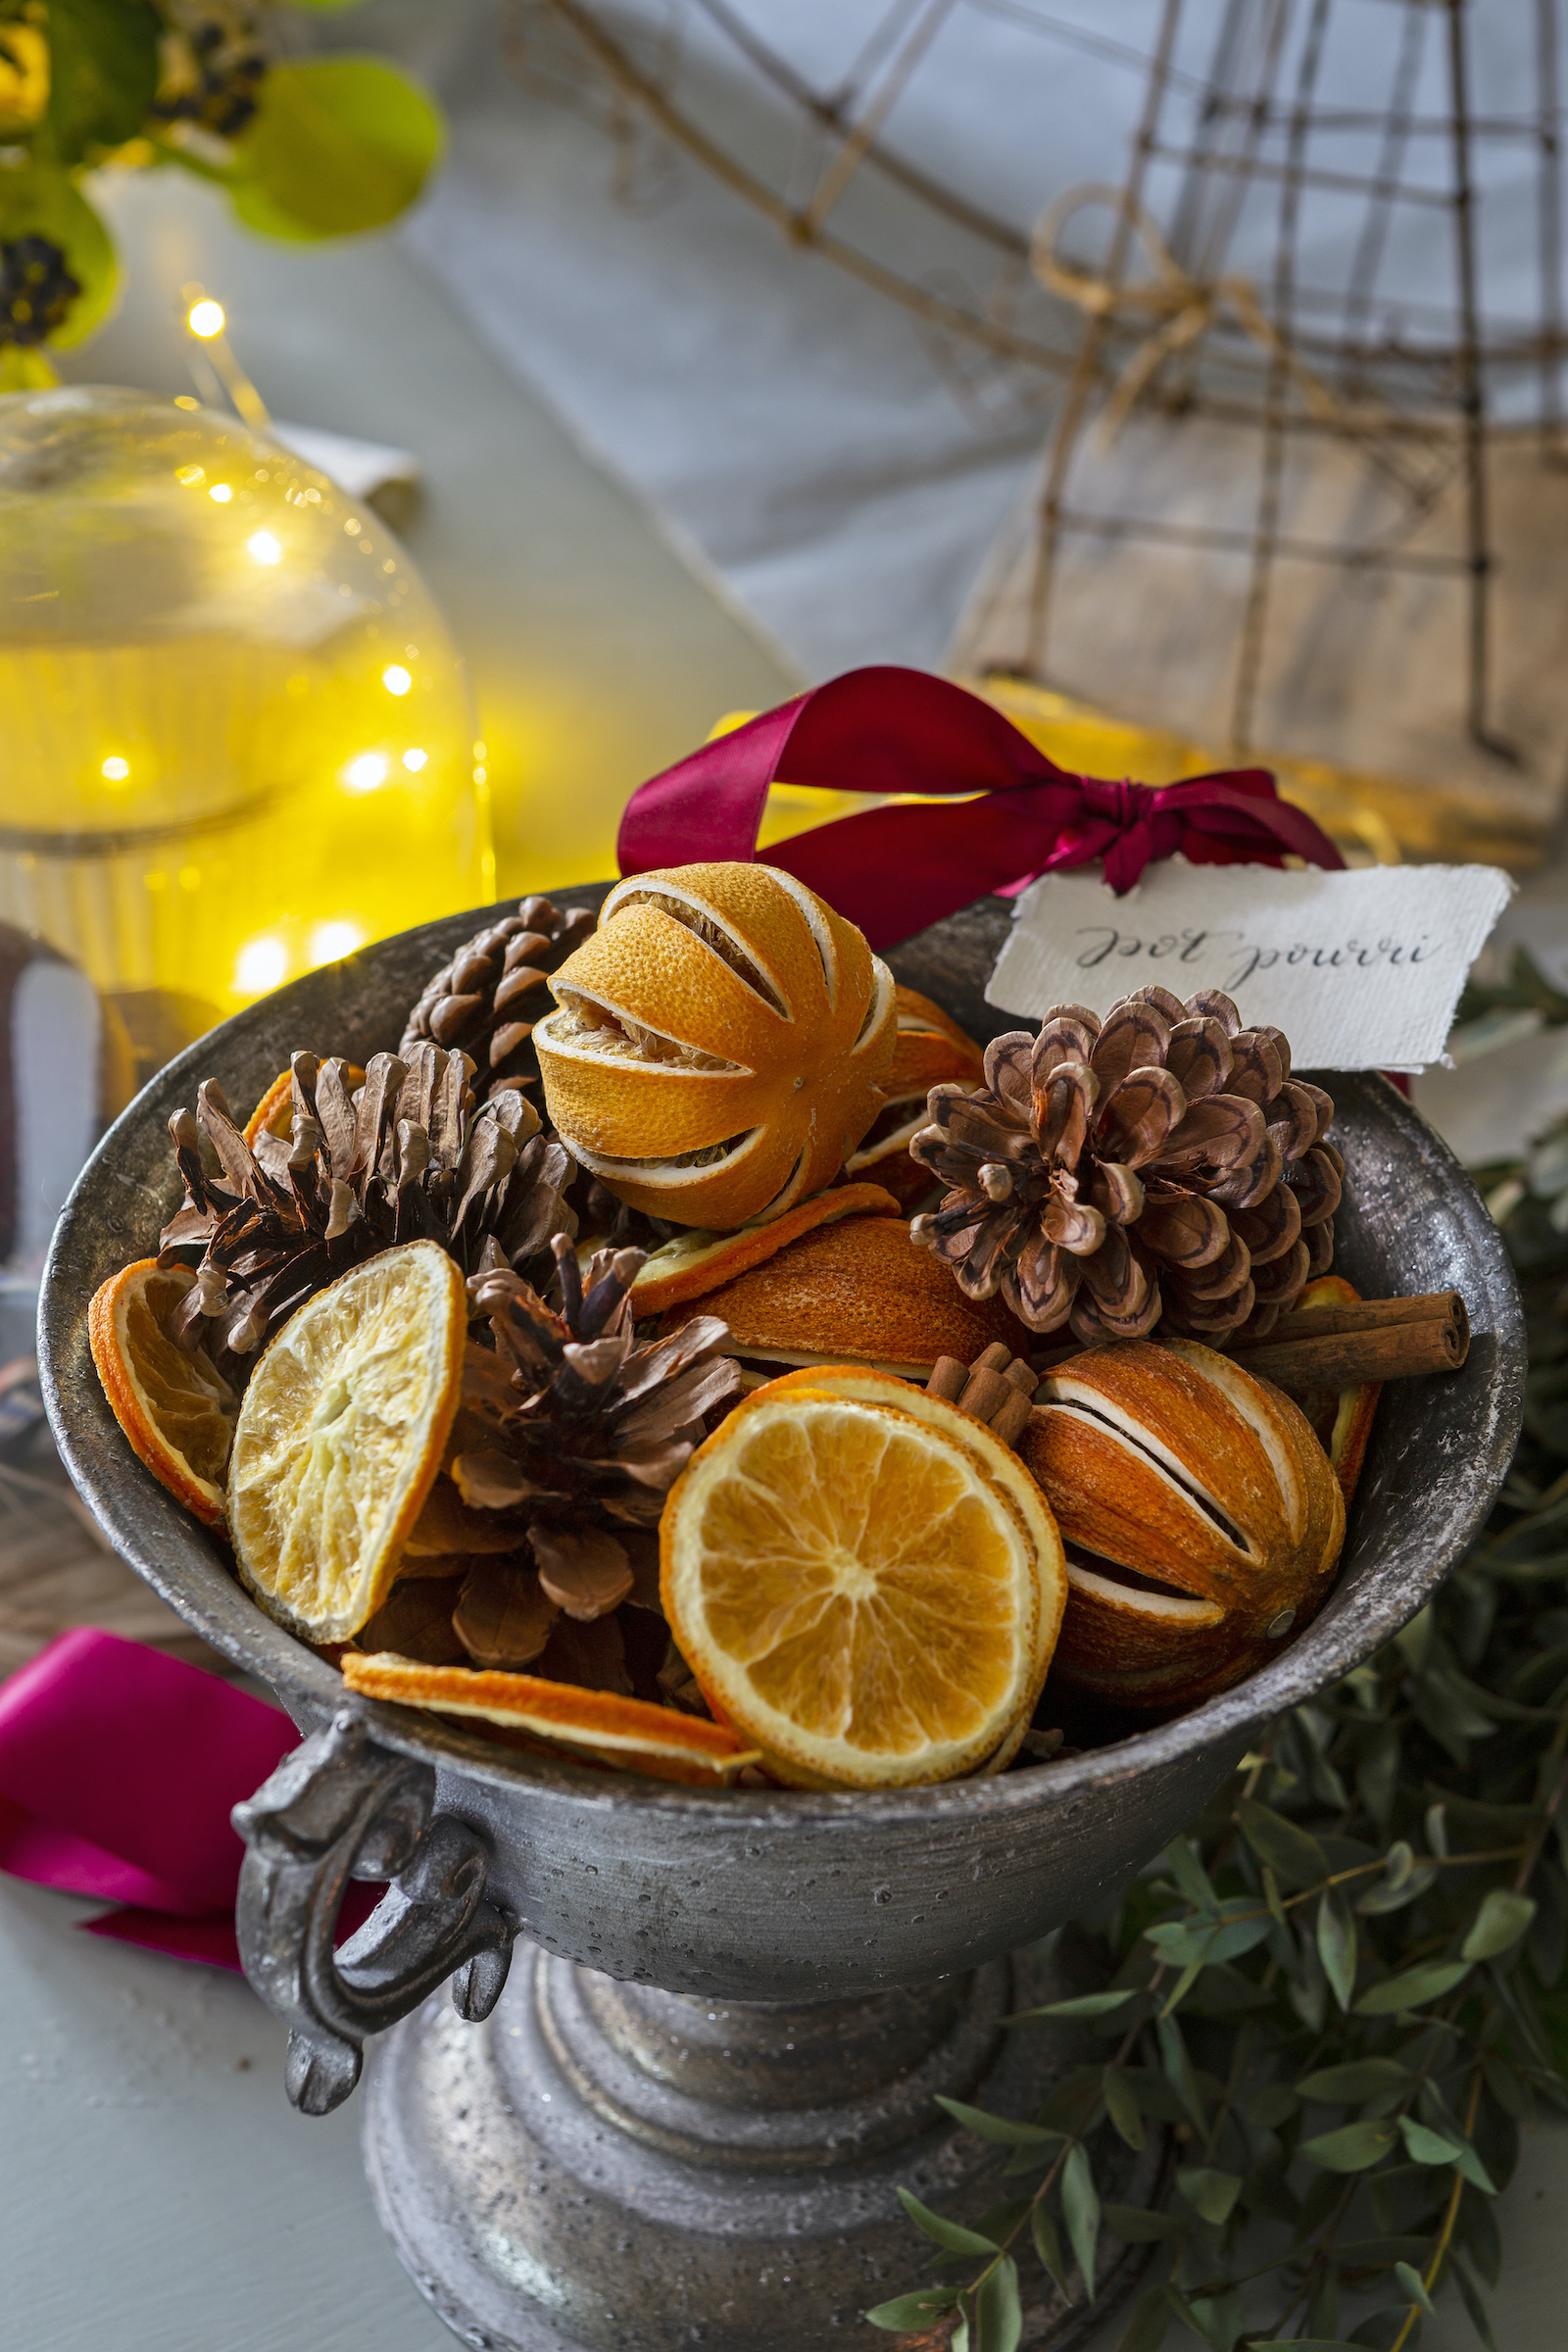
Your Christmas pine cone craft ideas don't have to involve hot glue, wire, and twine! This fragrant potpourri is an easy mix of festive favorites, with a shelf life that lasts well into winter.
'Fill a bowl or basket with pine cones, scented with drops of cinnamon oil, and add a few clove-studded oranges or dried fruit slices,' suggests Judith Blacklock.
14. Trim your tree with pine cones
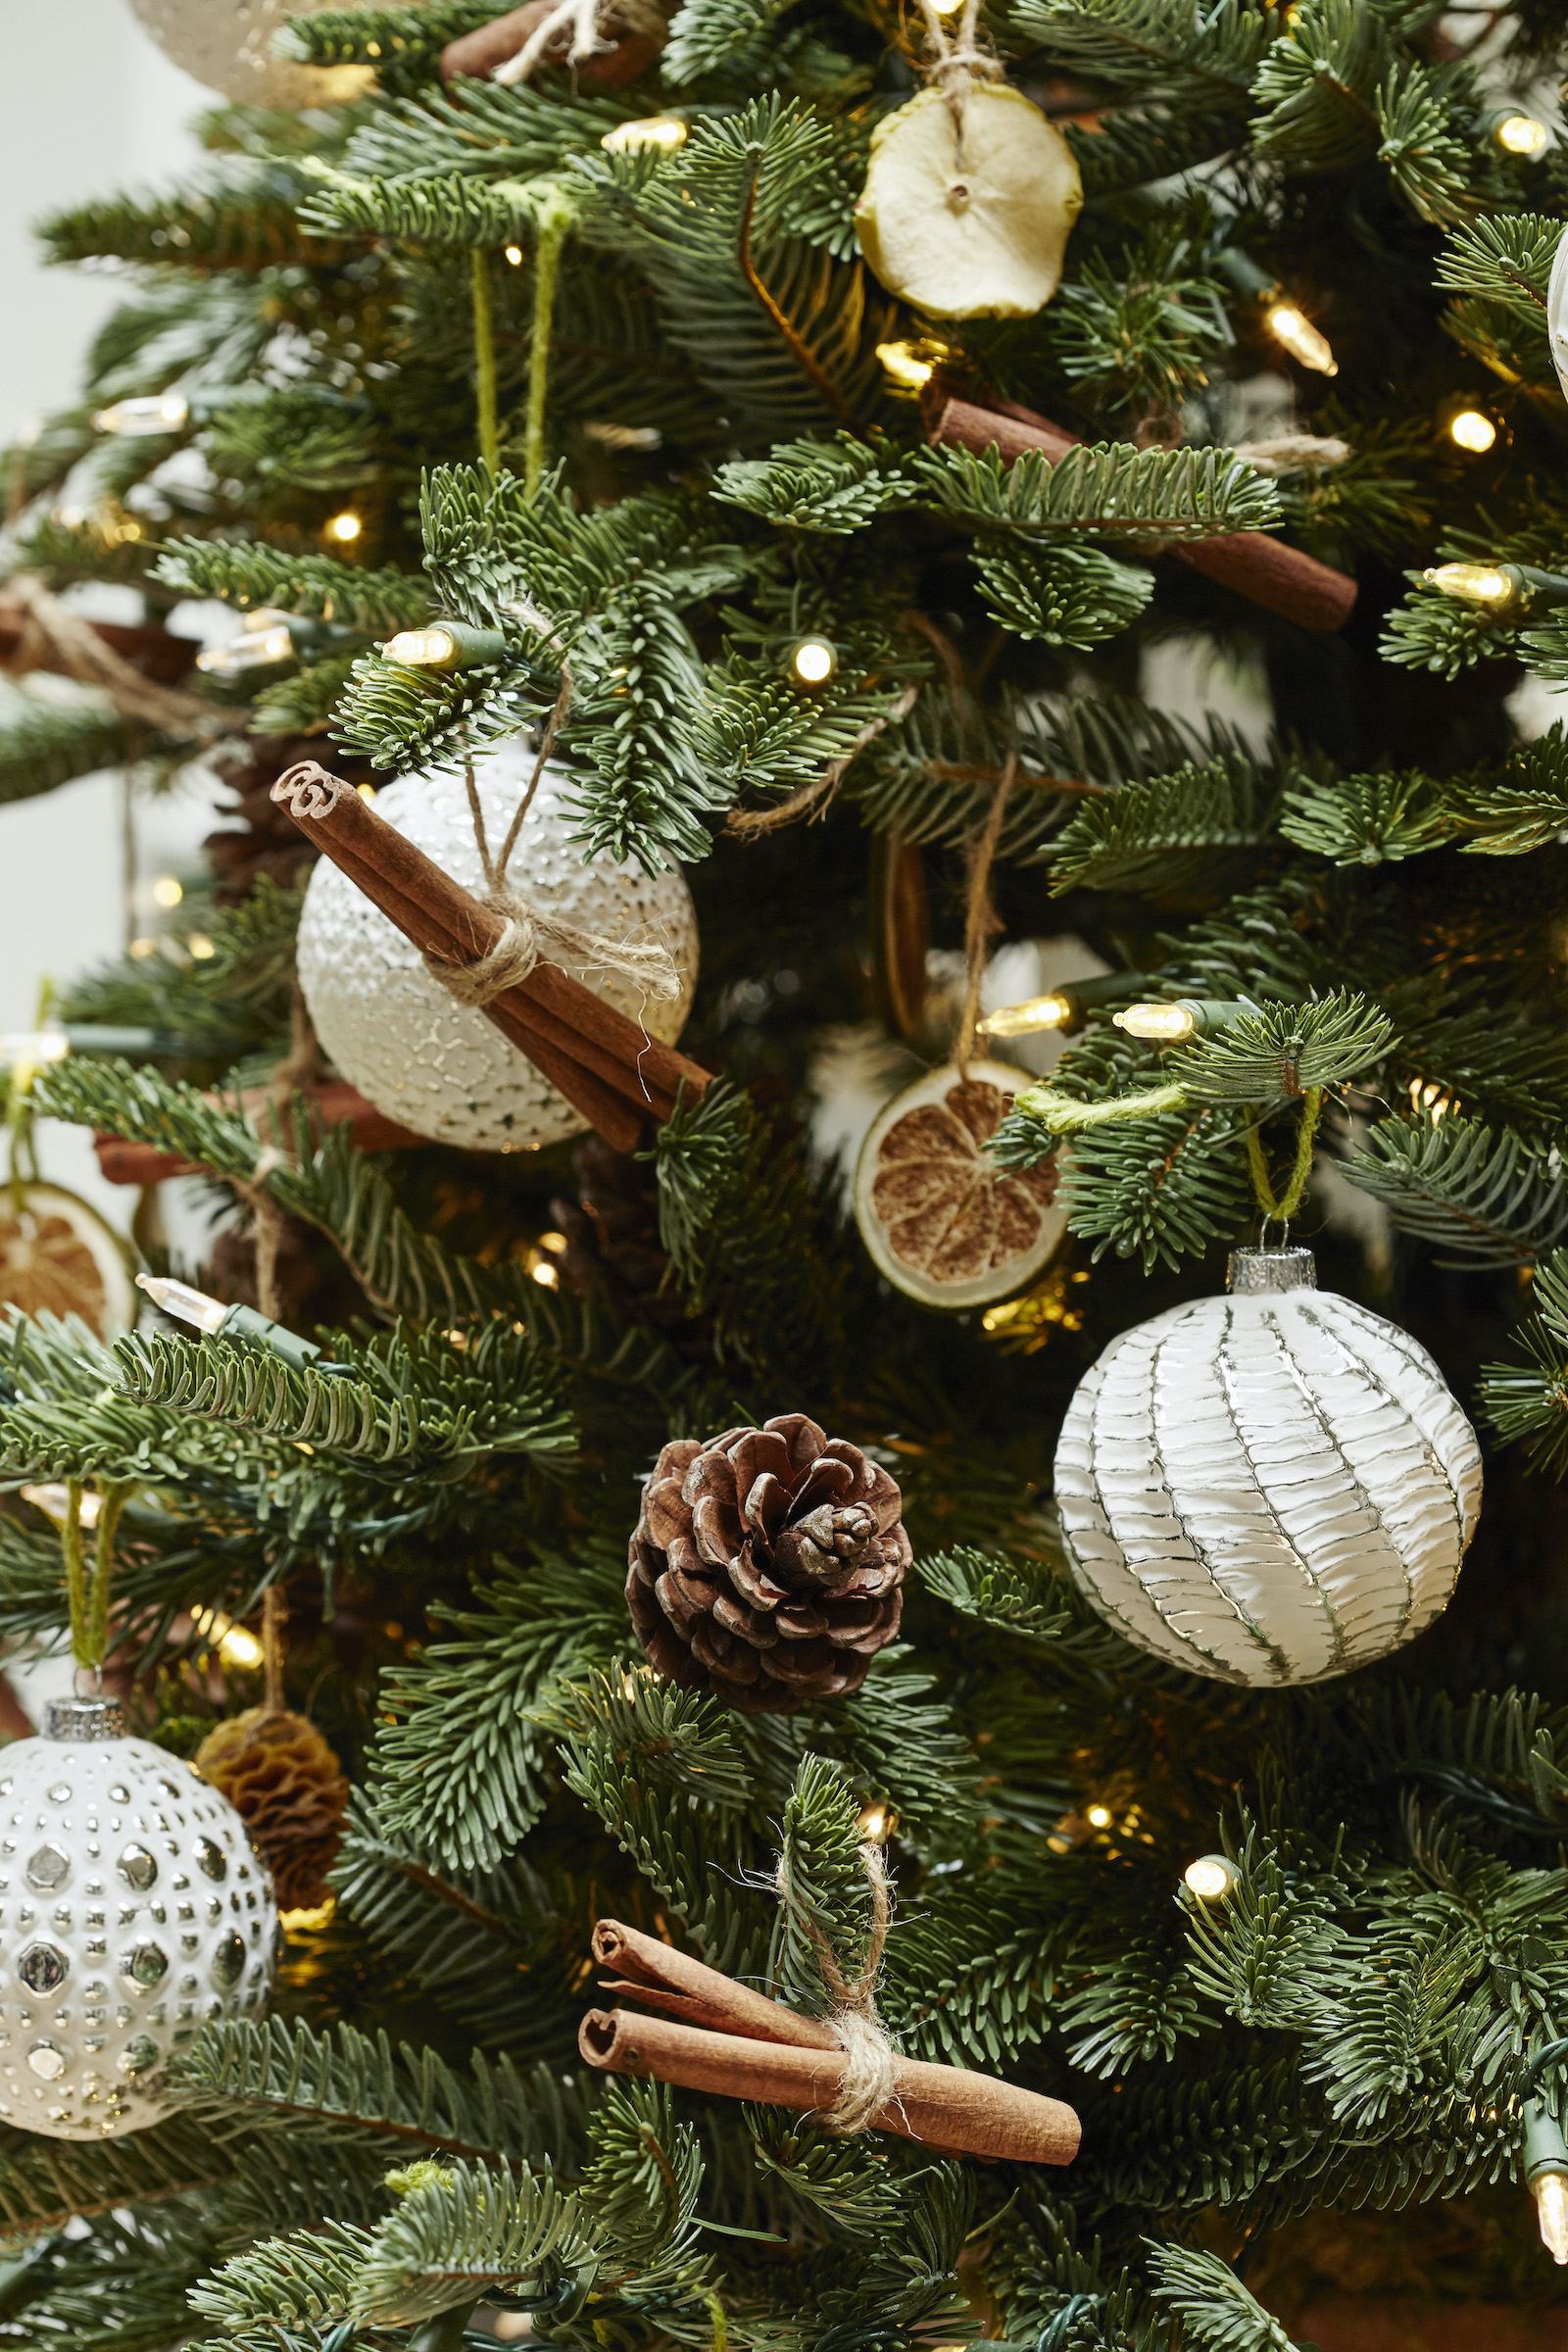
Bring a rustic touch to your Christmas tree ideas by mixing in homemade natural pine cone decorations with your bought baubles. Dried orange and apple slices, miniature bundles of cinnamon sticks – and pine cones – will all add scent and color.
The easiest way to attach pine cones is to wrap a piece of florist's wire between the scales of the cone, encircling the base. Twist one of end wires around the trailing piece to secure it.
Then simply twist the other end of the wire around a tree branch to fix your pine cone in place.
15. Decorate your pine cones
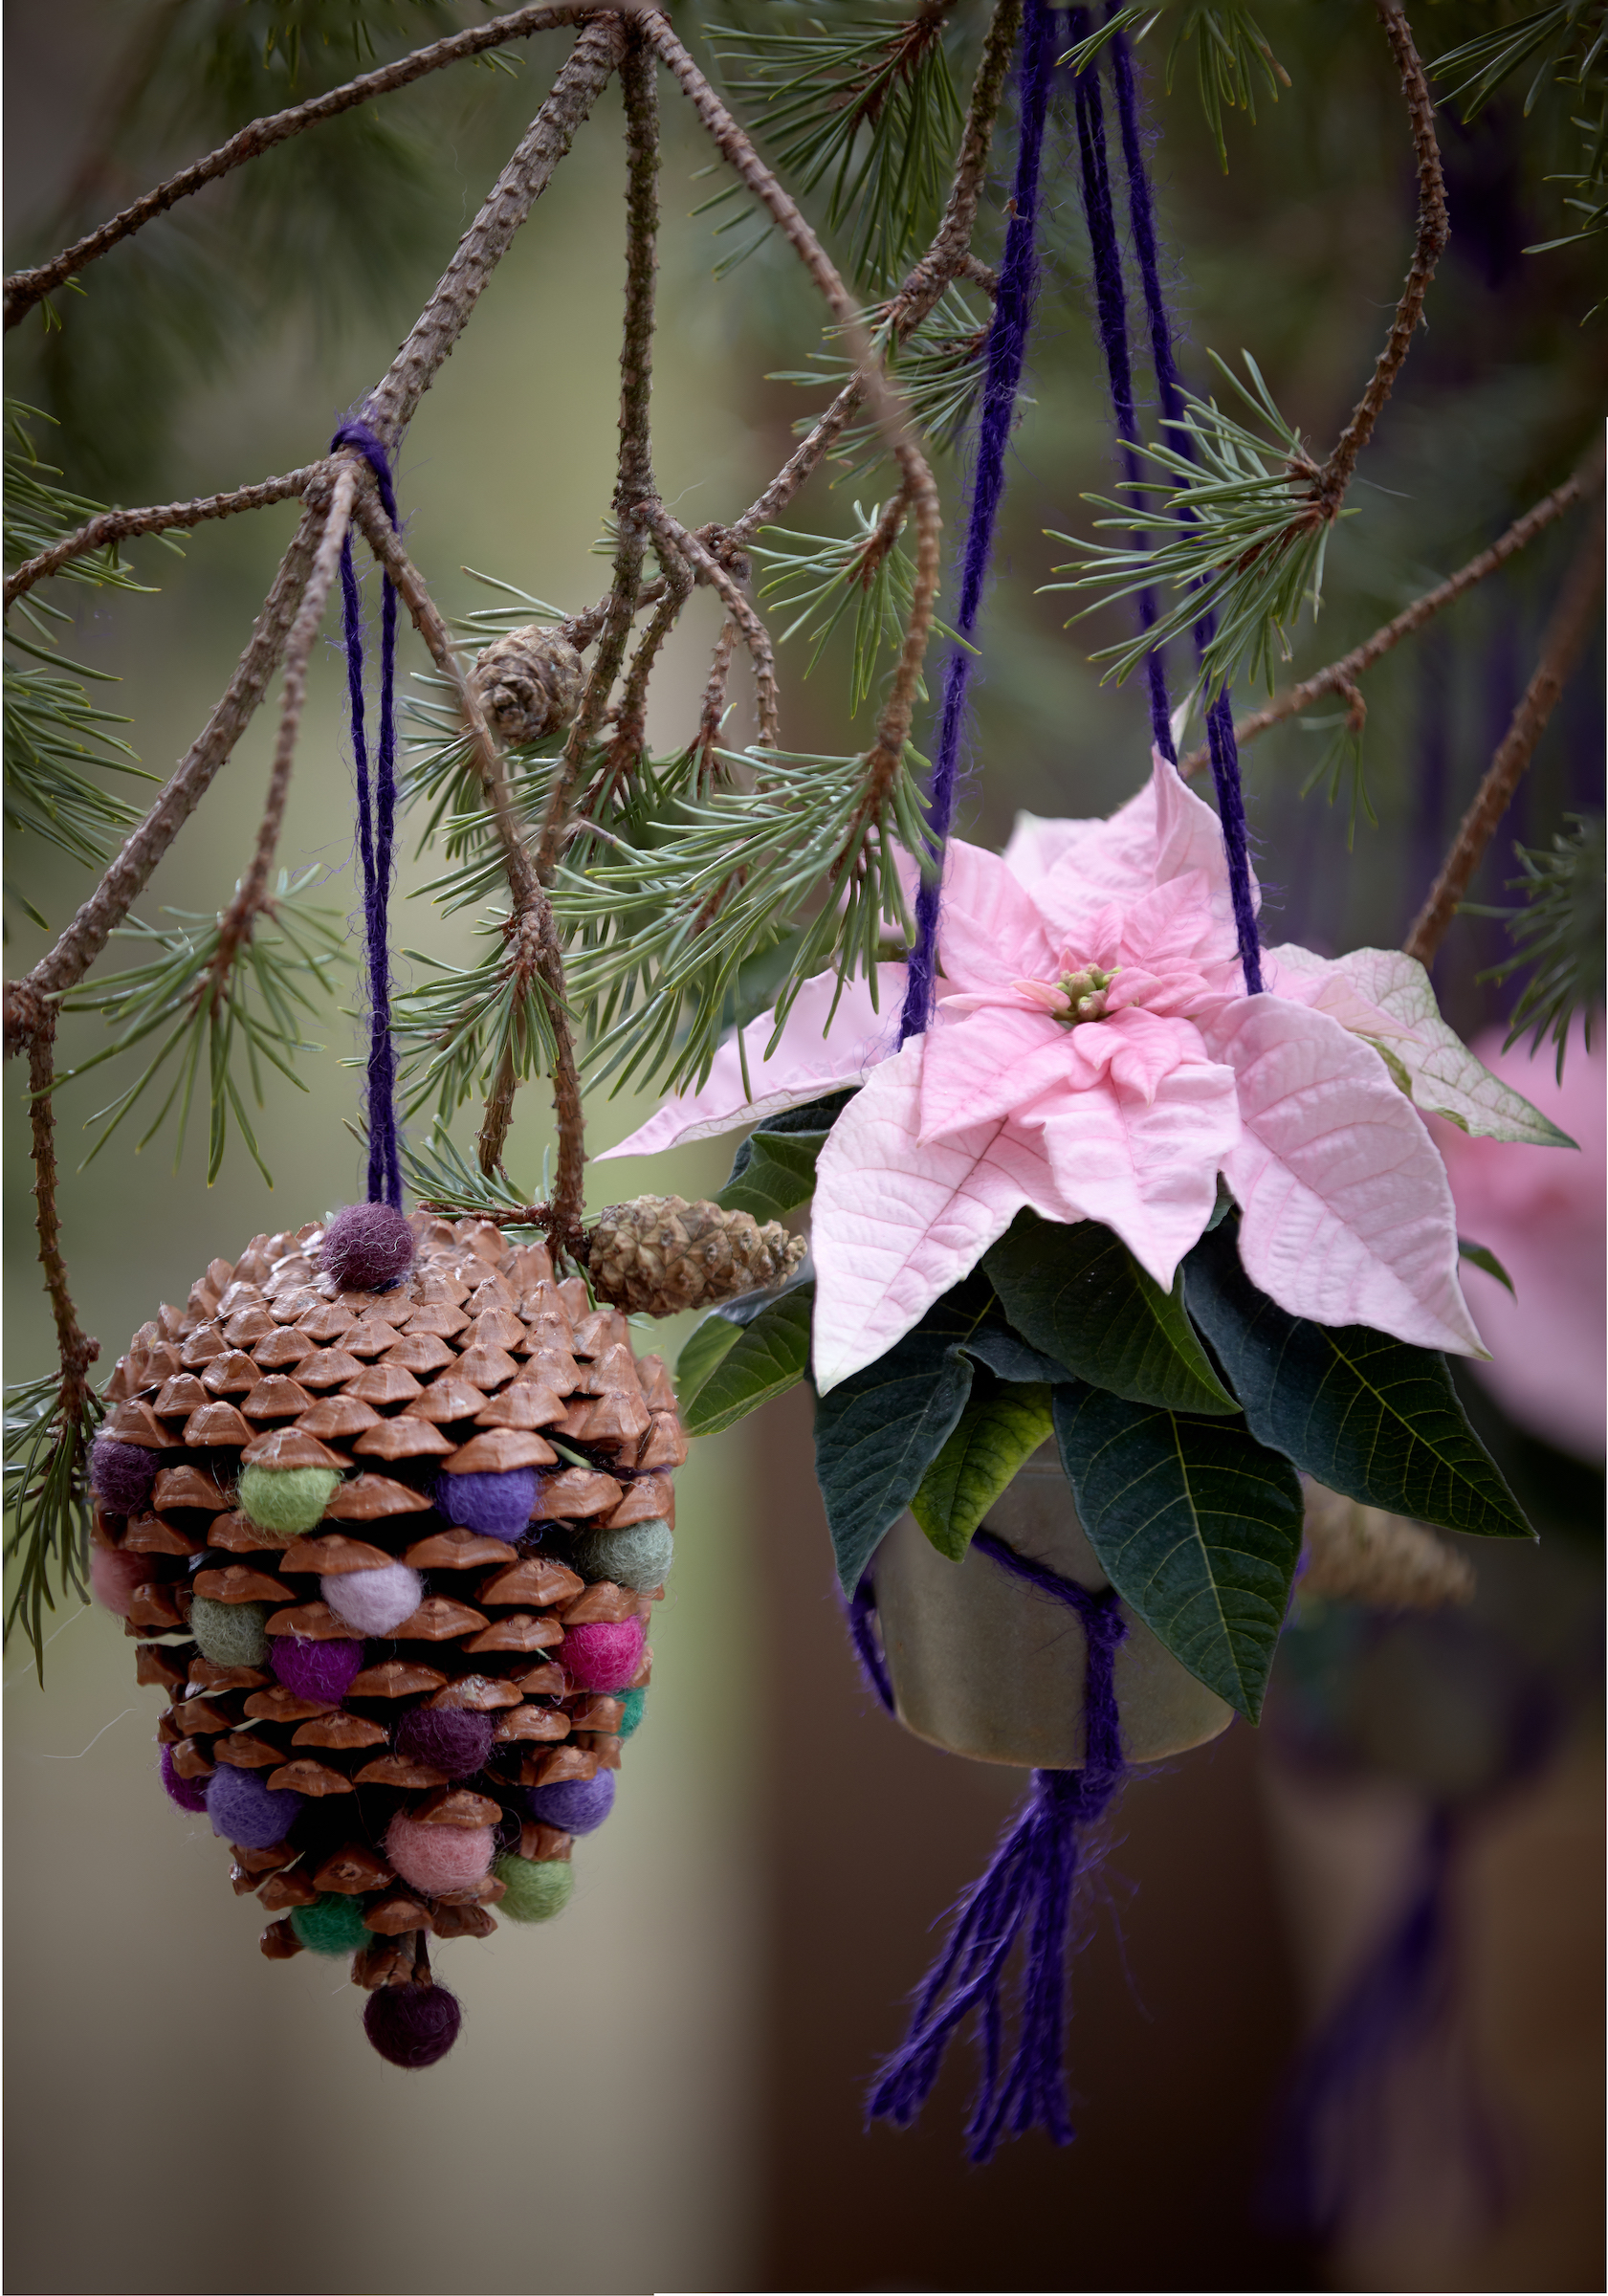
This simplest of Christmas pine cone craft ideas is one that children will love to try.
Using a hot glue gun, place a dot of glue between the open scales of the pine cone. Push in a small felt ball and hold it in place into secured.
Continue around the pine cone, adding felt balls at intervals.
Use hot glue to attach a loop of wool to the top of the pine cone, ready to hang the pine cone decoration.
16. Wrap your baluster with pine fronds
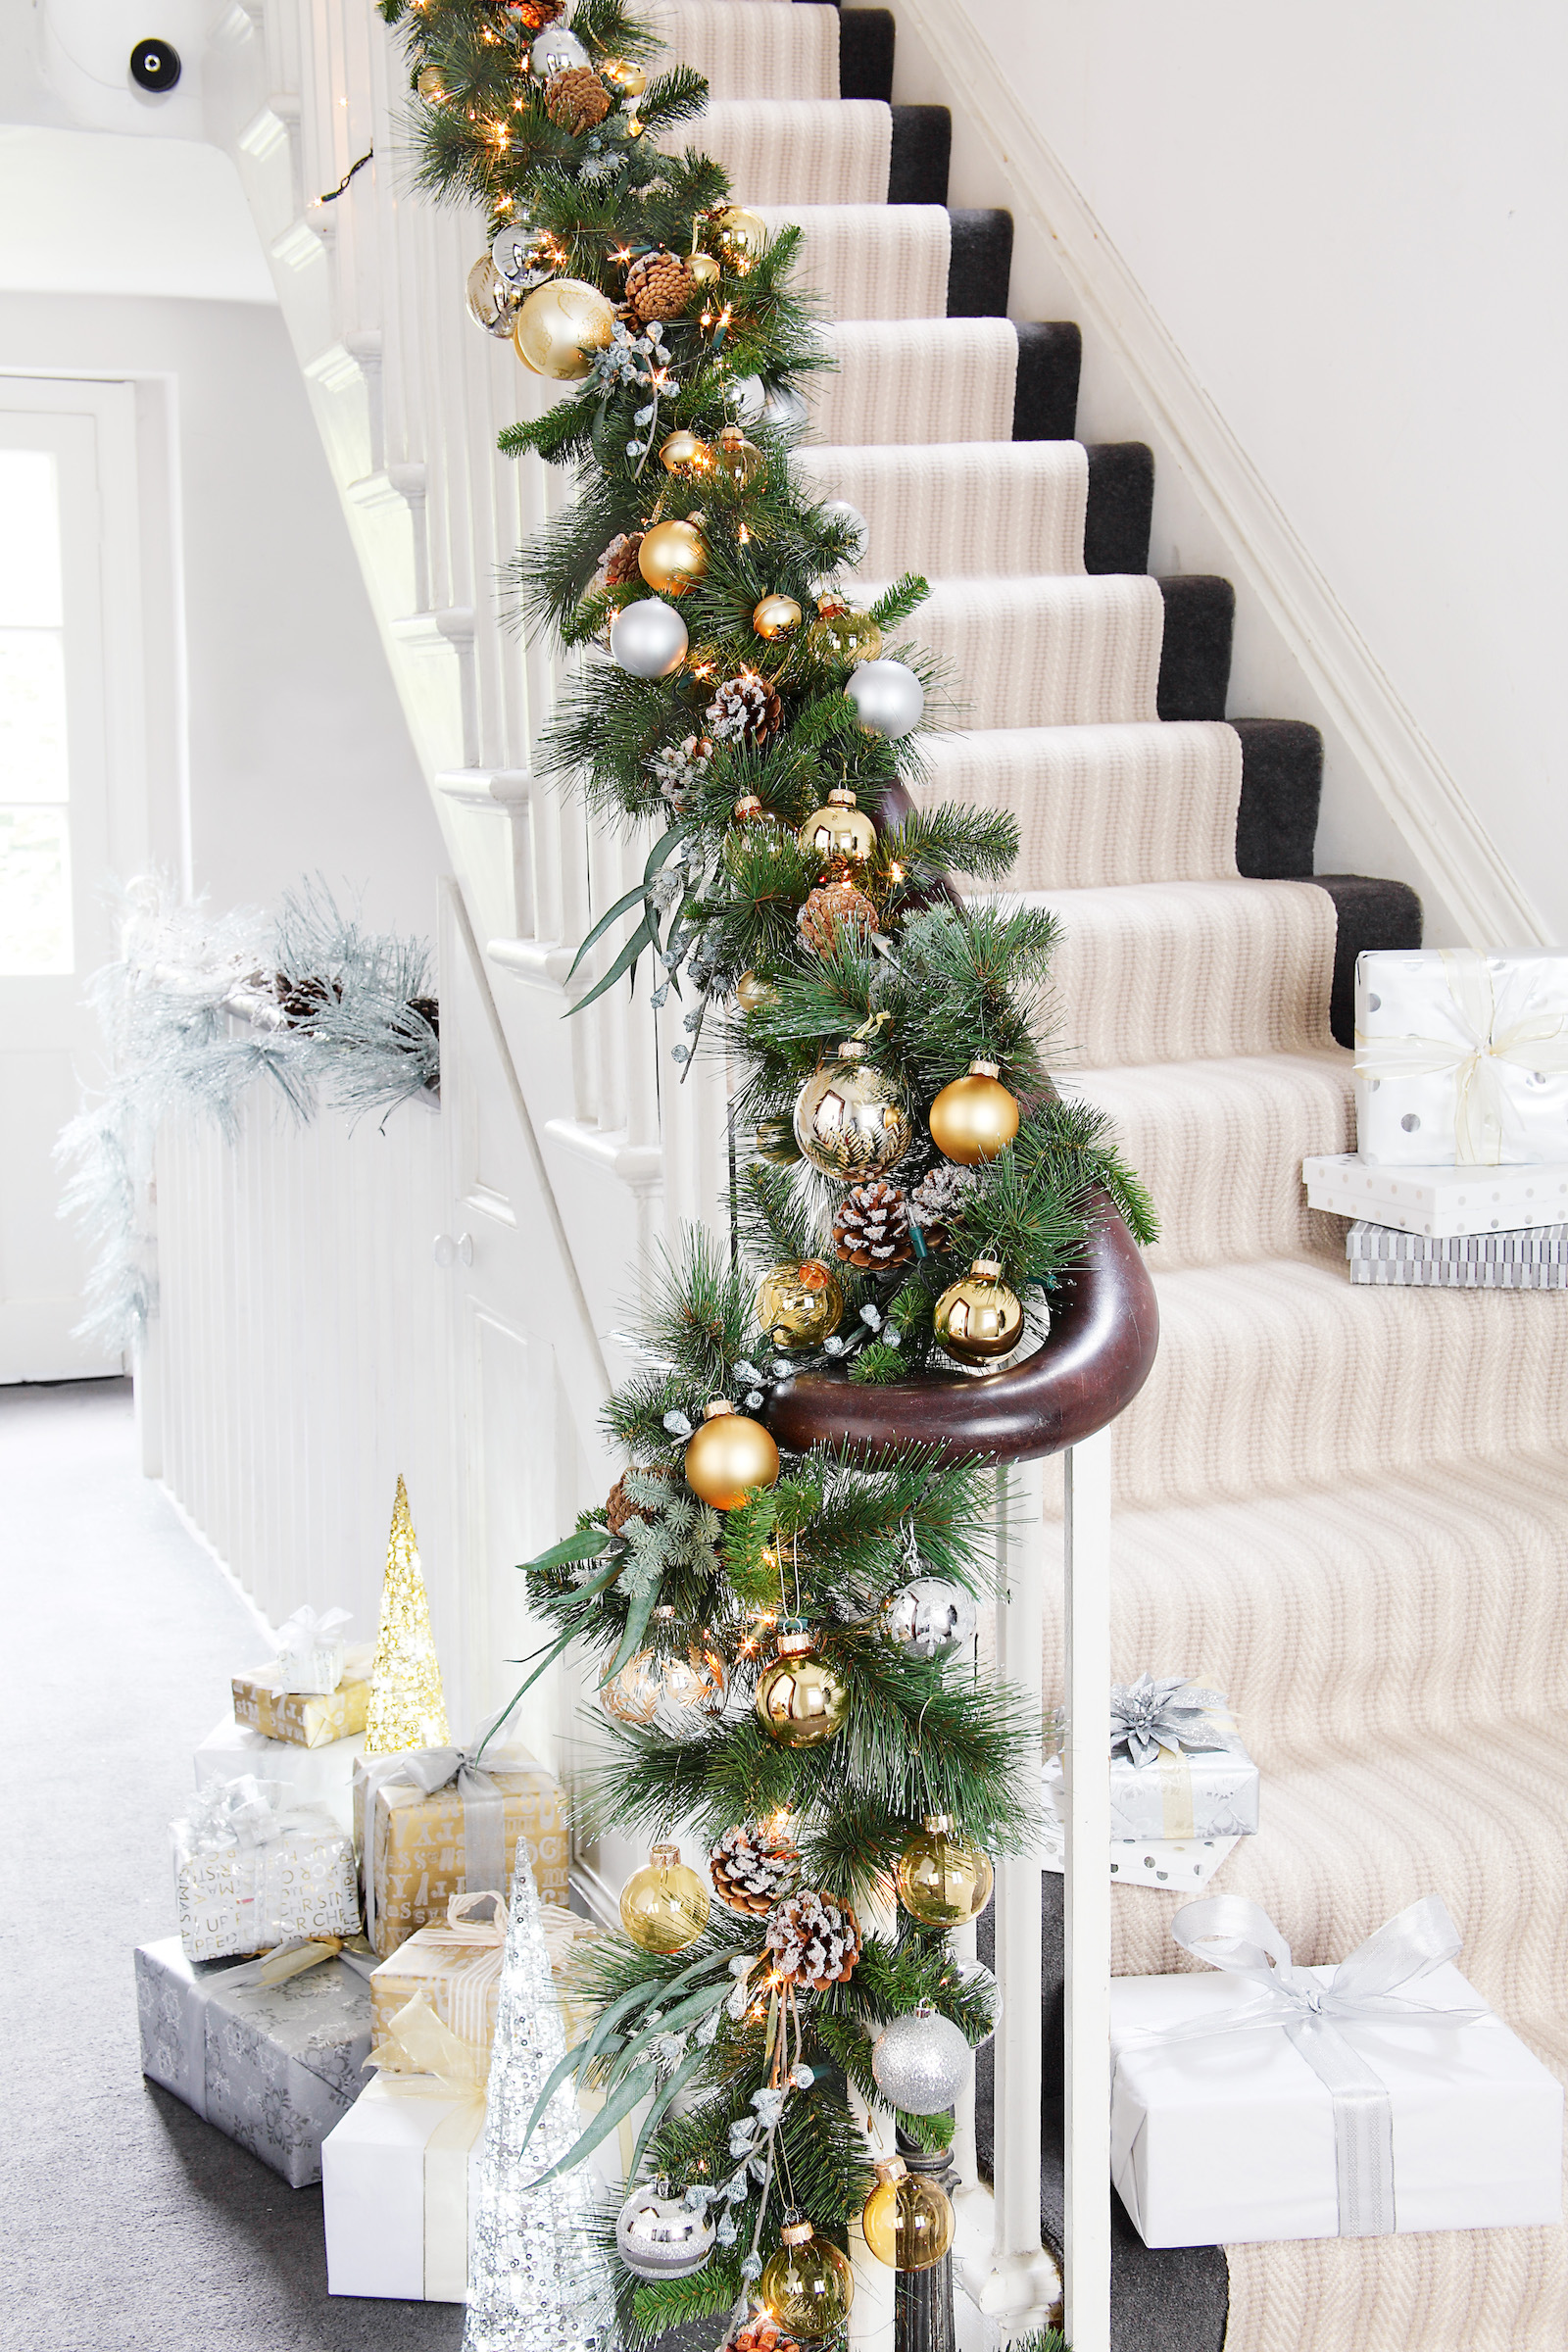
Make a Christmas garland for a staircase by wrapping fresh or faux foliage around your baluster, then decorating it with pine cones, baubles, ribbons and lights.
Start by attaching your greenery, fixing bundles in place with twine. Overlay the greenery so you can't see where it is attached to the baluster.
Next, wrap a length of fairy lights through the spindles and around the pine fronds.
Finish by wiring pine cones to the pine fronds, and tying on baubles, ribbons and any other decorations.
17. Make a snowy white wreath
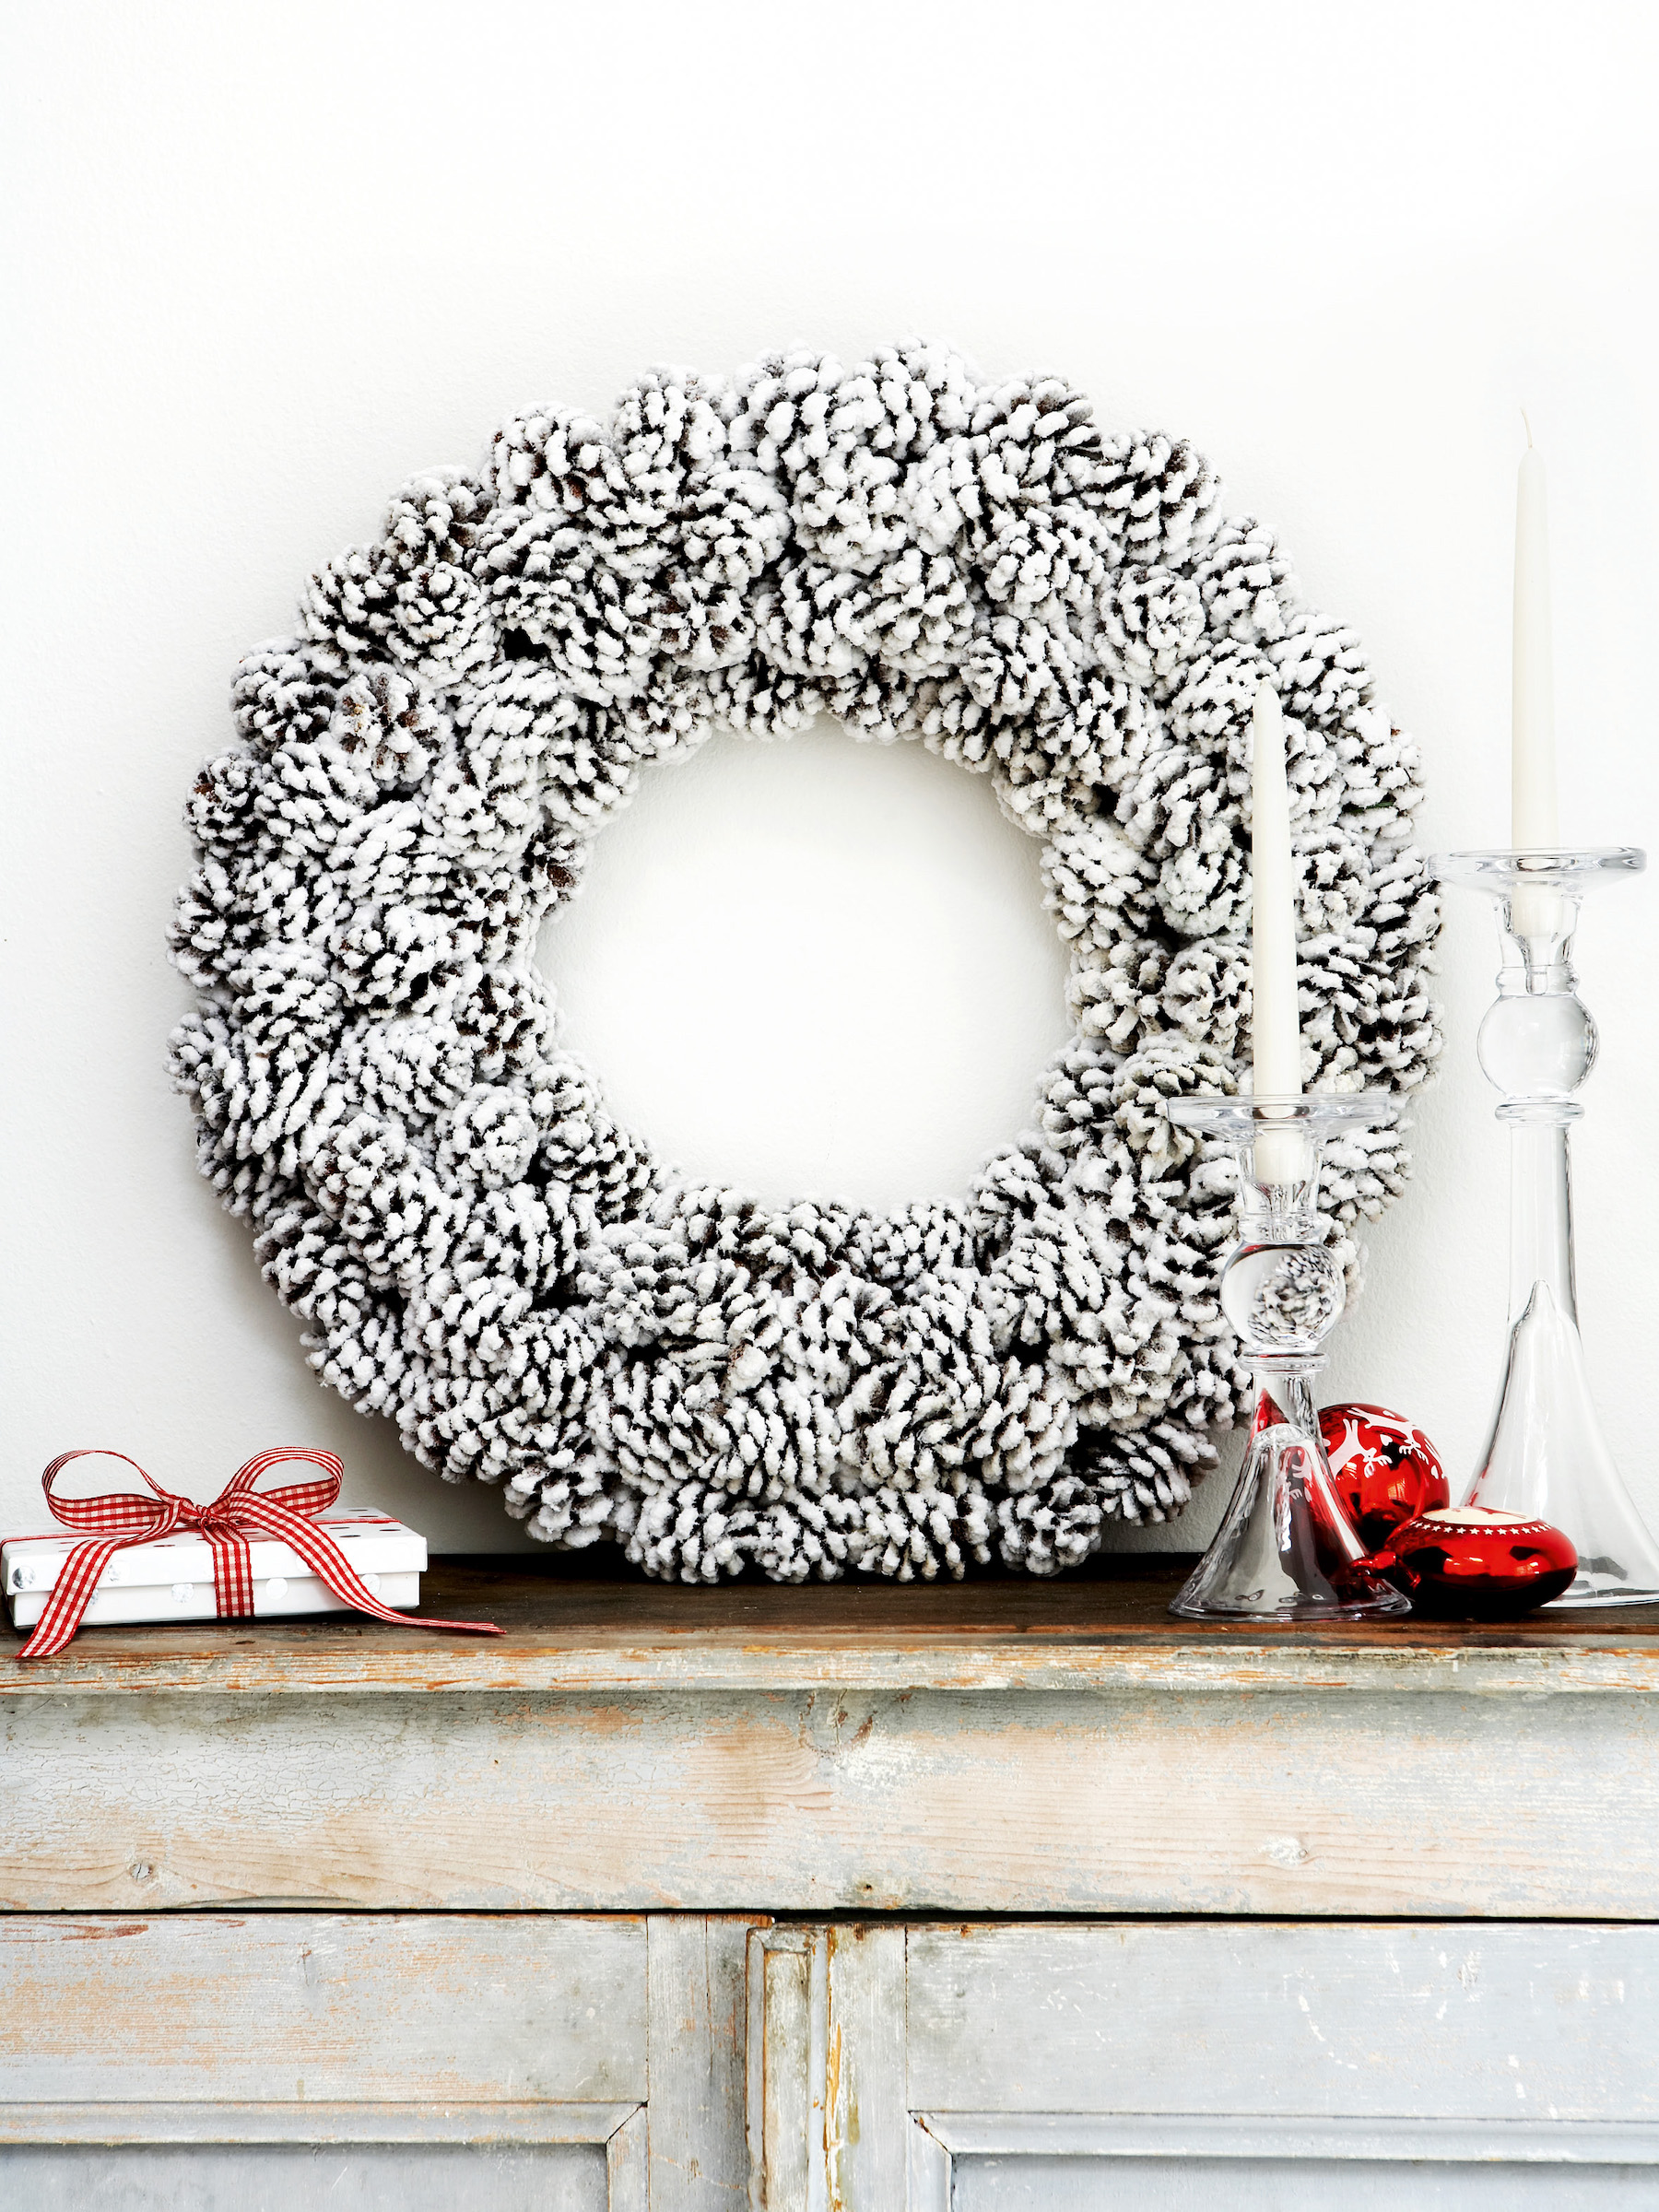
It's surprisingly straightforward to make a pine cone wreath but the effect can be stunning – especially if you spray paint your pine cones white.
'Pine cones take spray color well,' confirms floral arranger, Judith Blacklock.
'Place dry pine cones in a box and pile them on top of each other so that those underneath get a touch of the residue.
'Spray with spray paint and shake, and spray and shake again, until you are happy with the coverage. Be sure to use eco-friendly paint.
'If you wish to add glitter spray with glue first, then dip into the glitter.'
When the pine cones are ready, you can fix them with hot glue on to a grapevine wreath base.
18. Add a pine cone touch to presents
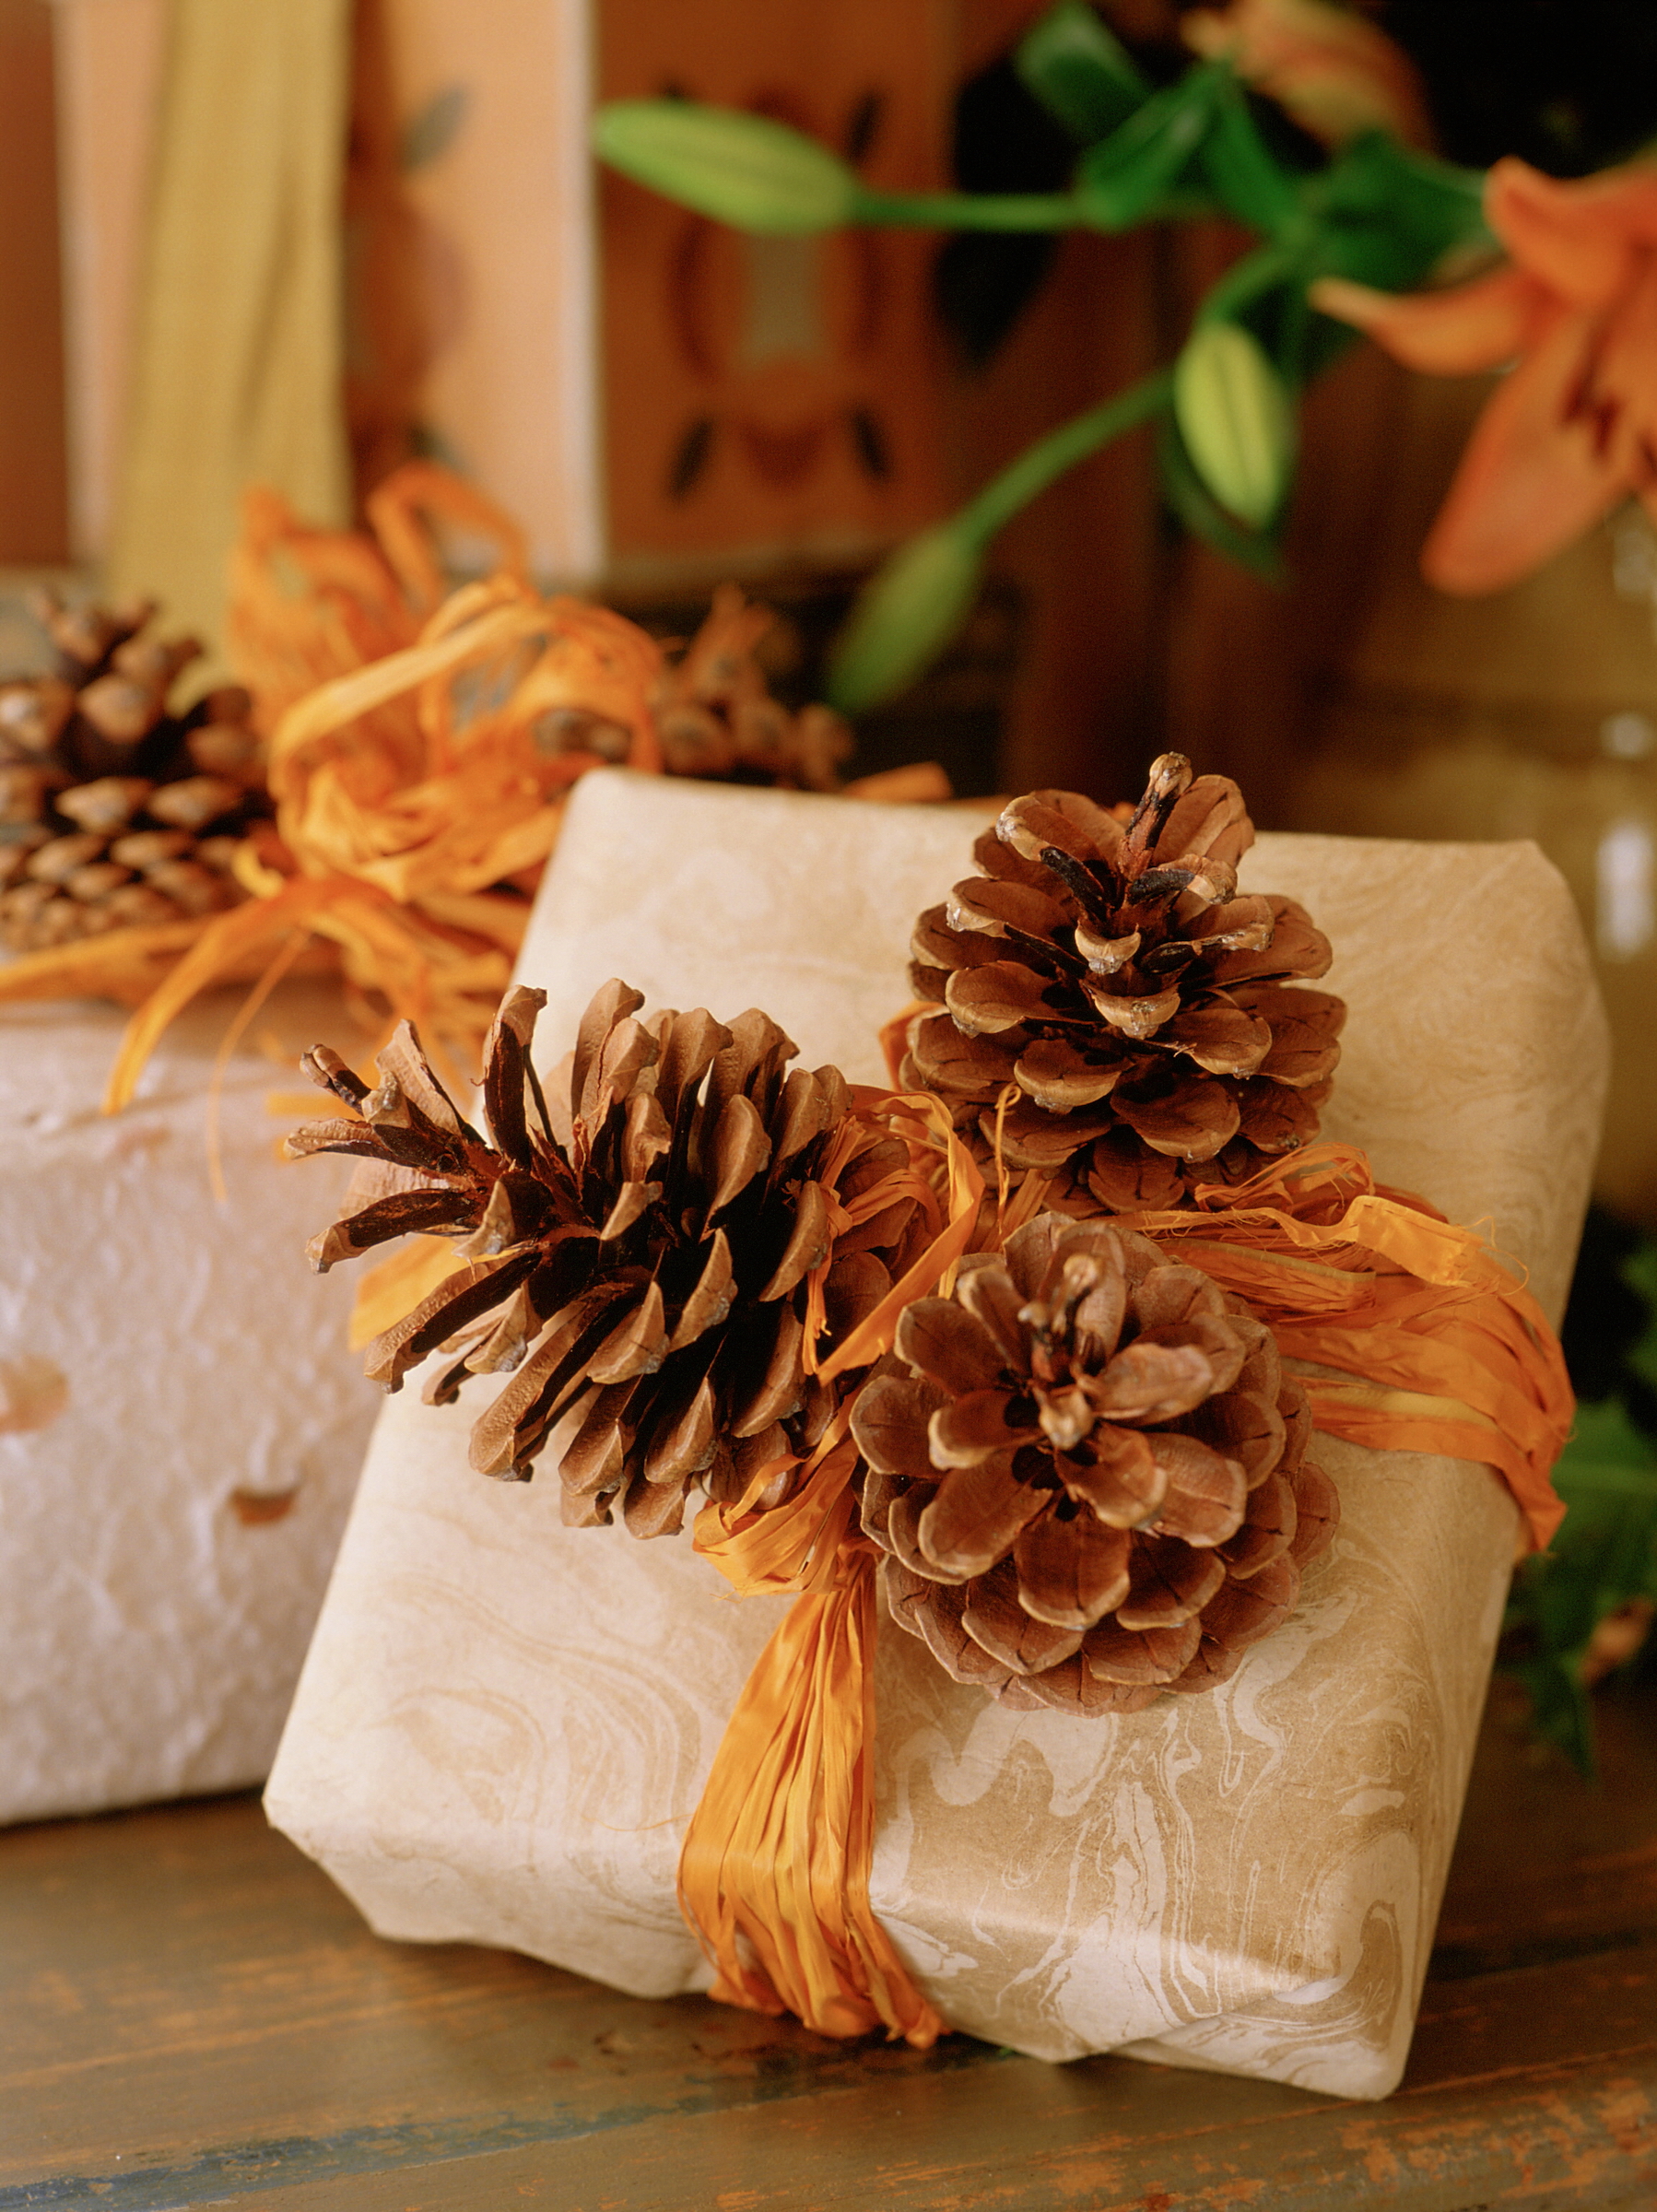
This cute pine cone trim gives present wrapping an extra dimension – and the recipient could tie them to their Christmas tree once they've opened their gift.
To make, fix together two or three pine cones by wrapping a string of raffia around the base, tucking it deep into the scales. Knot the raffia to secure.
Tie more raffia around the gift, then tie on the pine cones with the raffia string to finish.
19. Set out a Christmas candle tray
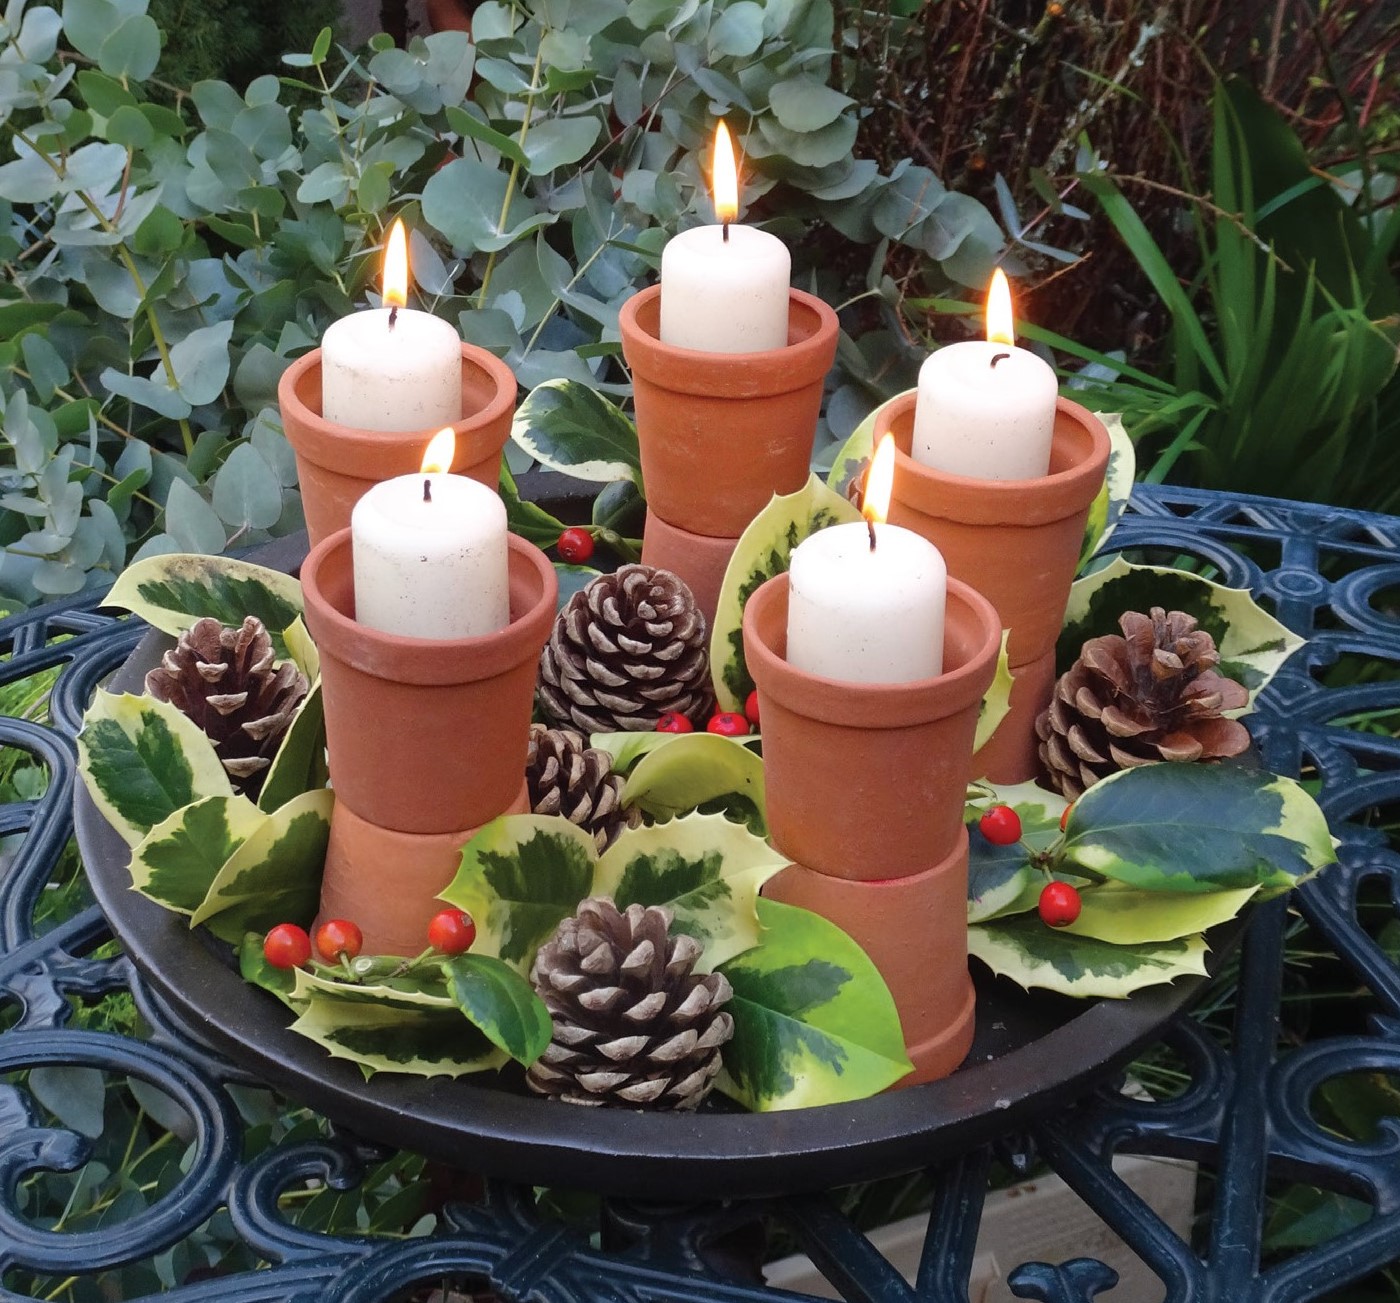
A scattering of pine cone decorations adds texture and depth to this easy display idea, created by Judith Blacklock.
'Place a few miniature terracotta pots upside down on a tray, and put a blob of florist's fix on the upturned bases. Place another pot the right way round on the top of each one,' explains Judith.
'Place a candle inside each pot; the top should rise above the rim of the container. My tip if you are reusing candles and they become dirty or marked, is to place them in a bowl of hot water and rub them gently to clean them.
'Arrange pine cones and holly around the base of the pots. Holly lasts well out of the water but if you wish this design to last longer, pour a small amount of water into the dish.'
20. Make a pine cone vase
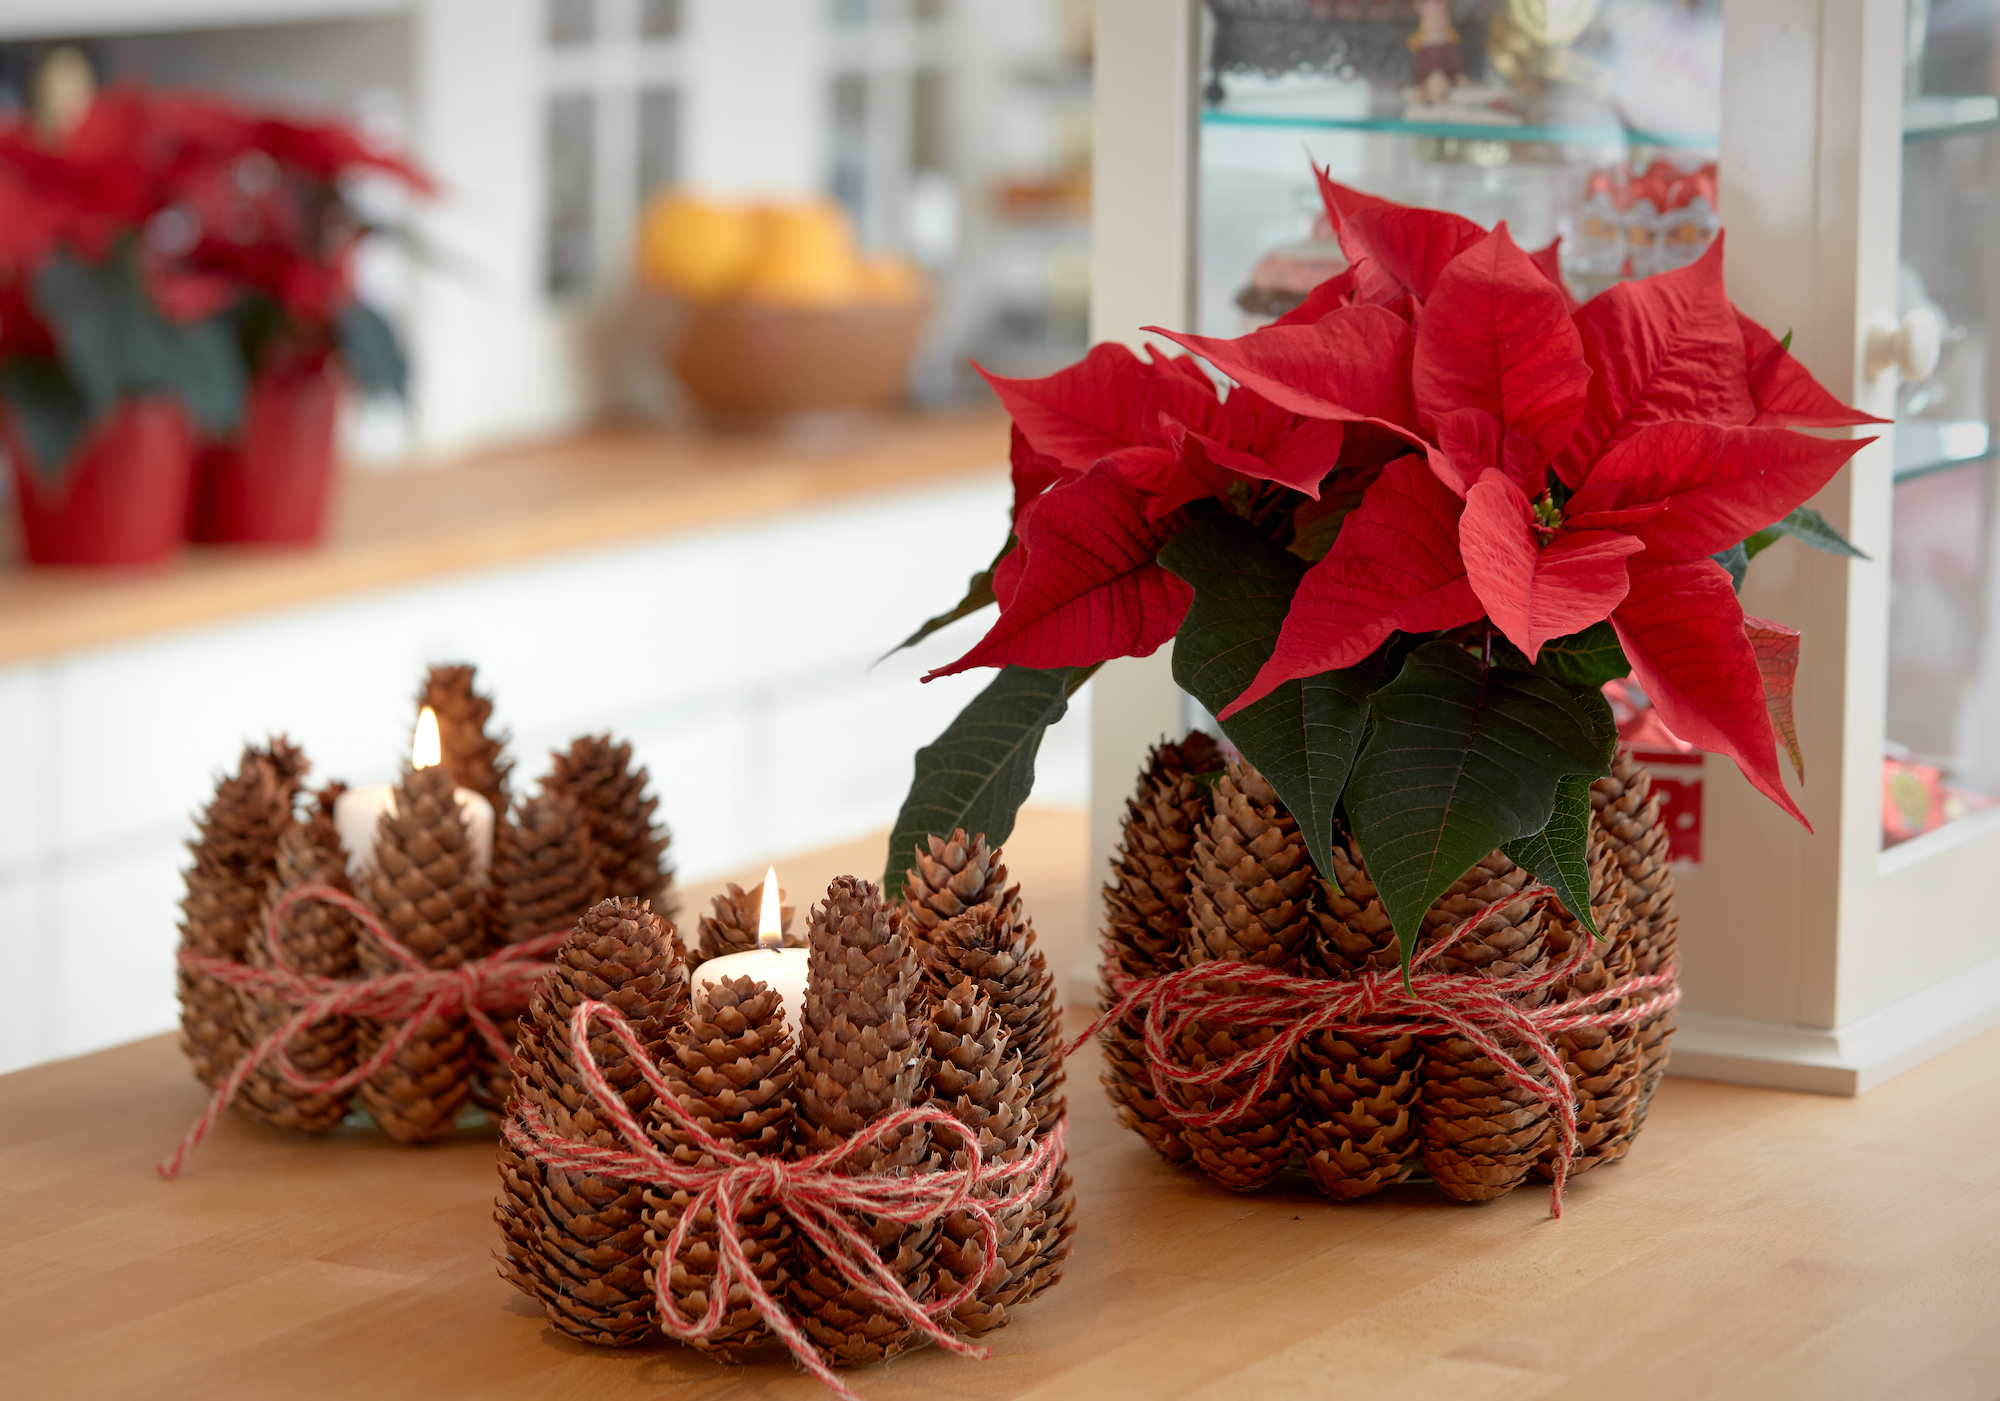
Choose tall, thin pine cones for this Christmas pine cone craft idea. You'll also need a glass jar or vase, and colorful string.
Start by using a hot glue gun to secure the cones close to one another directly onto the glass.
Wrap the string around the cones twice and tie it into a bow. Place the poinsettia and candle in the containers.
21. Style an orchid and pine cone centerpiece
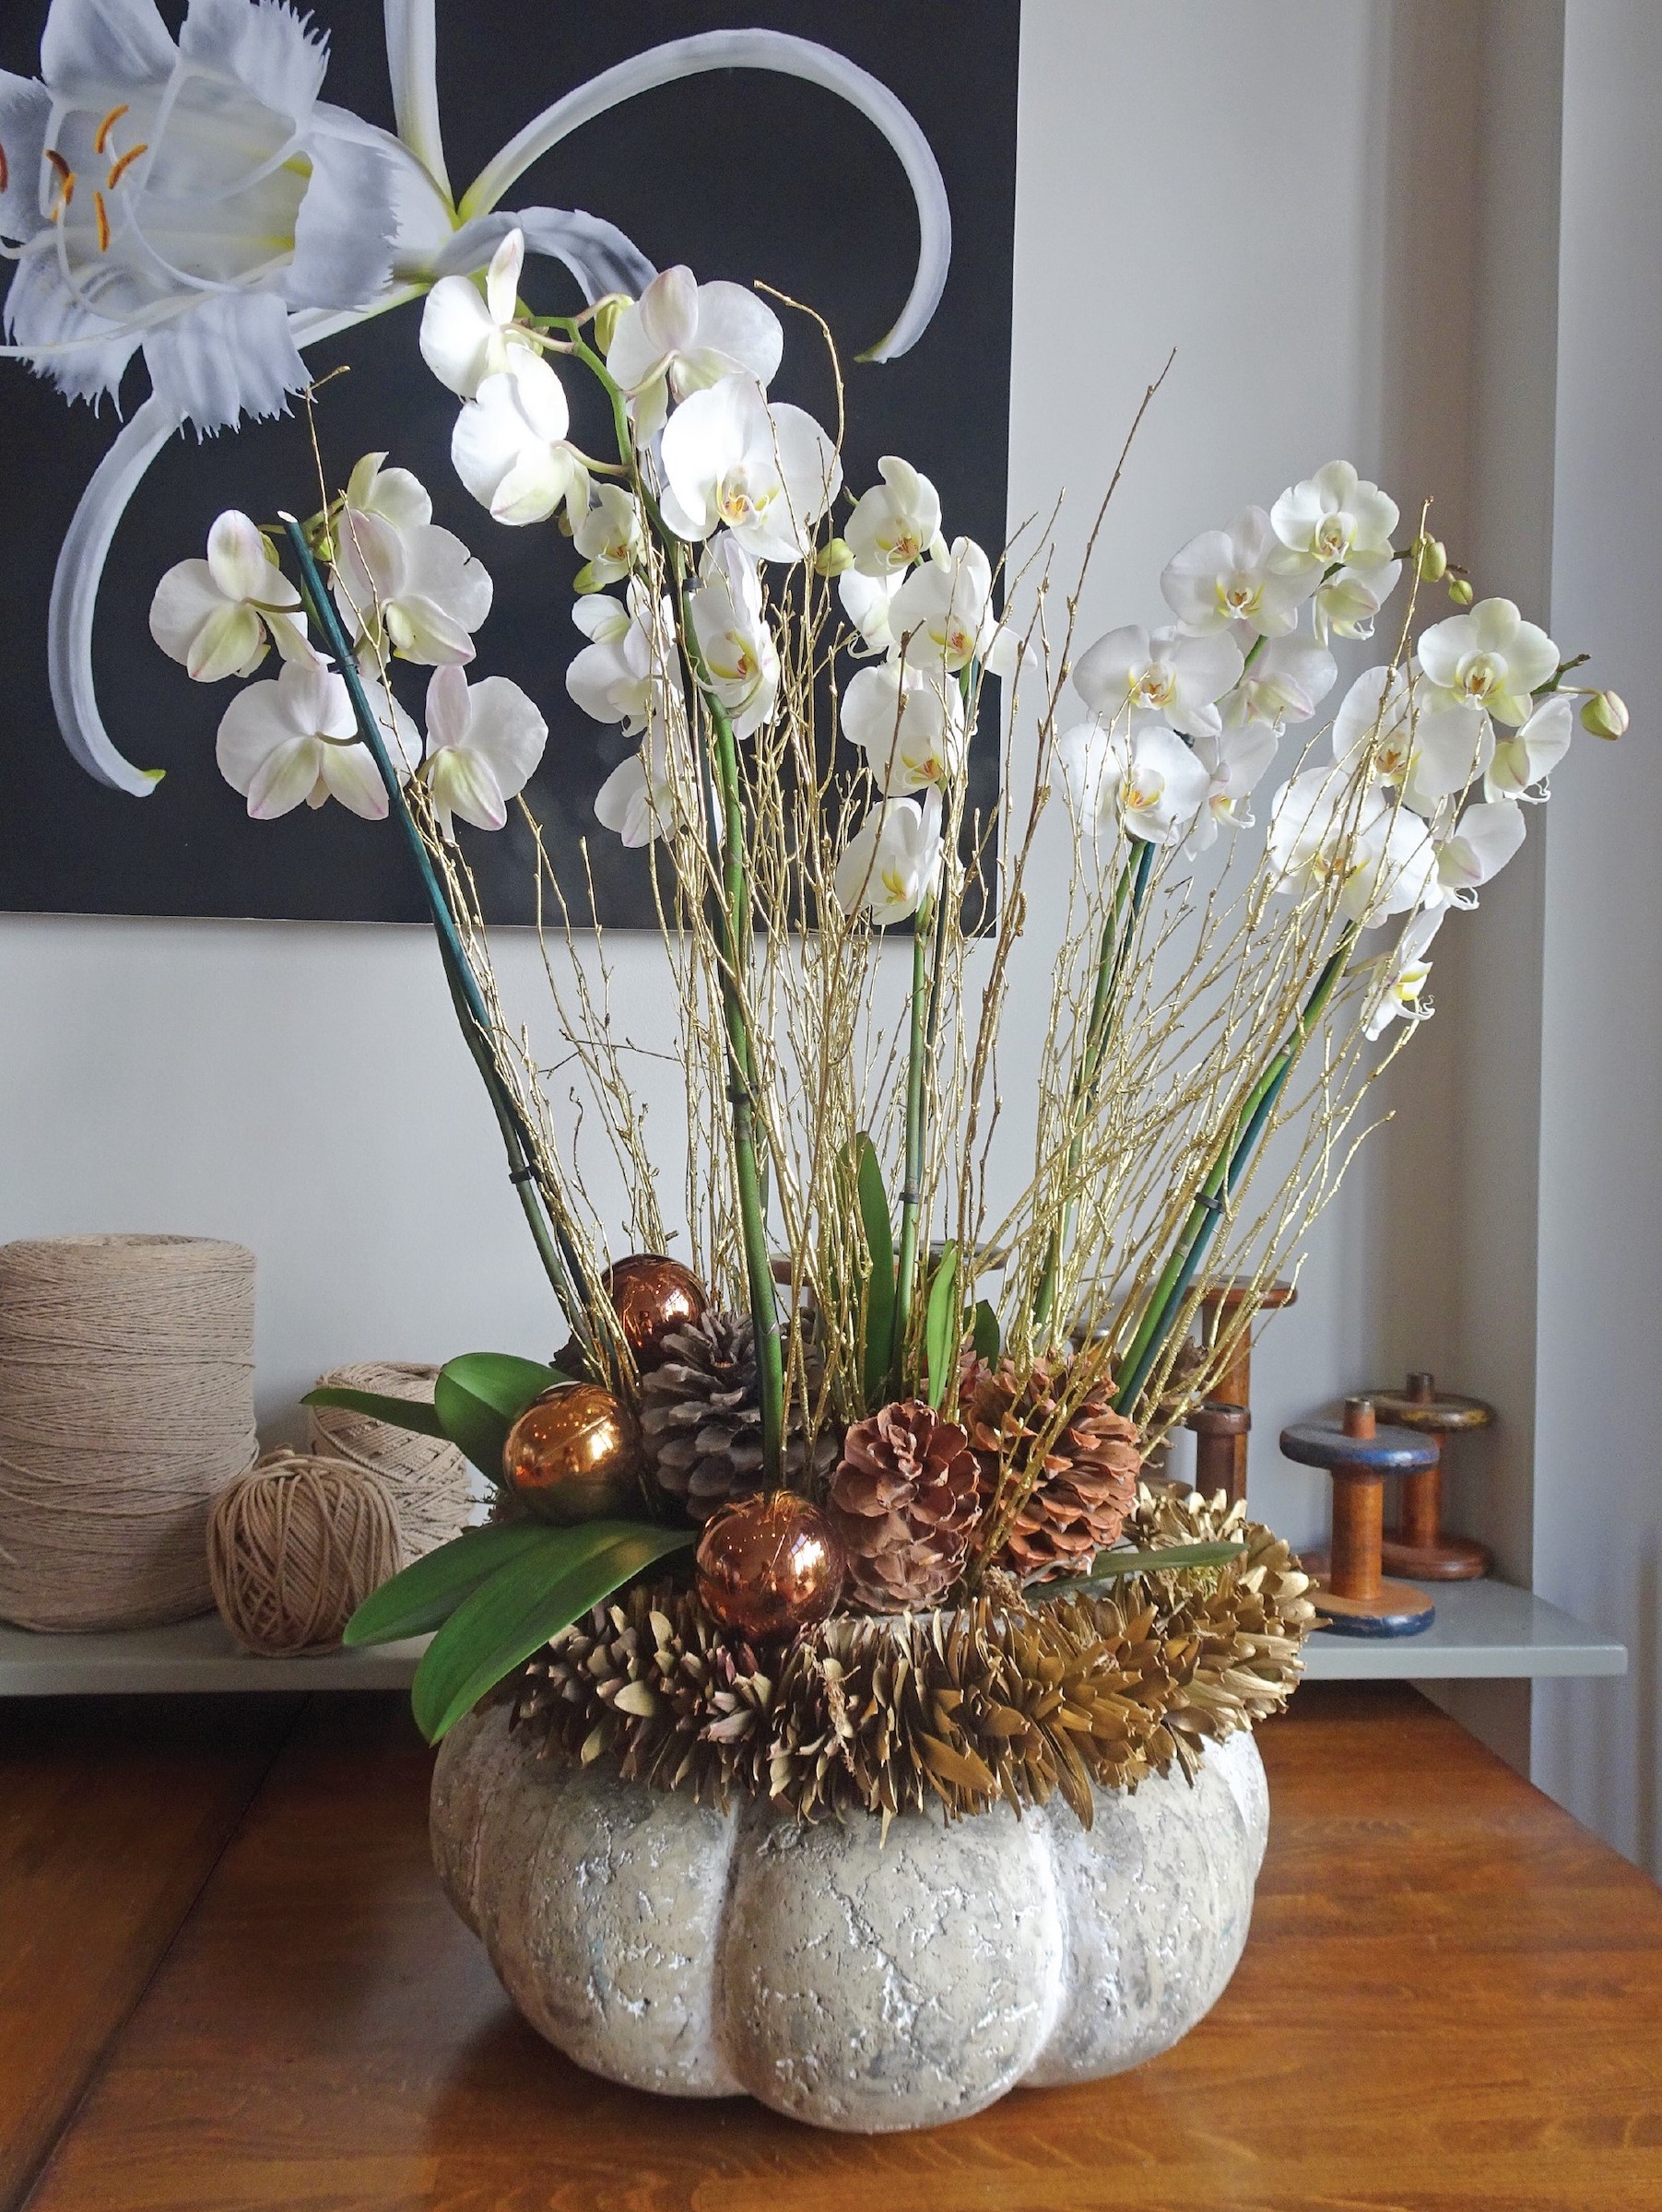
You can make a more minimal version of this display, created by Judith Blacklock, using a single orchid plant placed in a smaller container.
Water the Phalaenopsis orchids, let them drain, then place them in your container. Use moss to fill in any gaps.
Spray twigs with eco-friendly gold paint and insert the twigs through the moss, between the orchids.
Decorate the top of the moss with pine cones and baubles. You probably won't need to wire these into the display; just push them into the moss.
You could add a garland of dried leaves, threaded onto wire, as a collar around the top of the container.
What can I make from pine cones?
Pine cones in all shapes and sizes can be used to make characterful Christmas decor ideas for children, or more elegant designs to fill your home with holiday spirit.
'Create Christmas tree decorations by hot gluing ribbon loops to the base of cones. You could add additional interest by gluing beads or small buttons,' suggests Judith Blacklock. Or purchase a small wire ring and hot glue cones around to hang on the tree.
'Get children to glue two short, curved branches to the base of a pine cone to create antlers. Add a couple of eyes and a small bobble nose (available from hobby shops) and you have a reindeer.
'For a simple display, wire two large pine cones together, add a flourish of ribbon, and enjoy as an alternative door hanging.'
How do I prepare pine cones for crafting?
You can buy pine cones for crafting that will have been cleaned and dried and ready for use. But if you prefer to collect your own, you'll need to take a few precautions to make sure your pine cone decorations are clean and won't mold. You'll want to be sure they are free from insects, too.
'If your pine cones are wet, leave them outside on a dry day – perhaps on a slatted garden table or bench for the air to circulate freely,' suggests flower arranging expert, Judith Blacklock. 'If they are clogged with soil, take a toothbrush to them.'
For extra cleanliness and longevity, you can bake your pine cones before crafting. Tap your pine cones on a hard surface to remove any loose dirt and bugs. Soak them in a solution of water and vinegar, then bake them in the oven at a low temperature for a few hours.
This trick will also remove any sticky sap, which can be released from the pine cones and potentially mark surfaces.
Am I allowed to collect pine cones?
According to the USDA, pine cones can be collected from many National Forests without a permit, as long as you take small quantities and it is for personal use only.
The seeds from pine cones not only establish the growth of new trees, but they are also a larder for wildlife.
'Only forage where the pine cones are abundant so that you leave a food source for animals and birds,' says Judith Blacklock.
Do you need to bake pine cones before crafting?
Pine cones do not need to be baked before crafting, however, they should be thoroughly cleaned and dried beforehand. Leaving pine cones to air dry after washing can take several days, but baking them can help speed up the process. Baking pine cones can also help preserve them and is a good way to kill off any nasty bugs and make them more hygienic to craft with.
To prepare your pine cones for crafting first wash them in warm water to remove debris and leave them soaking for around 30 minutes. Once dry place on trays and bake in the oven for around an hour being sure to check on them to prevent burning. Leave to completely cool before crafting.
Andrea has been immersed in the world of homes, interiors and lifestyle since her first job in journalism, on Ideal Home. She went from women's magazine Options to Frank. From there it was on to the launch of Red magazine, where she stayed for 10 years and became Assistant Editor. She then shifted into freelancing, and spent 14 years writing for everyone from The Telegraph to The Sunday Times, Livingetc, Stylist and Woman & Home. She was then offered the job as Editor on Country Homes & Interiors, and now combines that role with writing for sister title homesandgardens.com.
- Pippa BlenkinsopContributor
